3. Project detail view
| Sito: | LifeWatch Italy Training Platform |
| Corso: | DataLabs - Tutorial Projects |
| Libro: | 3. Project detail view |
| Stampato da: | Guest user |
| Data: | martedì, 3 novembre 2026, 00:55 |
To access the Projects details section, you need to click on the appropriate record within the List of Projects.
The page is organized into two main areas, Header and Content.

About to the Header, the data are arranged into two different bars:
- Login/logout button
- Username (if the user is logged in)
- Project Information bar and
- Actions bar
while the Content contains the following seven types of information:
- Info
- Input
- Output
- Warnings and Alerts
- Team
- Statistics
- Provenance
- Metadata (only if metadata are available)
3.1 Project information bar
The project information bar is always visible in all pages relating to the projects and contains the following data:
- the title of the project
- the breadcrumb
- the status of the project
- the name of the user who created it (Creator)
- the chosen programming language (Programming Language)
- the version of the project (Version)
- the button to close the Project detail page
- the access to the chat service.

3.2 Actions bar
As already mentioned, the action bar collects all actions available for the project depending on the user’s role.

In particular, it needs a click on the:
- Open button to start IDE mode that allows visualization of the integrated development environment. This button is enabled only if the status of the project is "Running";
- Start/Stop button that enables the start (with or without timeout) or stop (simple (graceful) or forced) of the integrated environment;
- Actions drop down menu to:
- clone the project via "Clone the Project" item,
- create a service via "Create a Service" item
- publish a dataset through the "Publish a Dataset" item,
- publish the project through the "Publish the Project" item,
- publish a script through the "Publish the Script" item,
- download the zip file through the "Download .zip" item,
- archive the project through the "Archive the Project" item,
- delete the project through the "Delete the Project" item.
As anticipated above, the actions are available depending on the user's role, in particular:
- the Project Creator can perform all the listed actions consistently with the project status
- a Researcher can perform "Clone the Project" and "Download .zip" actions only if the project has been published
- a Guest user can perform only the "Download .zip" action
In addition, the actions are conditioned according to the status and the availability or not of the resources (e.g. for the item "Publish a Dataset" available only if there are input files and/or output for the selected project).
All details about the features are described in the relevant paragraphs.
3.3 Info
In addition to the fields already described, in the "Info" section are also shown the data referring to:
- Training Resource: it is a text field that can contain a web link to a specific section defined externally to the platform and accessible within the LifeWatch Training platform;
- Working Group: it is a text field that can contain a web link to a section that the Project creator has previously created within the LifeWatch Community;
- Help Desk Topic: it is a text field that can contain a web link to a specific section defined externally to the platform and accessible within the Help Desk platform;
Please note that:
- all three fields are optional
- the string must respect the URL standards, such as:
- it must begin with protocol: HTTP(S) o FTP(S)
- it must have the domain
- they are editable until the related service is published
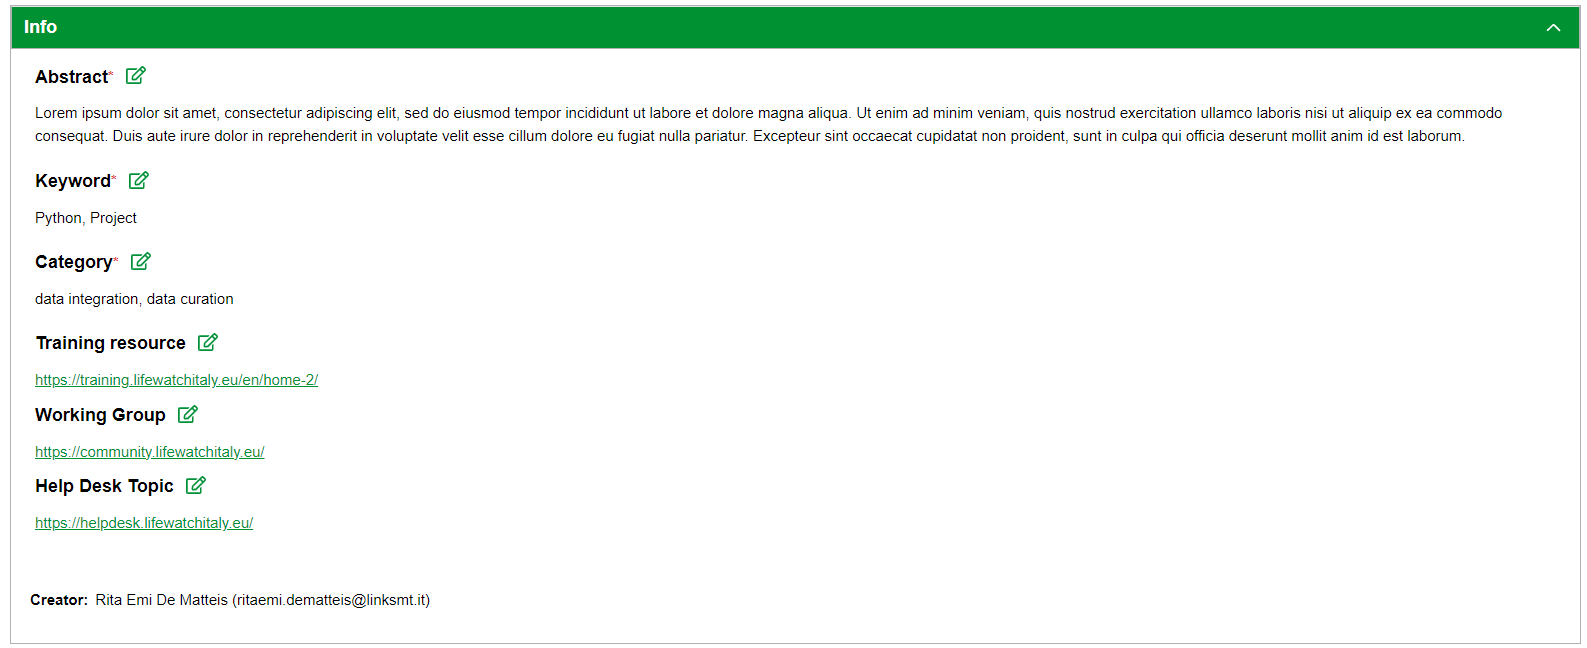
To edit the data, you need to:
1) click on the appropriate project record to edit within the List of Projects
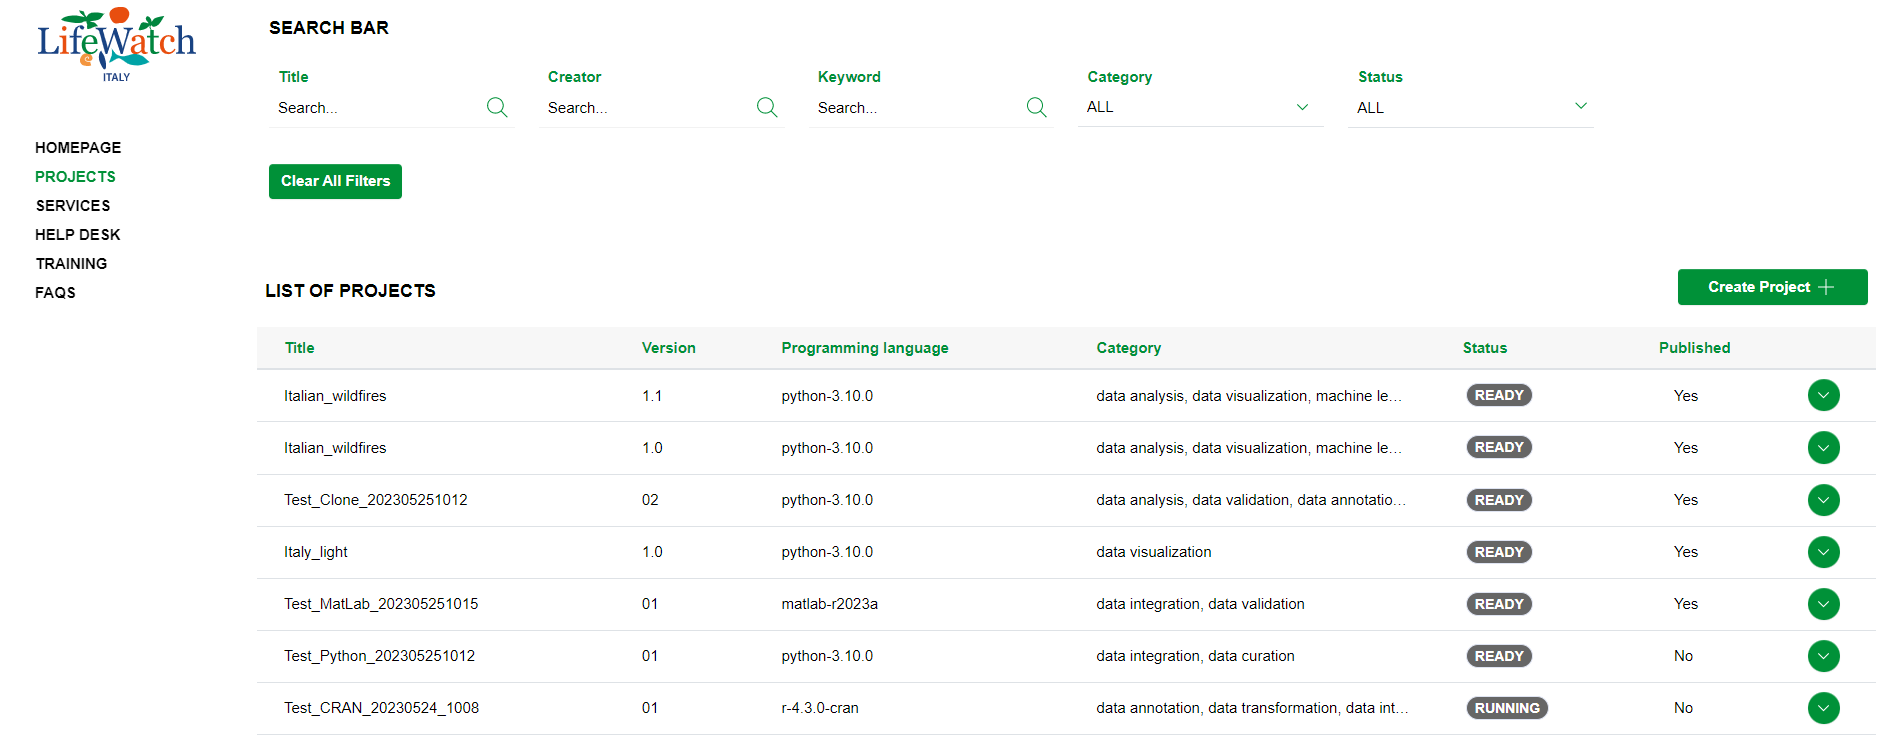
2) then on the Pencil icon
3) when you are finished editing your data, click on the Save button

Please note that these data are always editable only for Project creator and Researcher users which are part of the project team.
3.4 Input file
This section is composed by two main area:
- in the first, you can use the table to:
- view the list of input files
- download an input file
- publish an input file, if the source is local
- delete an input file, if the script and/or service is not published yet
- in the second, you can add an input file
To view the list of input files, you need to:
1) click on the appropriate project record within the List of Projects
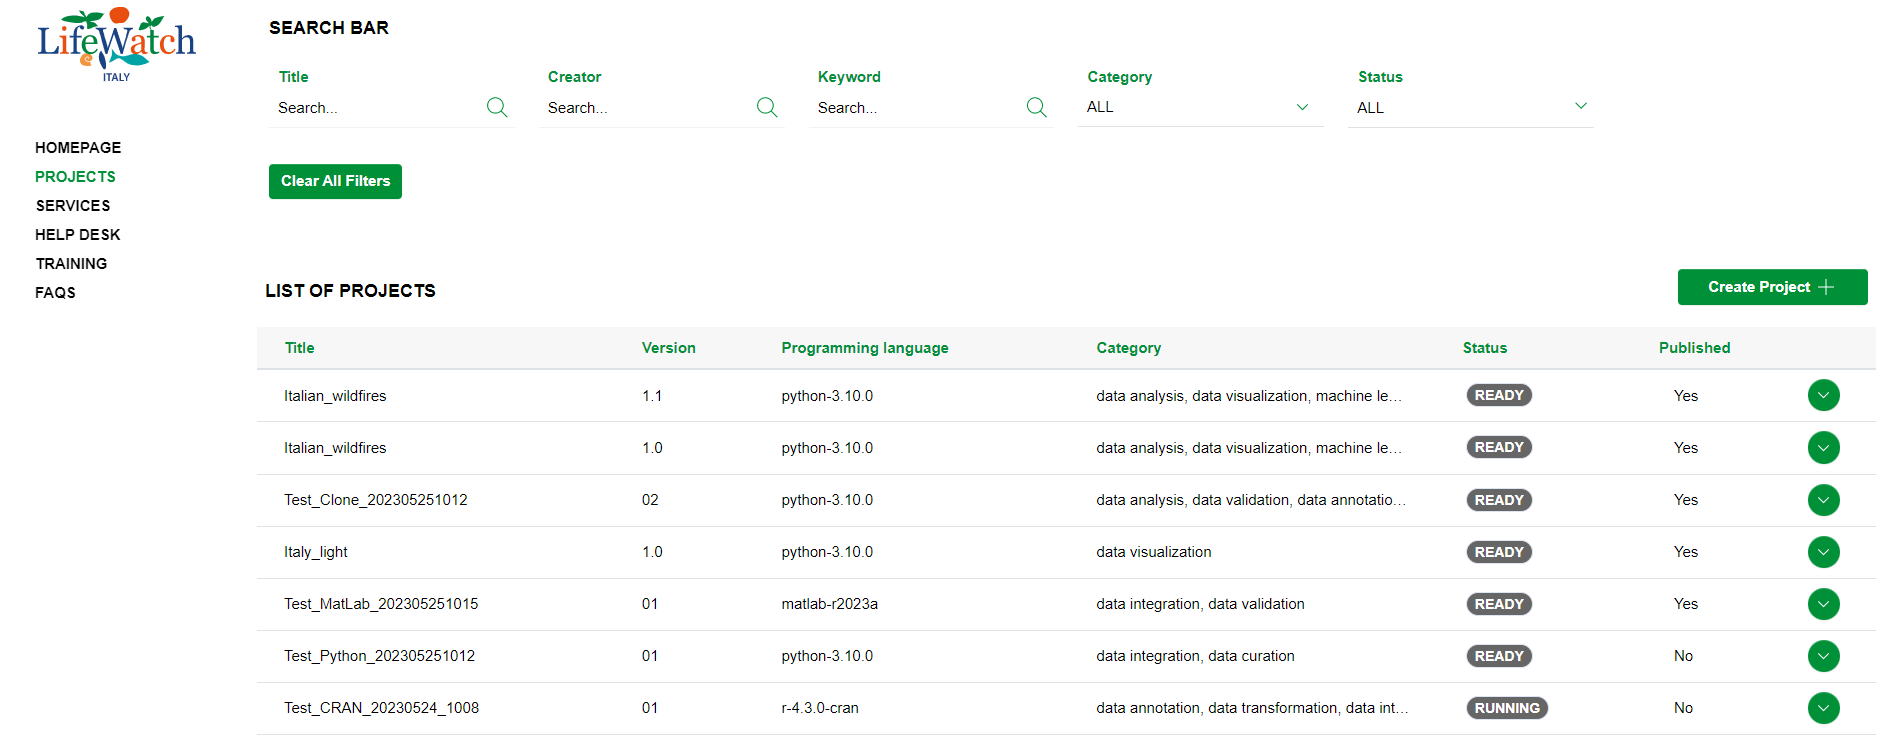
2) click on the Collapse icon to open the Input accordion
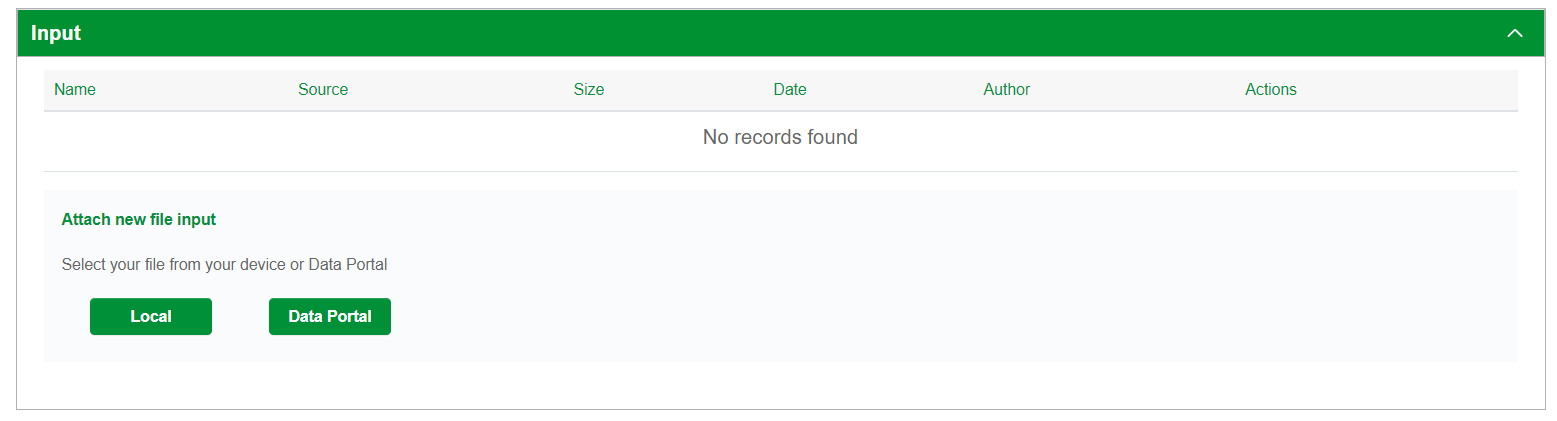
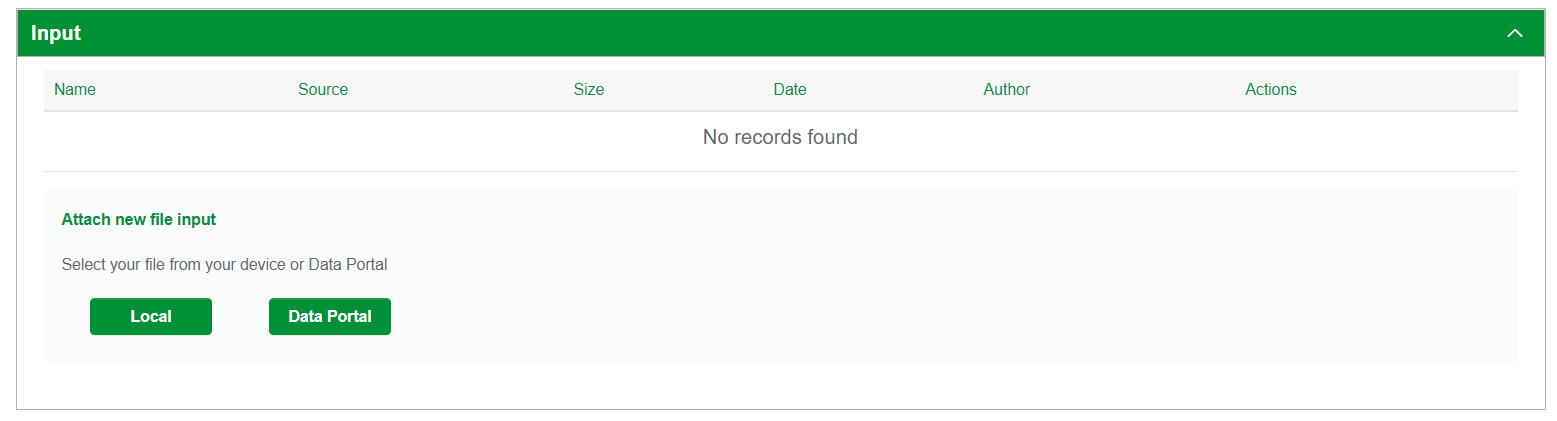
As mentioned before, in the first part of Input accordion, it is shown a table containing the list of input files referring to the project.
3.4.1 Create a new input file
To add a new input file, you need to:
1. click on the relevant project record within the List of Projects
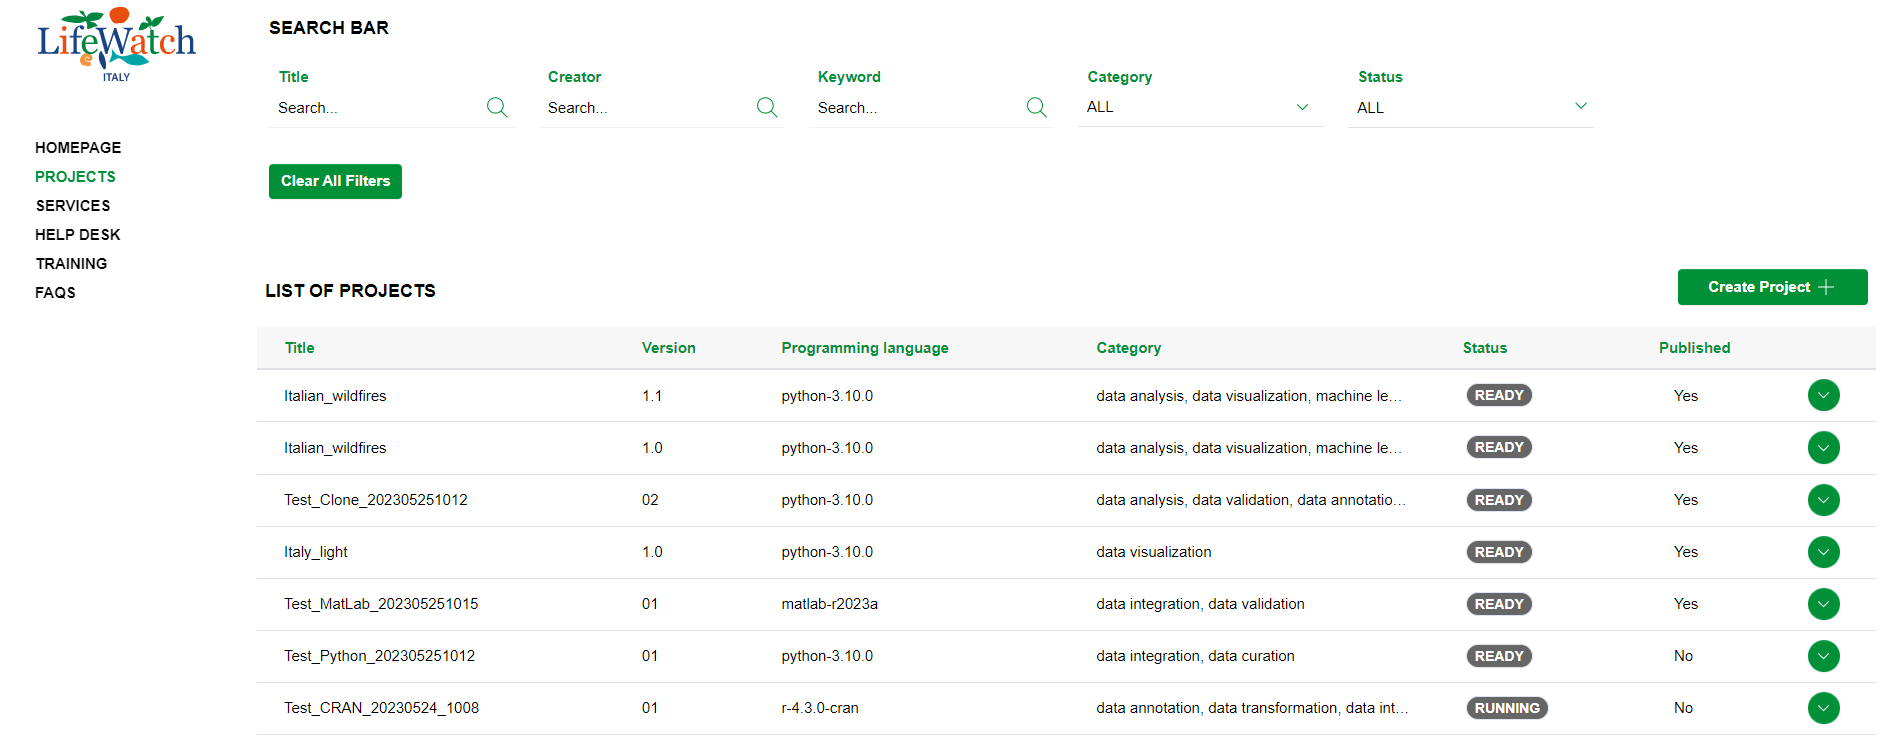
2. click on the Collapse icon to open the Input accordion
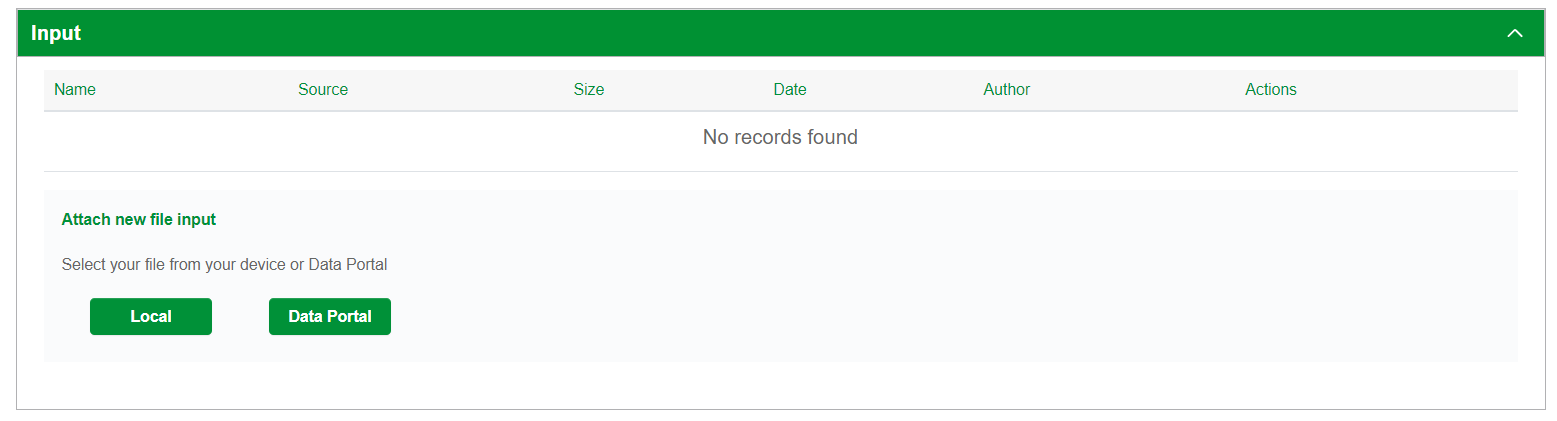
3. click on the Local button if you want to upload a file that is on your device or Data Portal button if you want to upload a file that is published and searchable within Data Portal of LifeWatch.
4. If you have selected Local upload, you have to choose from your device the file you want to upload. Otherwise you have to enter the file URL. Click on Next button to proceed.
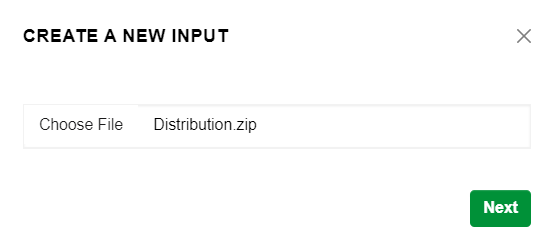
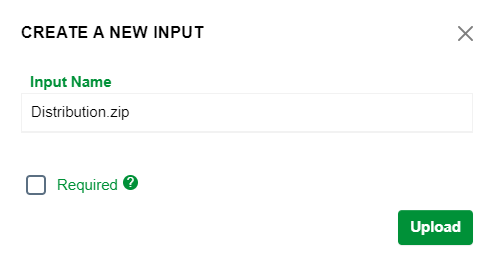
5. After click, you can modify the input name and you have to flag “Required” item if you want your input to be considered as persistent file. This means that the input you are creating will be indispensable for starting and running the script/project, that is, it will be considered as an integral part.
Please note: after the upload the input name cannot be changed.
6. Otherwise, if you have selected Data Portal upload, you have to locate an input file among those published and to select the dataset from the detail view by clicking on Select

7. You can modify the input name and you have to flag “Required” item if you want your input to be considered as persistent file. This means that the input you are creating will be indispensable for starting and running the script/project, that is, it will be considered as an integral part.

Please note: after the upload the input name cannot be changed.
Click on Upload button to complete the procedure.At the end of the procedure the system generates:
- a new input file (record), visible within the input accordion
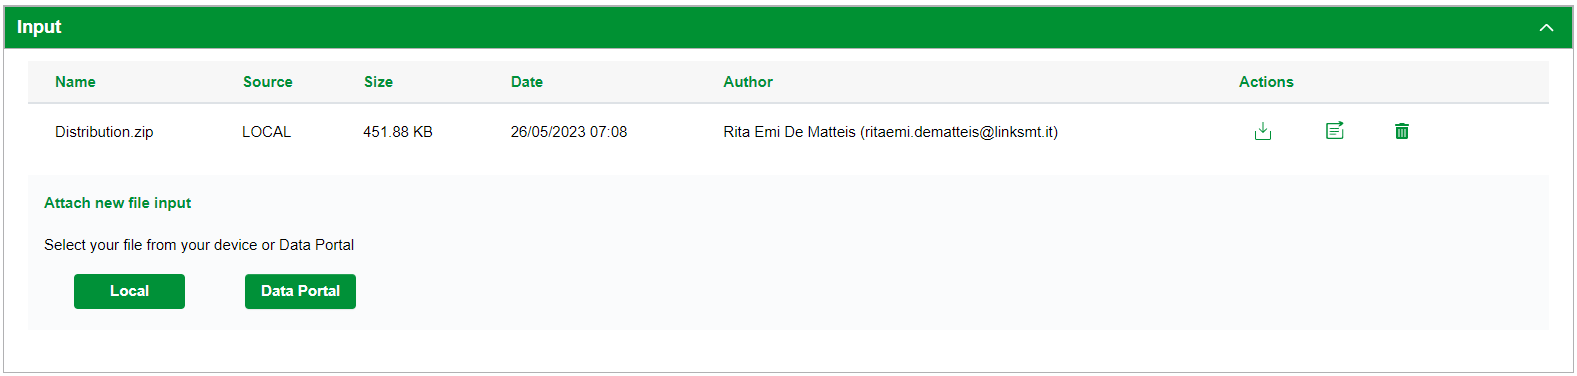
- a new file available within the relevant folder into the Jupyter environment.
3.4.2 Download the input file
1. click on the appropriate project record within the List of Projects
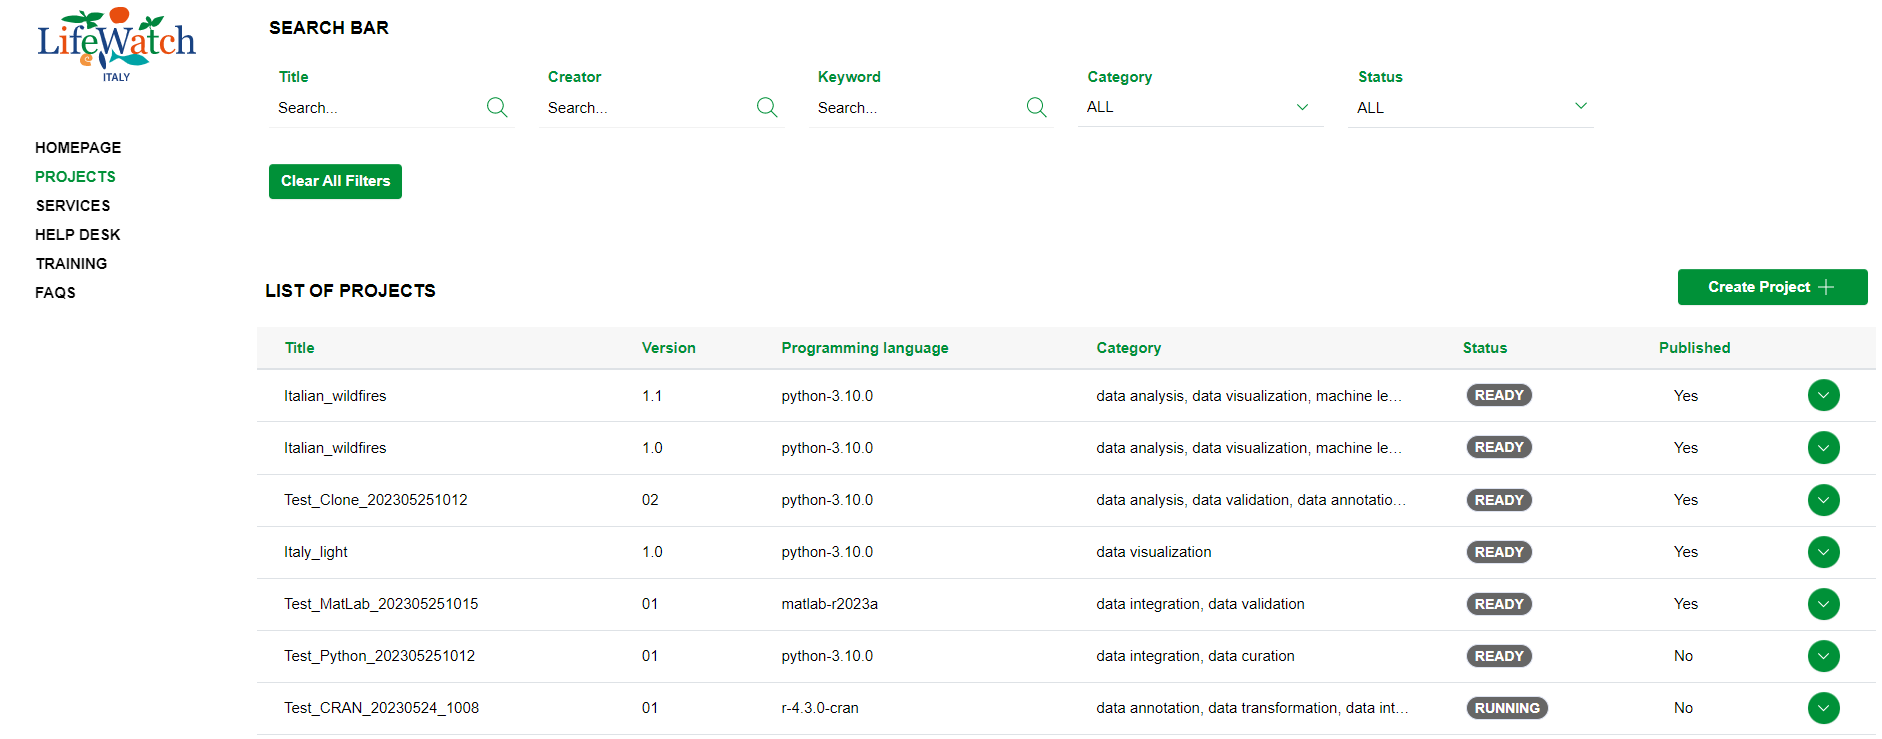
2. click on the Collapse icon to open the Input accordion
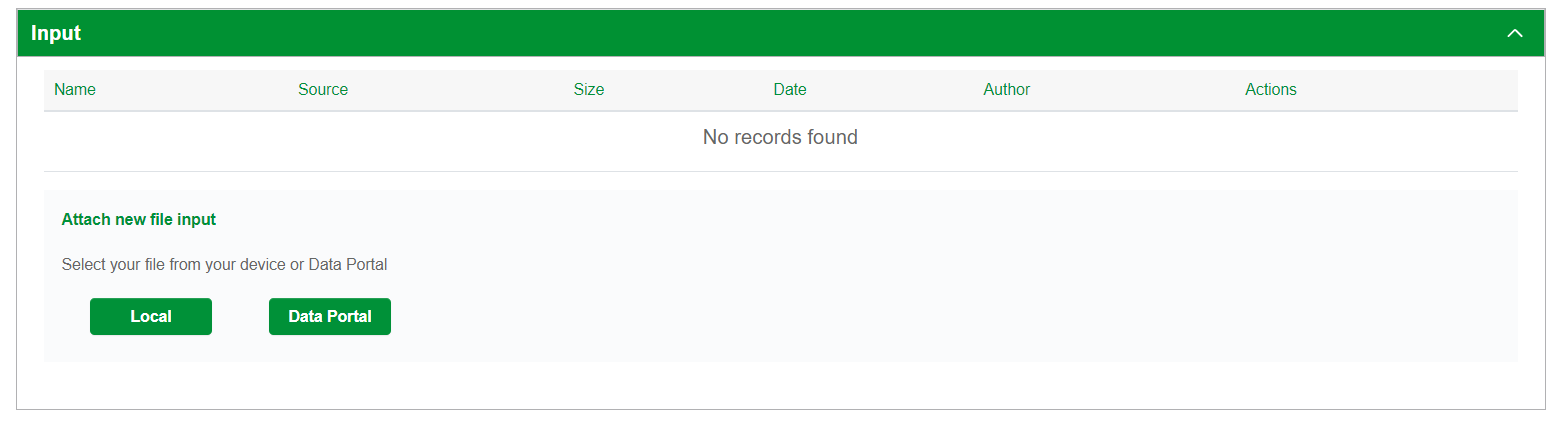
3. identify the input file to download and click on Download icon to download it

3.4.3. Publish the input file
To publish an input file, you need to:
1. click on the appropriate project record within the List of Projects
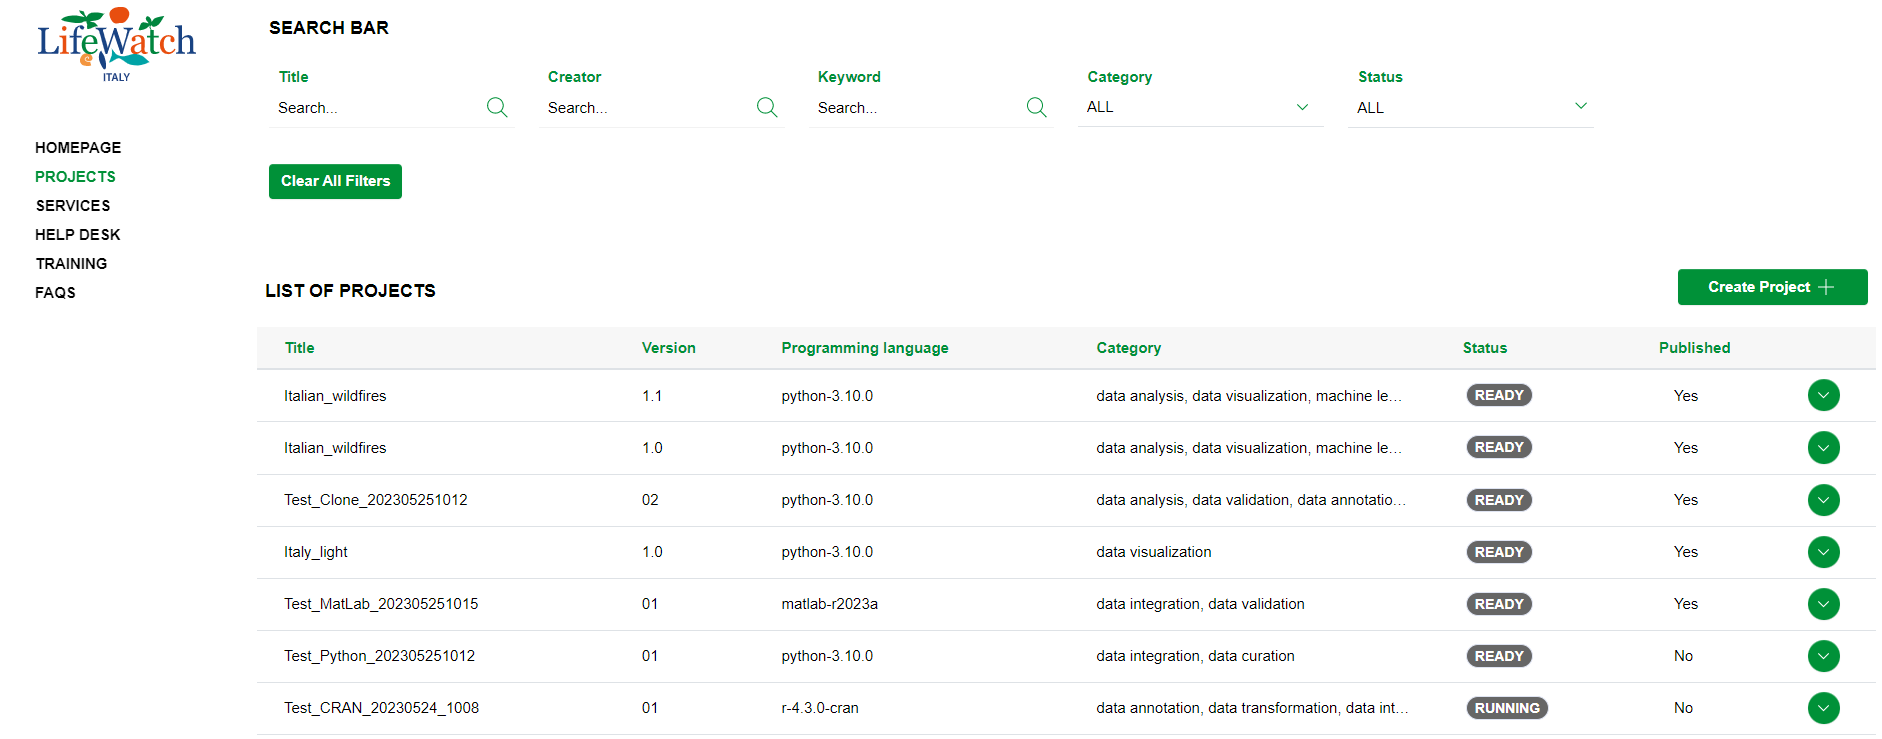
2. click on the Collapse icon to open the Input accordion
3. identify the input file to publish and click on the relevant icon; alternatively, the user can select the item "Publish a Dataset" from the menu "Actions" available both in the details of the Dashboard and in the action bar of the detail view of the project.

4. then it's necessary to follow the wizard of publication of the dataset (see further details in the relevant paragraph).
3.4.4 Delete the input file
To delete an input file, you need to:
1. click on the appropriate project record within the List of Projects
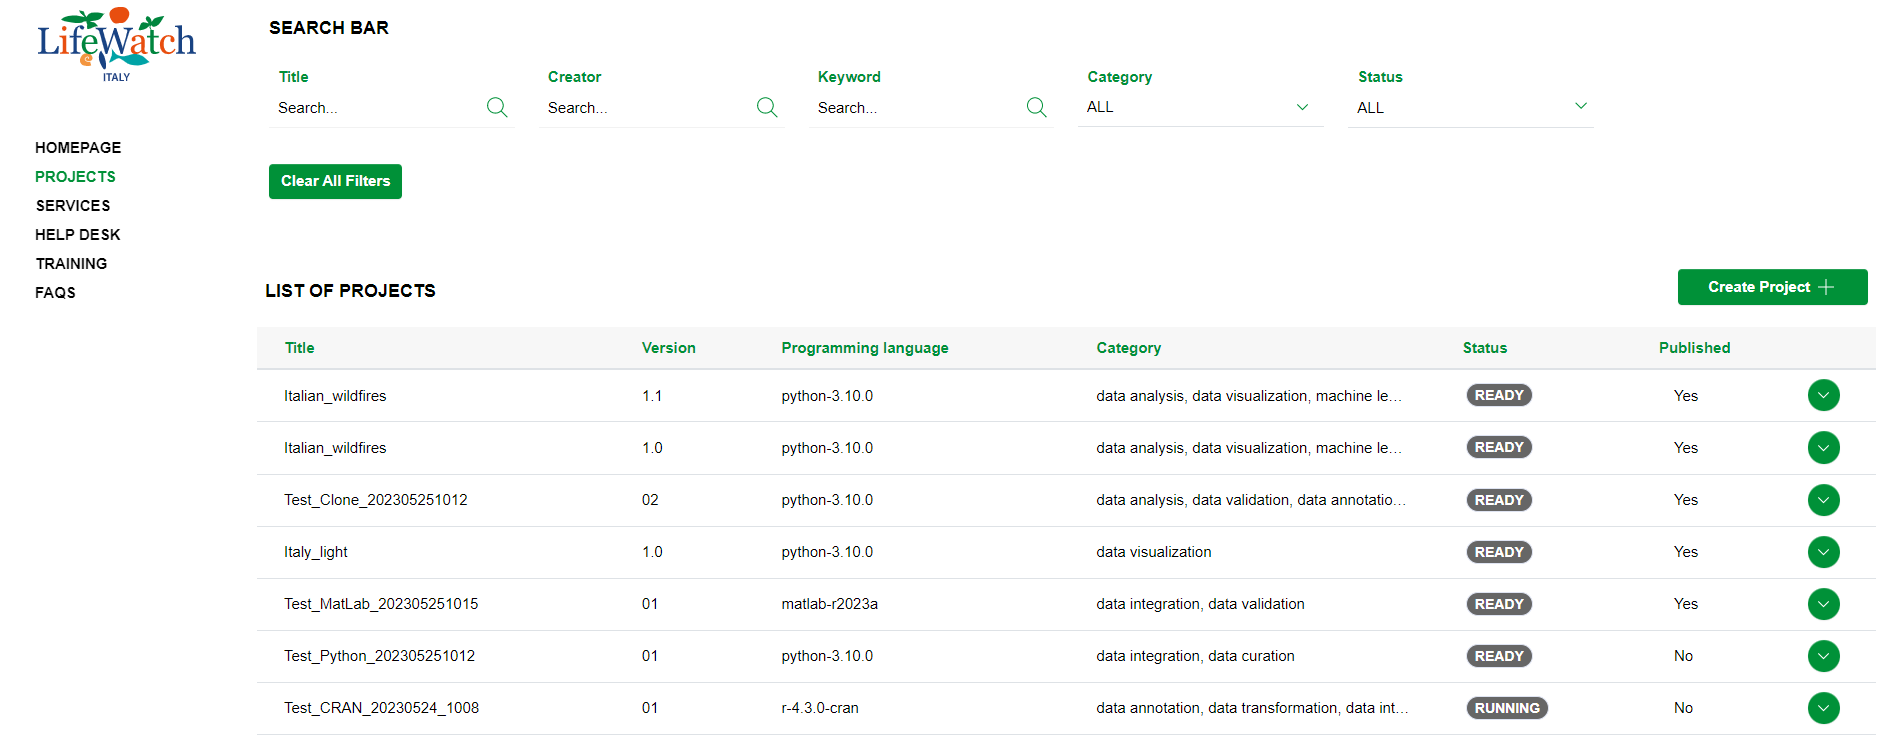
2. click on the Collapse icon to open the Input accordion
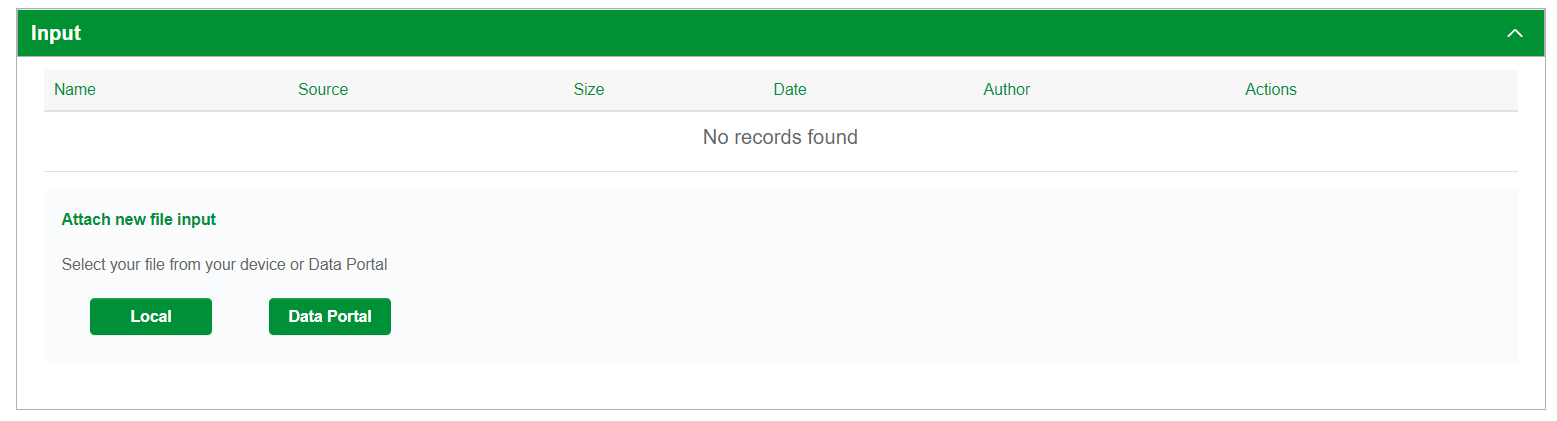
3. identify the input file to delete and click on Delete icon to remove it

At the end of the procedure the system deletes the input file (record) within the input accordion and into the Jupyter environment.
3.5 Output file
This section is composed by a table where it's possible:
- view the list of output files
- download an output file
- publish an output file.
To view the list of output files, you need to:
1) click on the appropriate project record within the List of Projects
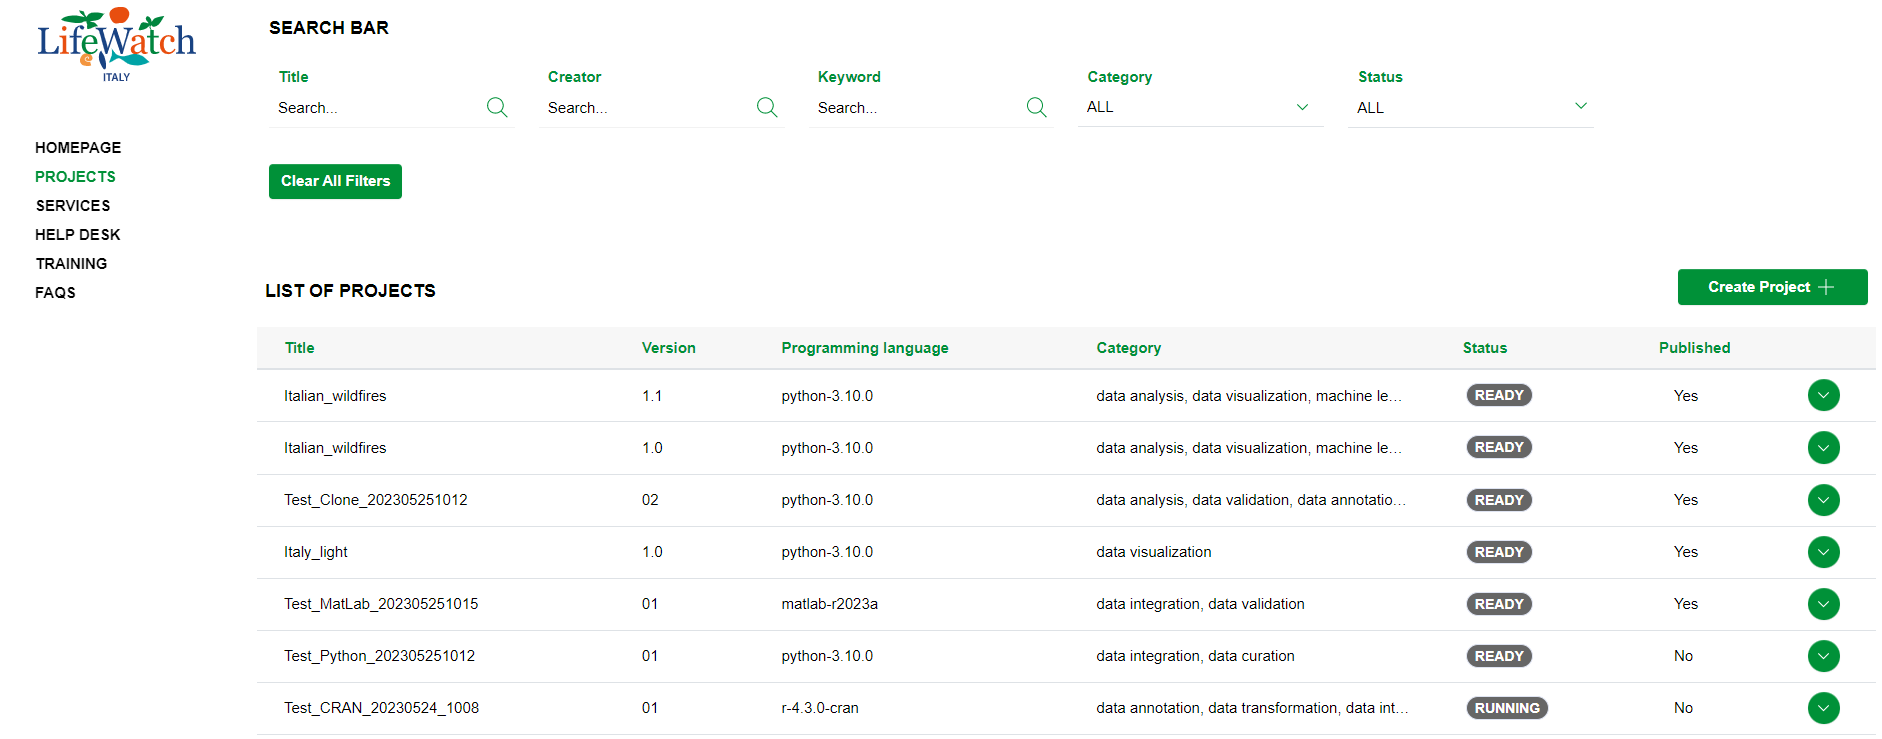
2) click on the Collapse icon to open the Output accordion

As mentioned before, it is shown a table containing any output files referring to the project. The output file(s) will only be displayed if a script has been run from the Jupyter environment providing for the elaboration of one or more output files.
3.5.1 Download the output file
To download an output file, you need to:
1. click on the appropriate project record within the List of Projects
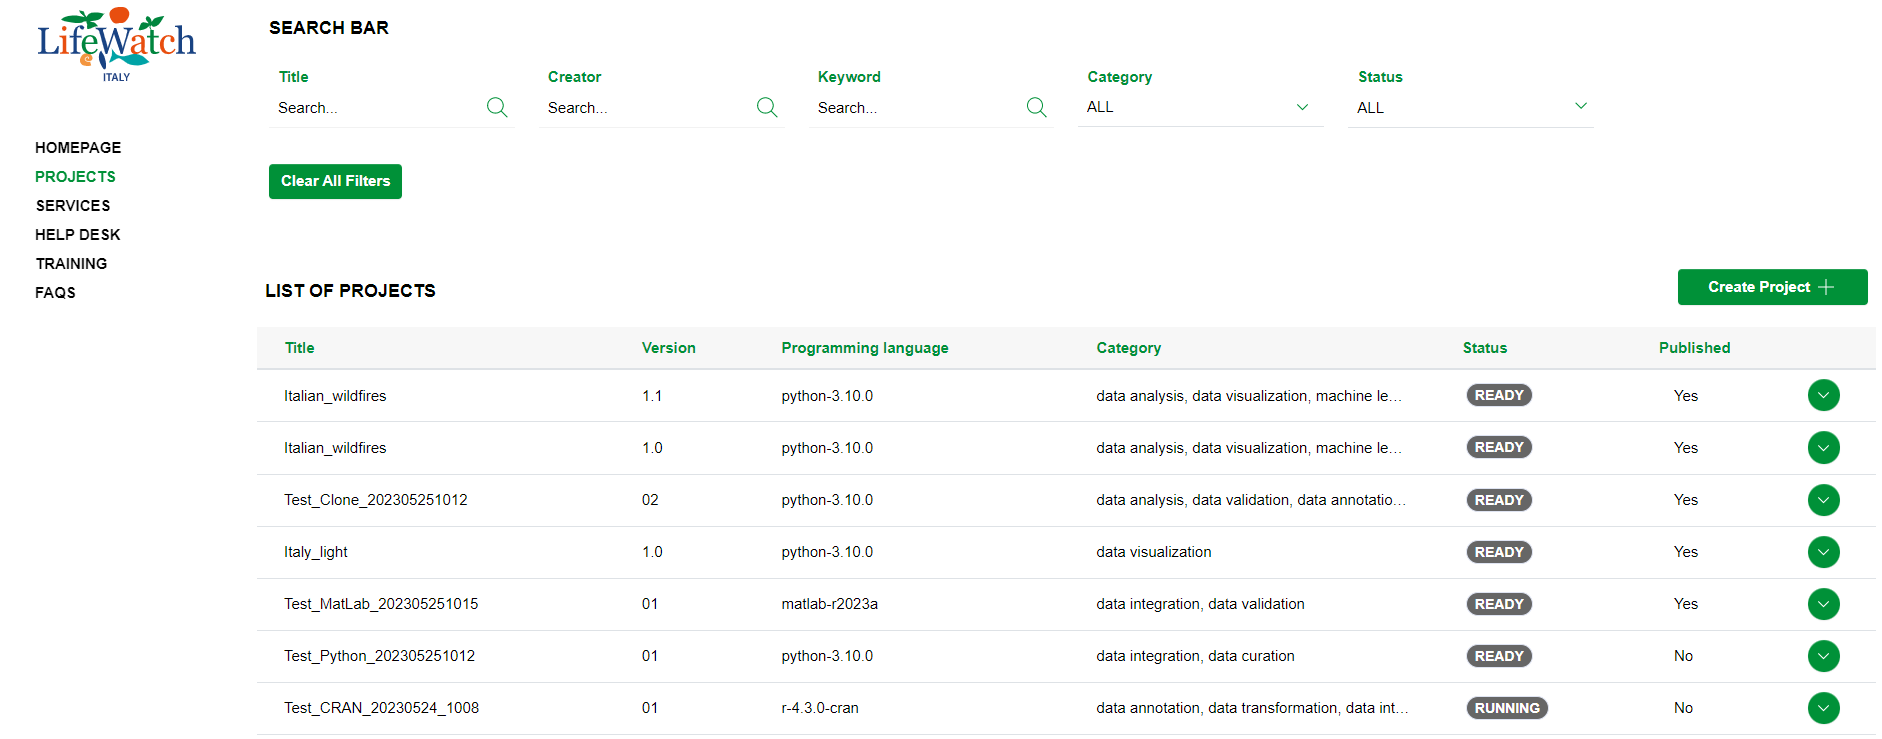
2. click on the Collapse icon to open the Output accordion

3. identify the output file to download and click on Download icon to download it

3.5.2 Publish the output file
1. click on the appropriate project record within the List of Projects
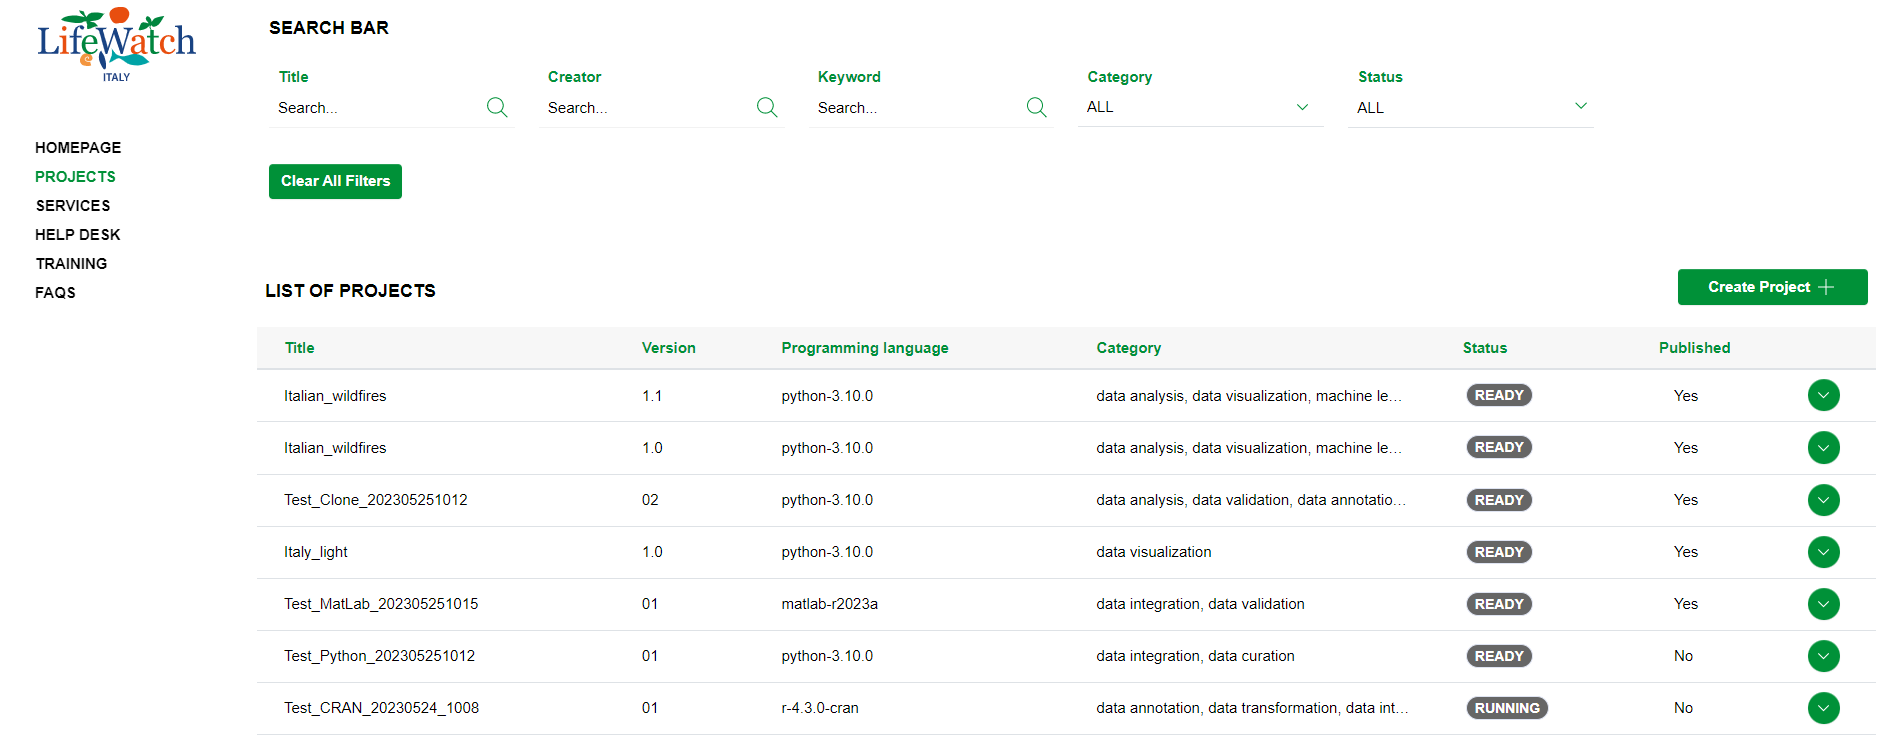
2. click on the Collapse icon to open the Output accordion

3. identify the output file to publish and click on the relevant icon; alternatively, the user can select the item "Publish a dataset" from the menu "Actions" available both in the details of the Dashboard and in the action bar of the details view of the project.

4. then it's necessary to follow the wizard of publication of the dataset (see further details in the relevant paragraph).
4.6 Warning and Alerts
This section reports any errors and/or alert generated by the execution of the project. The information reported refers, therefore, to the last instance of execution of the Integrated Development Environment (IDE).
The section will automatically update at the end of each execution. To access to Warnings and Alerts section, you need to:
1) click on the appropriate project record within the List of Projects
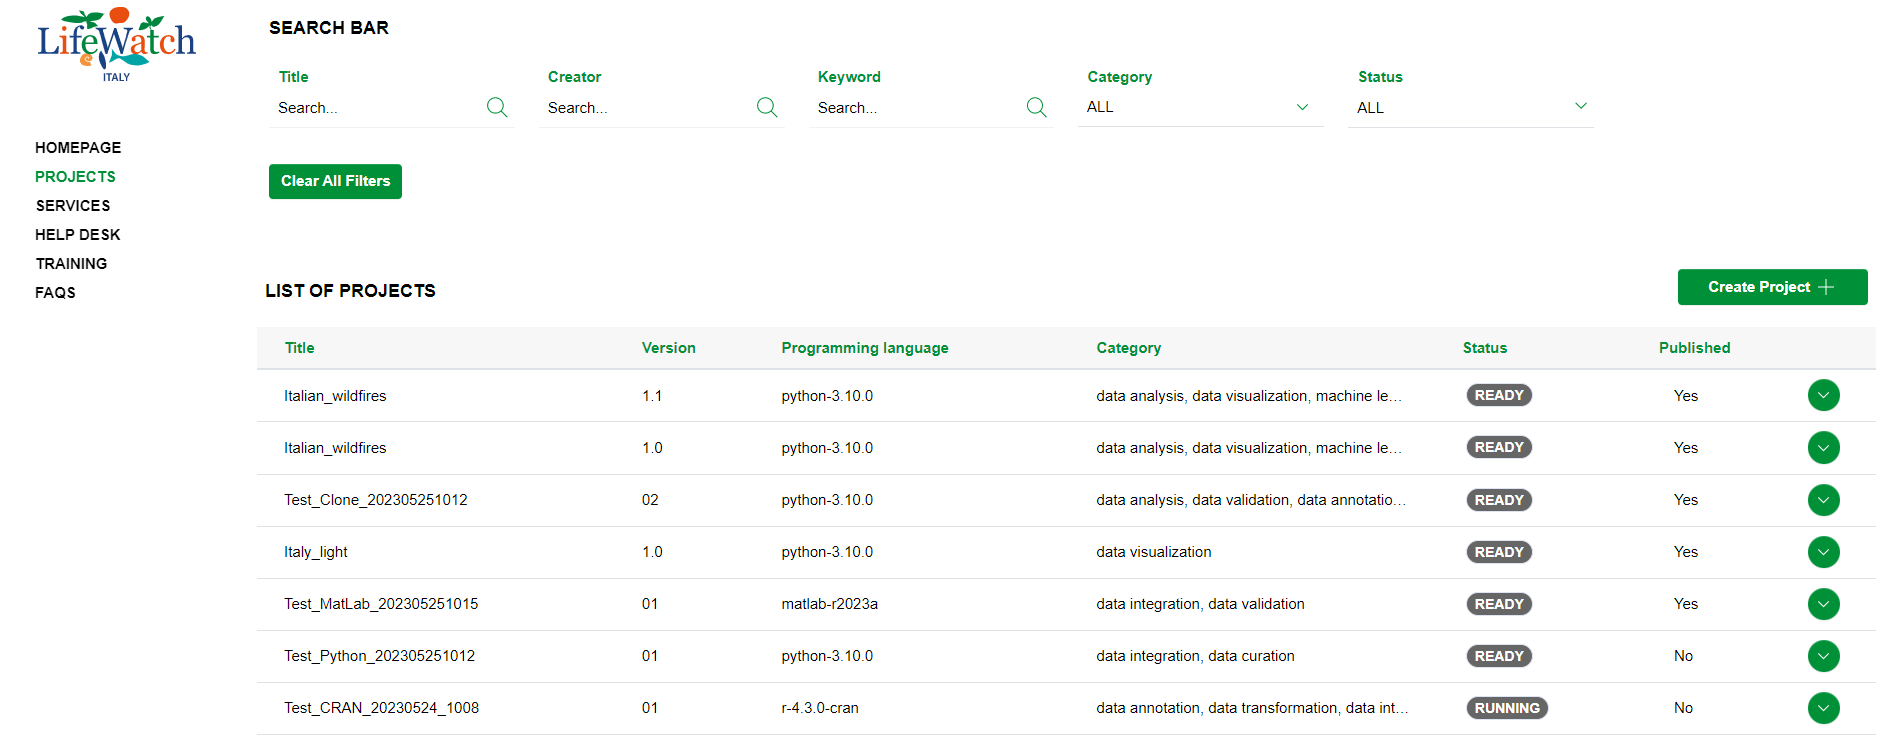
2) click on the Collapse icon to open the Warnings and Alerts accordion. Please note that if the project execution does not generate any warning and/or alert, the application will show the following view:

3.7 Team
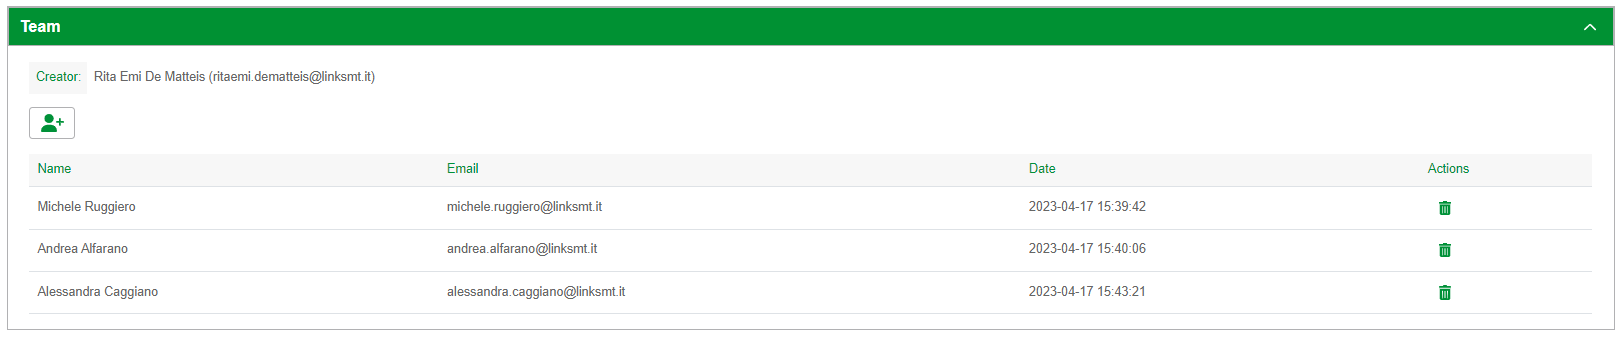
This section is composed by two main area:
- the first area shows the name and email of the Project creator and a table containing a set of information concerning the member(s) of the project team. In particular, the visible information is:
- Name
- Date of addition to the project team
- Actions (available only for the Project creator and Administrator)
- the second area is available only for the Project creator and Administrator and give the possibility to add a new member.
3.7.1 Add a member
To add a new member to the project team, you need to:
1. click on the appropriate project record within the List of Projects
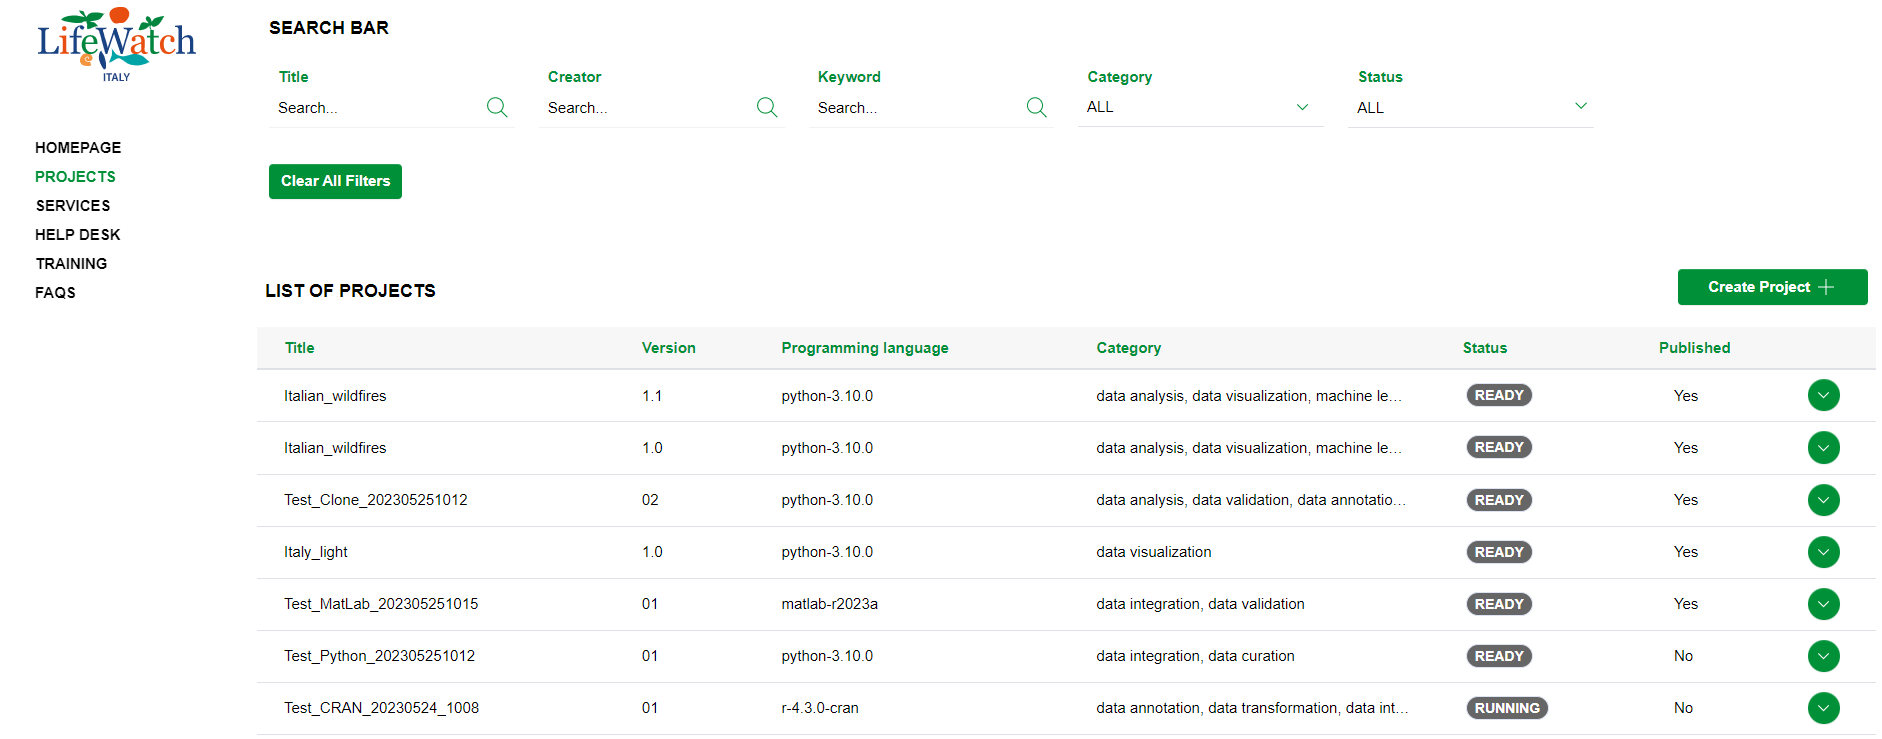
2. click on the Collapse icon to open the Team accordion

3. click on the relevant icon to add a new member

4. Insert email and name of the new member and click on the Save button

5. In the table shown in the first area, a new record is created with the new member added
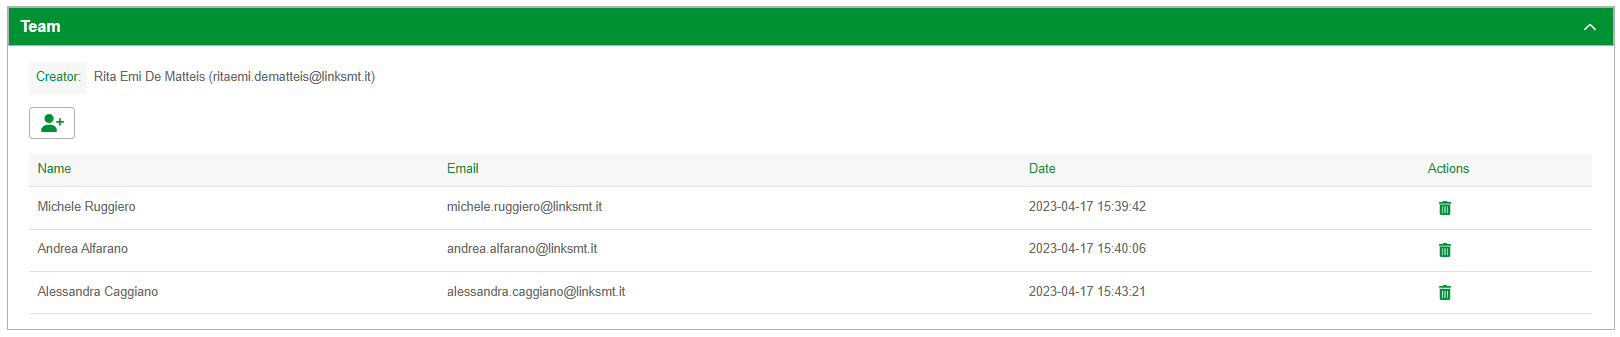
Please note that at the end of the procedure, the system generates a mail notification to the added user.
3.7.2 Delete a member
1. click on the appropriate project record within the List of Projects
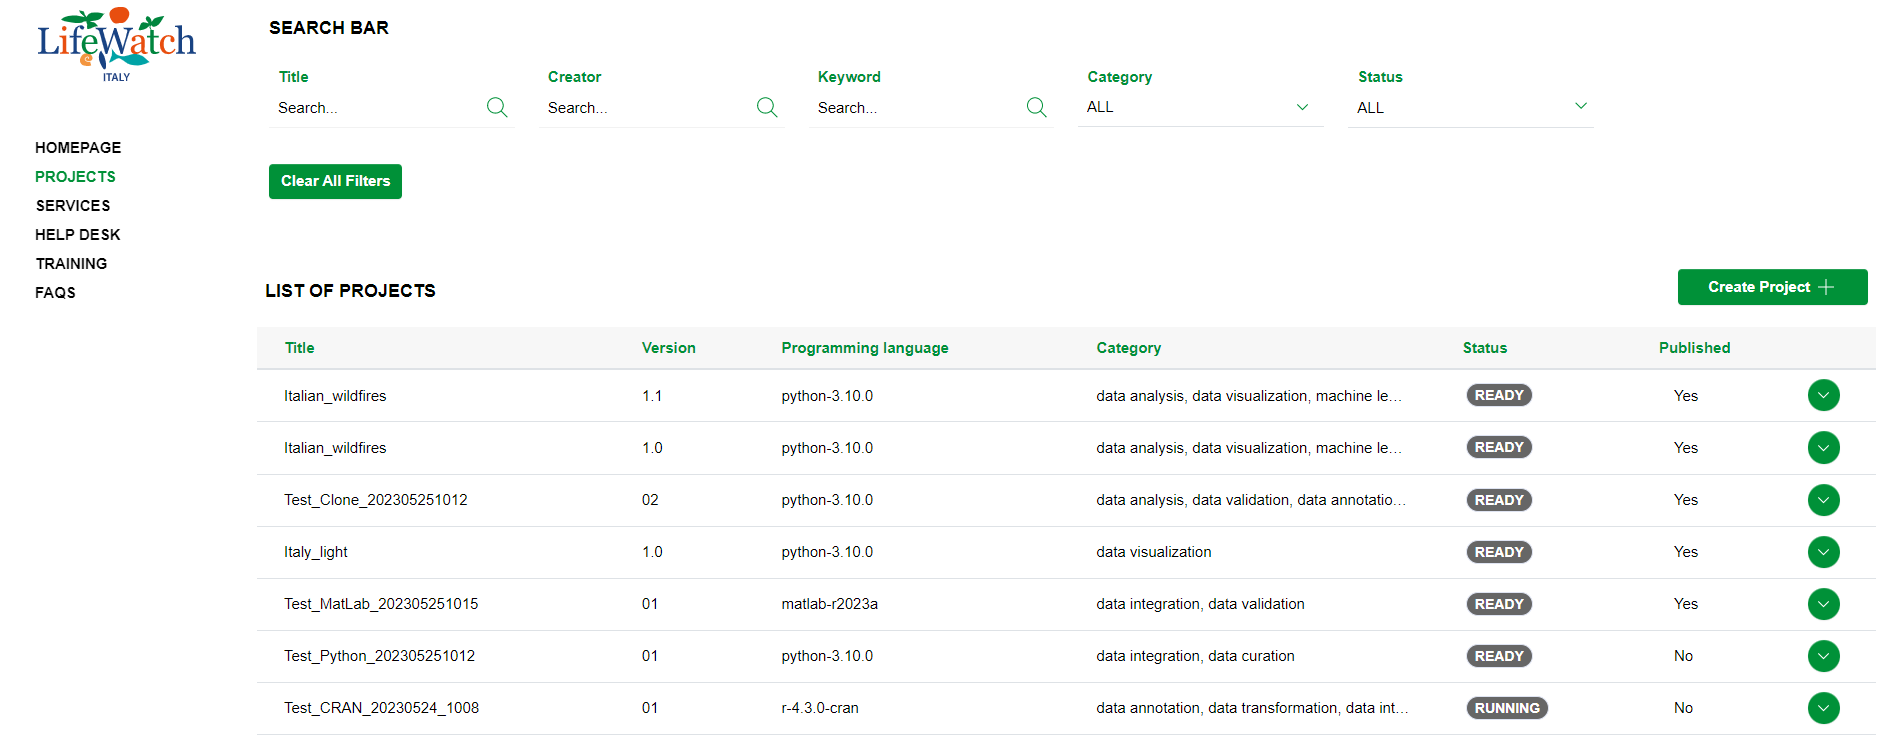
2. click on the Collapse icon to open the Team accordion

3. identify the member to delete and click on the relevant icon
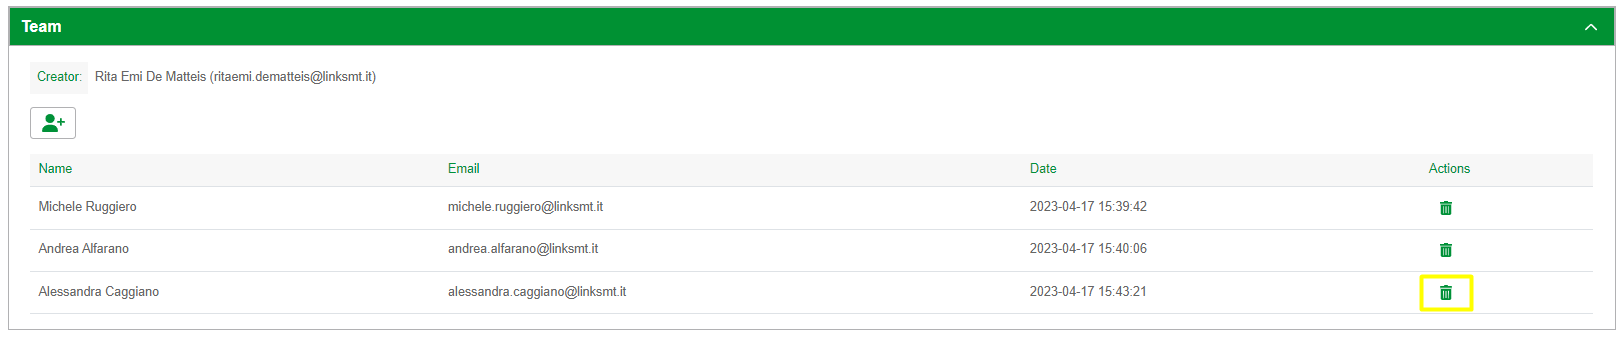
Please note: only the Project creator and Administrator can delete a member of a project team. Also note that at the end of the procedure the system generates a mail notification to the removed user.
3.8 Statistics
The section shows in a table the statistics generated by the last execution of the project. This information is automatically updated at the end of each project execution instance. To access to Statistics, you need to:
1) click on the appropriate project record within the List of Projects
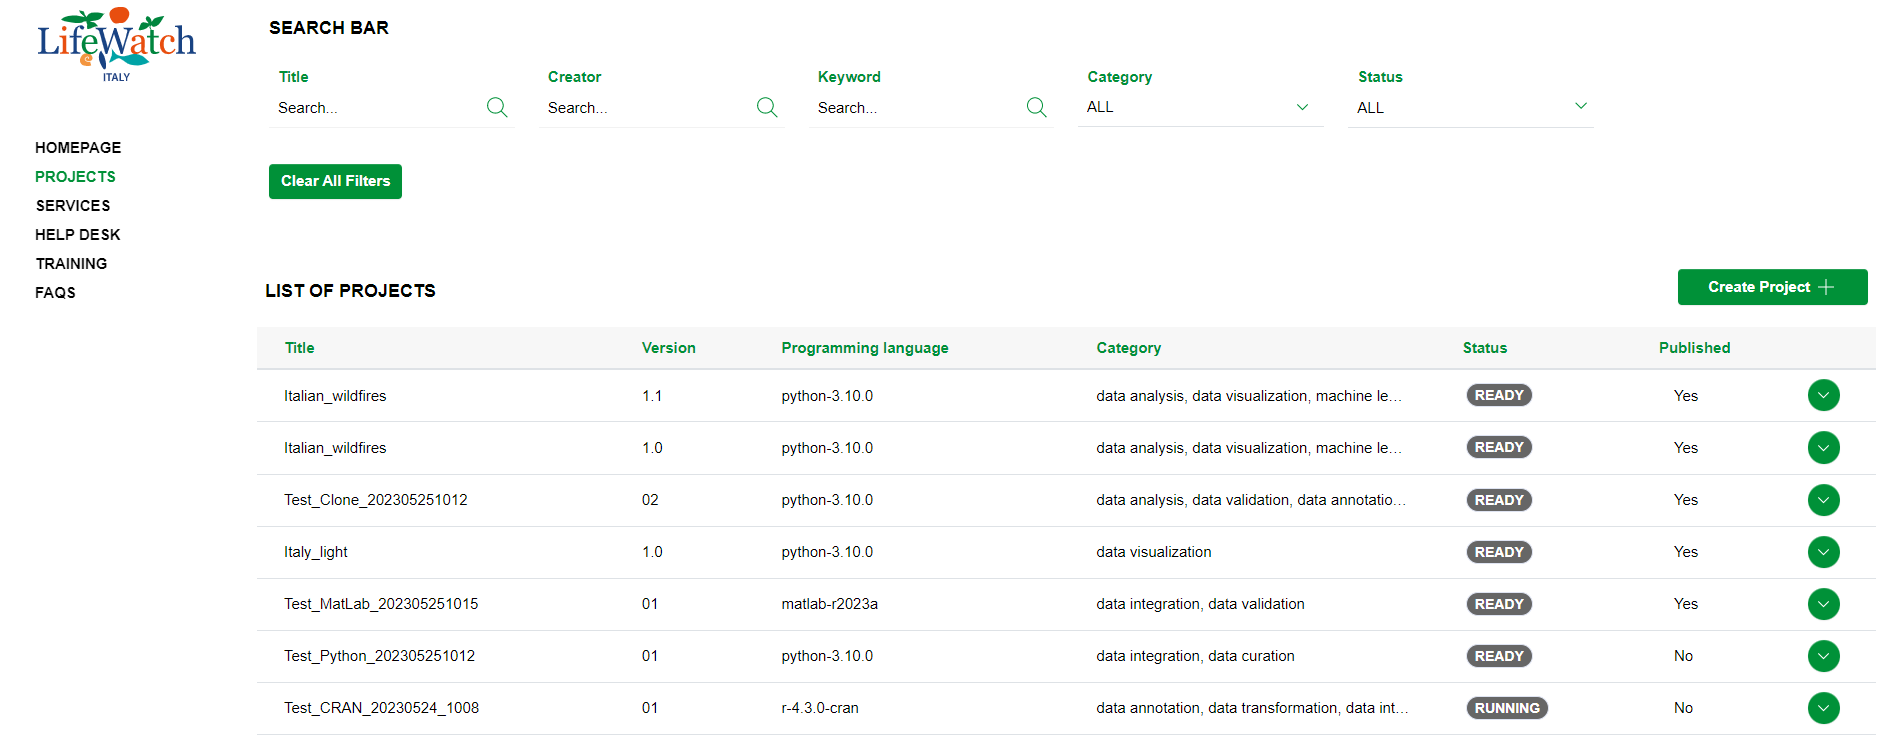
2) click on the Collapse icon to open the Statistics accordion
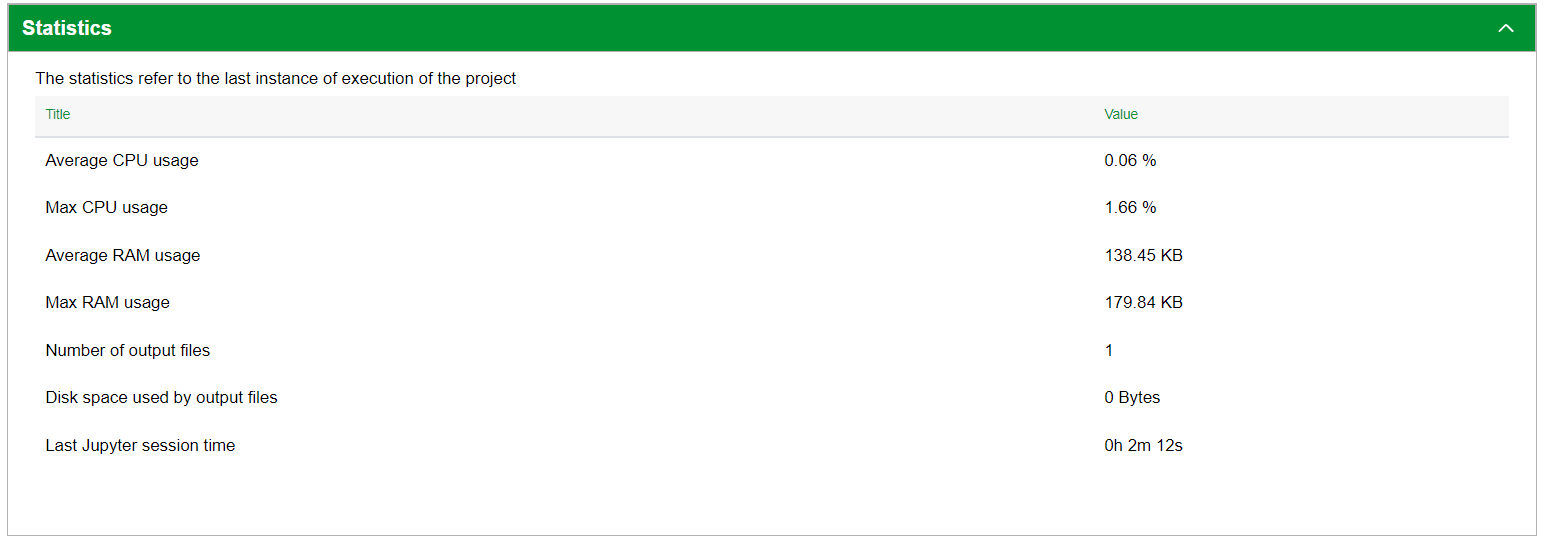
3.9 Provenance
In this section you can see all the projects cloned from the selected reference project. The provenance is represented through a tree chart. To access to Provenance section, you need to:
1) click on the appropriate project record within the List of Projects
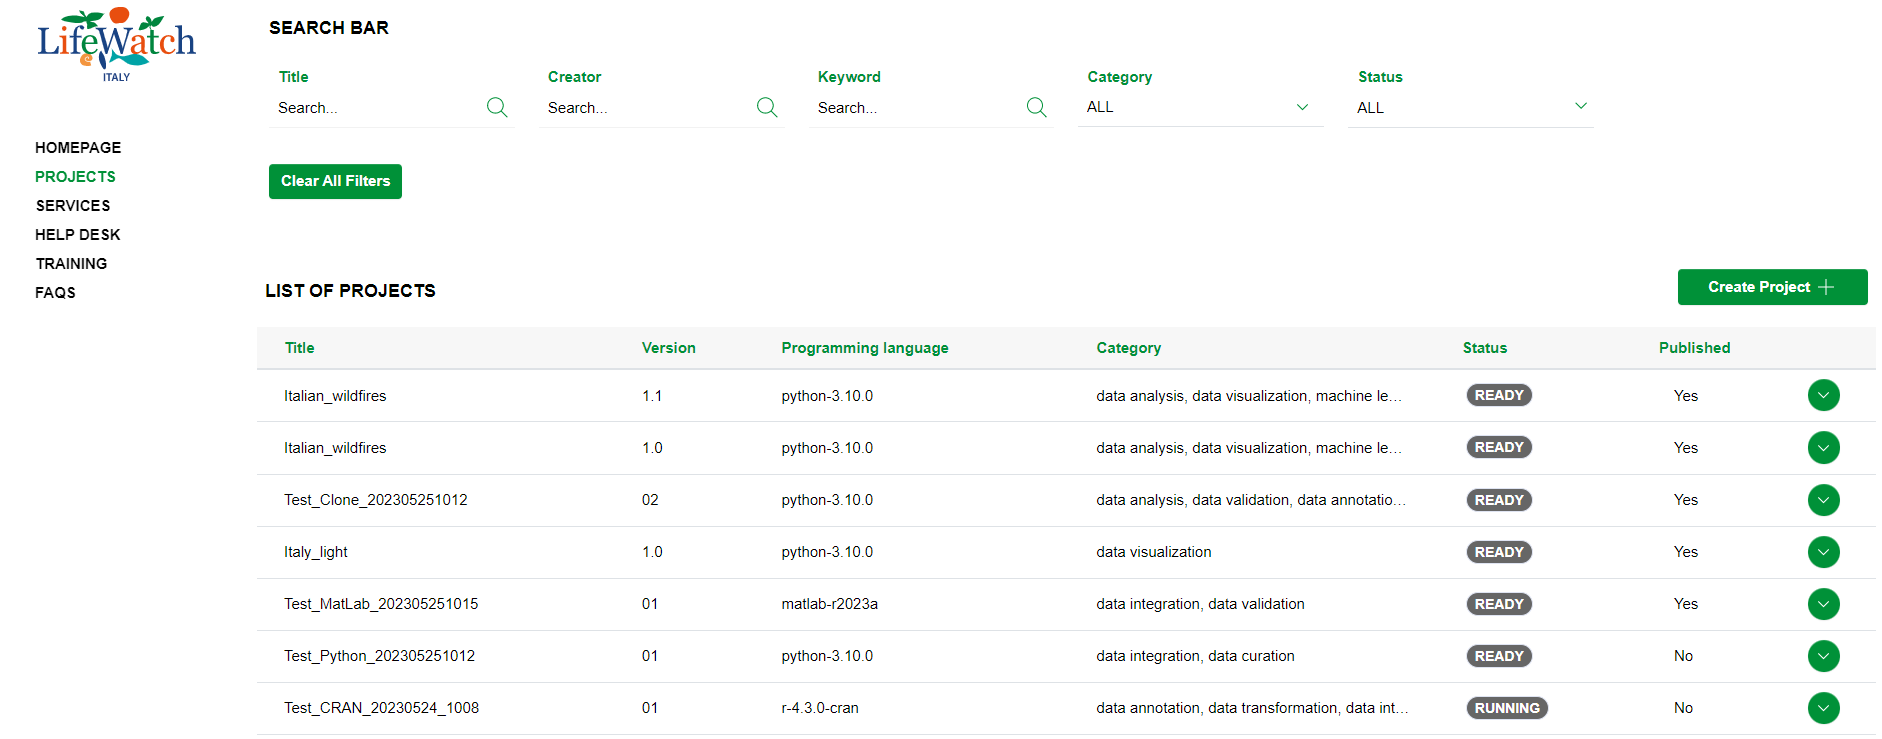
2) click on the Collapse icon to open the Provenance accordion
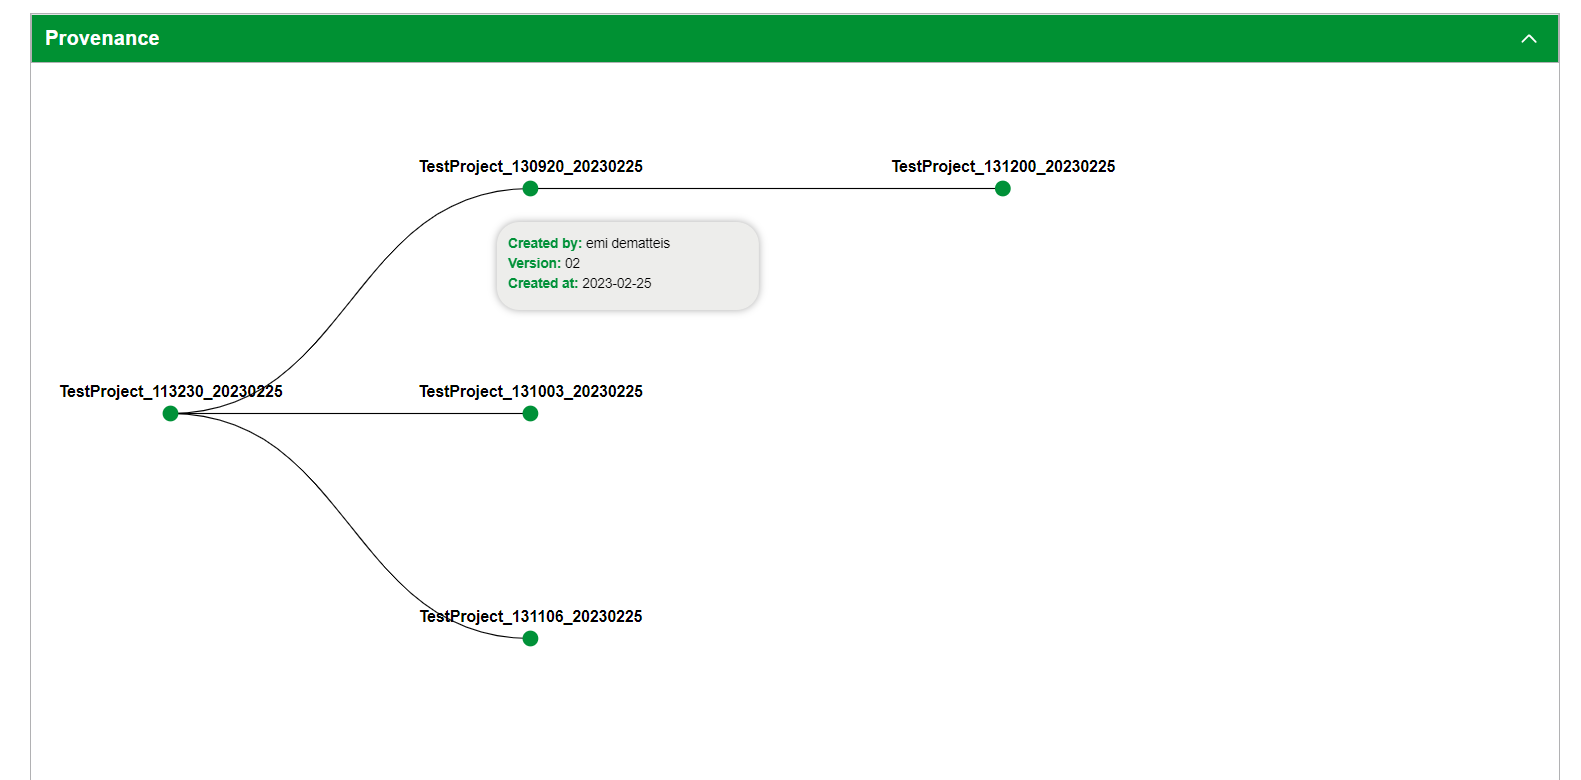
Please note that, if you click on a node, the application will show you the details of the selected project.
3.10 Metadata
In this section you can see all the metadata related to the published resources. To access to Metadata section, you need to:
-
click on the appropriate project record within the List of Projects

2. click on the Collapse icon to open the Metadata accordion

Please note that this section is available only if the script has been published in the Metadata Catalogue.