1. Custom JupyterLab environment
| Sito: | LifeWatch Italy Training Platform |
| Corso: | DataLabs - Tutorial Code |
| Libro: | 1. Custom JupyterLab environment |
| Stampato da: | Utente ospite |
| Data: | martedì, 3 novembre 2026, 00:56 |
1.1 Access to JupyterLab
To access to JupyterLab environment, click on “Open” from the Project Dashboard
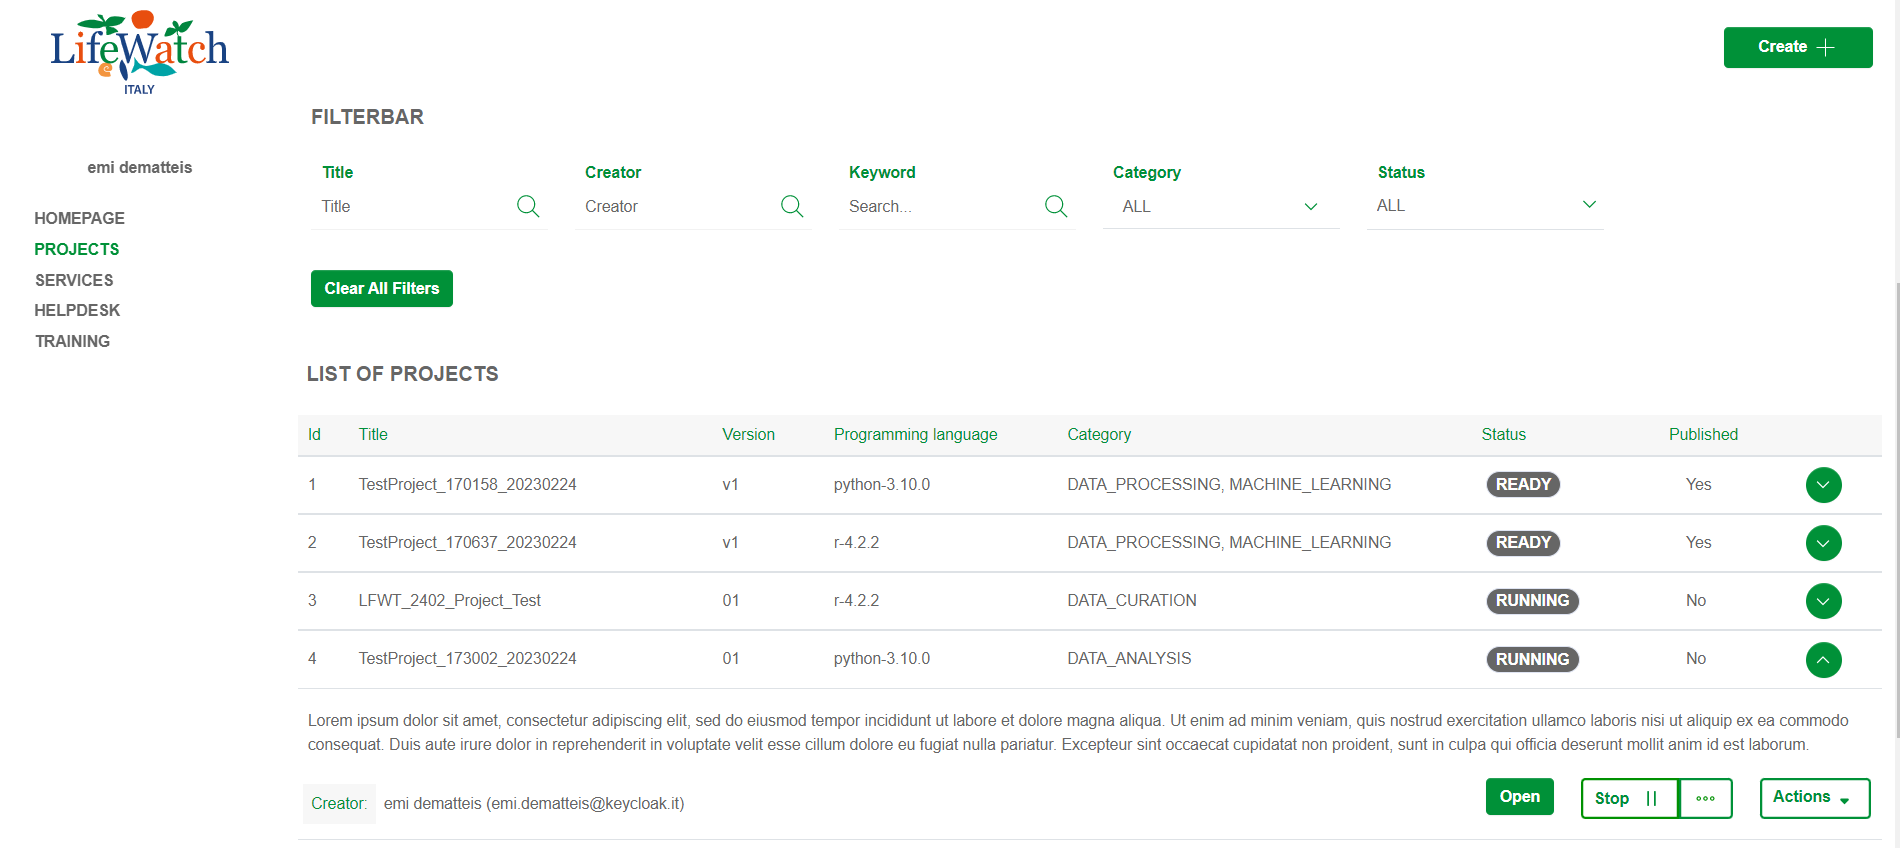
or from the Project Detail view
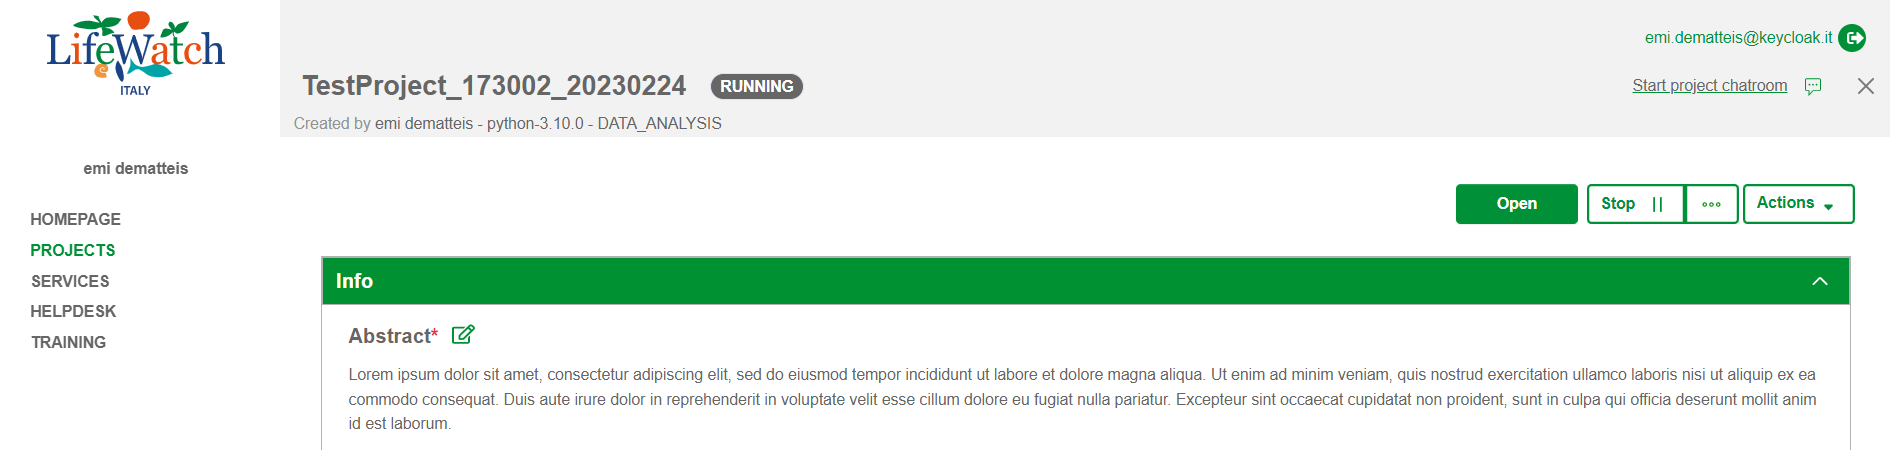
1.2 JupyterLab standard functionalities
JupyterLab default installation offers you standard functionalities, described in the official documentation.
For more details, please see the following link: https://jupyterlab.readthedocs.io/en/3.4.x/user/interface.html
Collaborative coding
For LifeWatch community, collaborative coding feature (disabled in default JupyterLab installation) is enabled to allow writing code in collaborative mode. Please note that the activities in the notebook, such as writing code, executing code, renaming files, deleting files, and others, are shared in real time with all users simultaneously active on the same project.
You can see the cursor of other active users in your notebook, with indication of their user id (Figure 1).
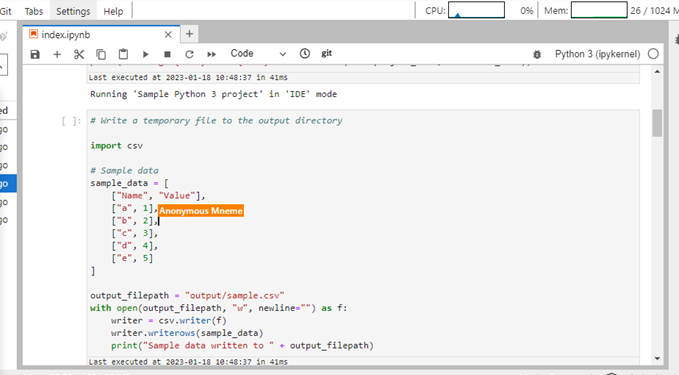
Figure 1 – Example of collaborative coding
1.3 Masking and enforcement of menu and operations
In this custom JupyterLab environment some functionalities are disabled for system security reason.
These include:
- plugin and extensions installation functionality
- access to older Jupyter interfaces (/notebook and /tree)
- access to functionality as logout, help, console, terminal, shutdown …
- ‘Property Inspector’
- ‘Command Palette’
- some Git functionalities such as Clone and Branch management.
1.4 Template Scripts
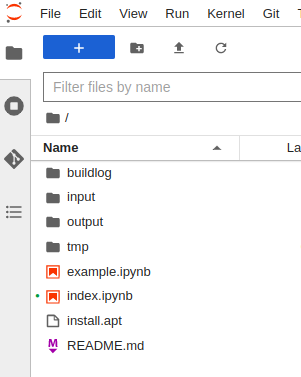
Based on the language selected during project generation (Python 3, R, R-cran, Matlab), the system provides you a project template. It contains general indications and small code examples.
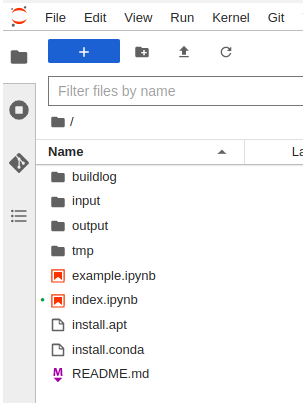
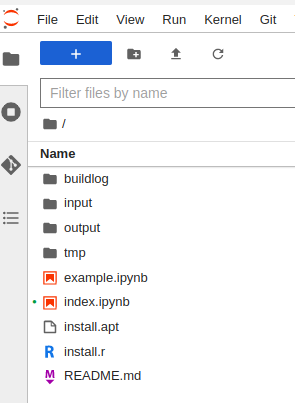
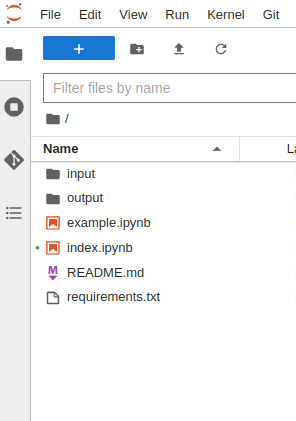
The basic structure of the project template (Figure 2) is as follows:
- buildlog: contains eventual logs for library installation.
- input: this folder contains the input dataset files;
- output: every script output must be placed inside this folder;
- tmp: can be used to write temporary files during execution that should not be committed to git repository.
- example.ipynb: This is an example notebook that contains some basic functions examples to work with input and output
- index.ipynb: this is the main script file containing the source code. As a starting point, this file is populated with some basic examples.
- README.md: this file contains a detailed description of the developed Project. As a starting point, it contains a user guide on how to start a new project.
- install.apt: this file can be used to install additional packages through apt that can be required.
- requirements.txt: this file contains the required R libraries needed by the main script to run.
- install.conda: this file contains the required libraries needed by the main script to run.
Make sure to list every library, one for each line.
Please note: to apply the changes to this file (and install any new library) a complete restart of the project is needed.
To start working on the project, open the file index.ipynb double clicking on it.
1.4.1 Environment variables
Some execution contexts are provided to the scripts through system environment variables.
The index.ipynb sample notebook shows how to read this information from the os environment.
The available env variables are the following:
- PROJECT_NAME: The project's name.
- PROJECT_DESC: The project's description.
- EXEC_MODE: The execution's mode: ide during the development stage, headless when executed as a service.
A simple example of their use is reported in Figure 3. For example, EXEC_MODE env variable could be used such a control variable in debug operations.
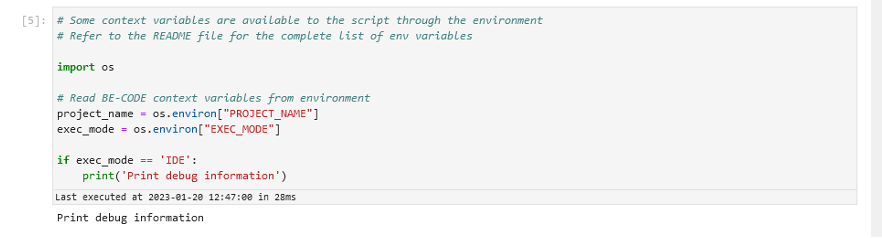
Figure 3 – Environment variables – example of use
1.4.2 Quoting method
Here is the pattern for quoting external sources. To cite either a computer program or piece of source code it needs the following information:
- Author(s) name (Individual or corporation)
- Date
- Title of program/source code
- Code version
- Type (e.g. computer program, source code)
- Web address or publisher (e.g. program publisher, URL)
It needs to add a markdown cell in the following format:
Author, A. A. (Year). Name of the software or app (Version number) Publisher.
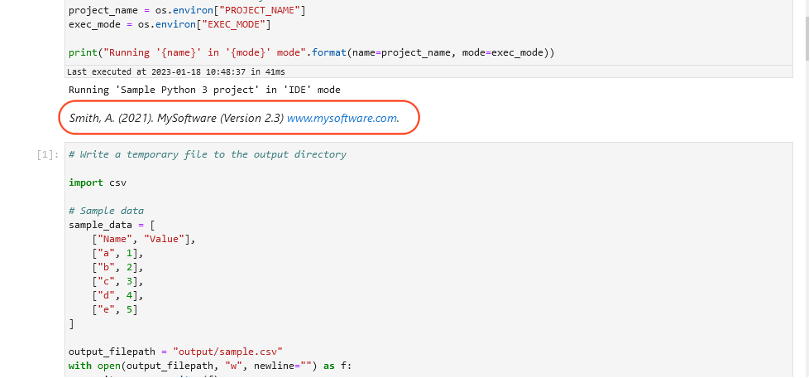
Figure 4 – Example of citation
1.5 Custom JupyterLab functionalities: Git
JupyterLab manages version control using Git, allowing commit/push/pull of repository files directly from the IDE.Some Git actions (i.e. branch/tag) are not allowed.
You can access to Git functionalities through different ways:
- Click on Git button in the notebook top bar (Figure 5) to display differences between Git HEAD and current version of code.
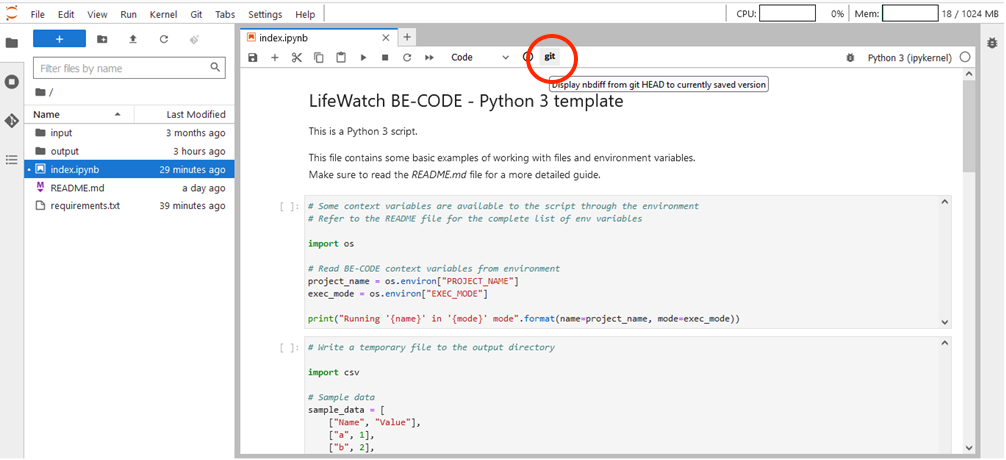
Figure 5 – Git button in notebook top bar
- Click on Git button in JupyterLab top bar (Figure 6) to access to the allowed git functionalities (i.e. Push/Pull..) and to online official Git documentation
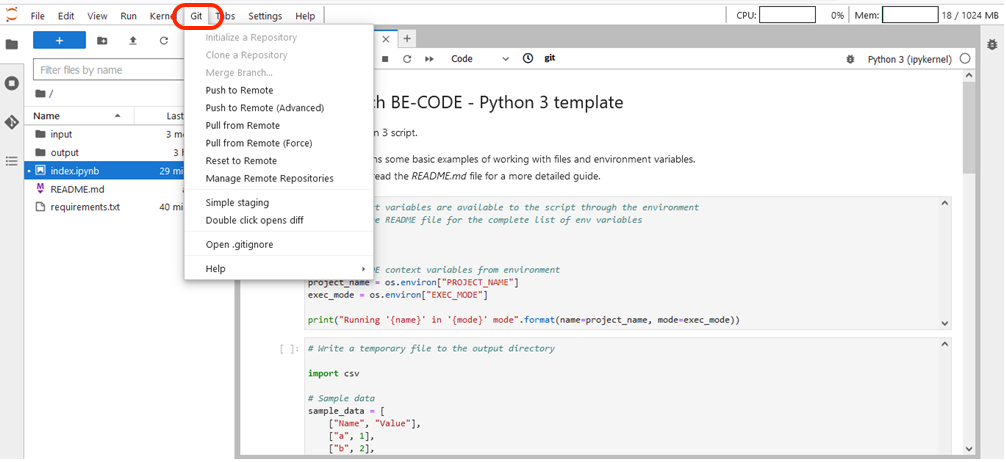
Figure 6 – Git button in JupyterLab top bar
- Click on Git icon button in the JupyterLab left bar (Figure 7) to open a Git section for changes and history management, Commit, Push and Pull operations.
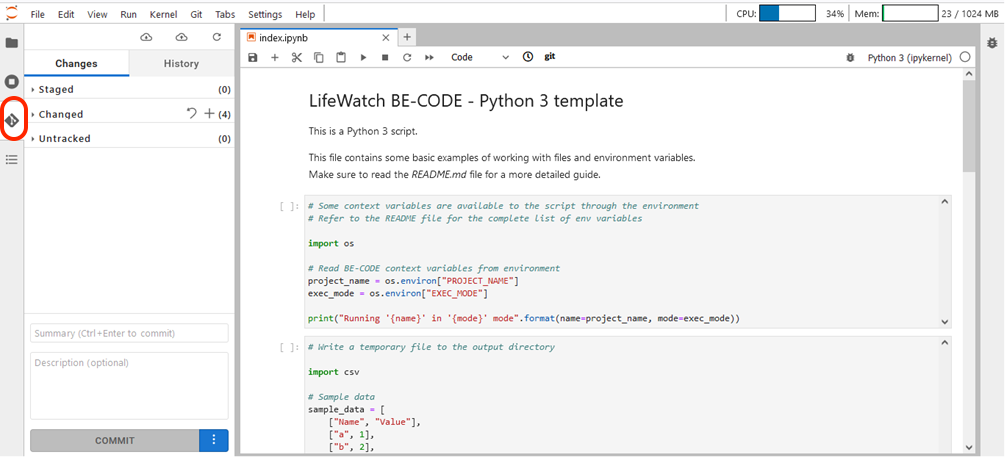
Figure 7 – Git button in JupyterLab left bar
No additional authentication credentials are required to operate on Git.
1.6 Resources monitoring
Information related to resources usage are:
- Current and recent CPU usage (%)
- Current and recent Memory usage (MB)
- the execution time of each notebook cell (see details in the paragraph 2.5.3).
On the top bar in the JupyterLab notebook there are graphs related to system resources usage:
- CPU
- RAM
Click on graph to
change visualization type (bar/spyke).

Figure 8 – Resources monitoring – example of spyke graph

Figure 9 – Resource monitoring – example of bar graph
Warning messages
If a warning resource threshold is exceeded, system provides an alert showing, in the notebook bottom right, a warning message specific for resource type. Please note that warning resources thresholds are configured by system administrator.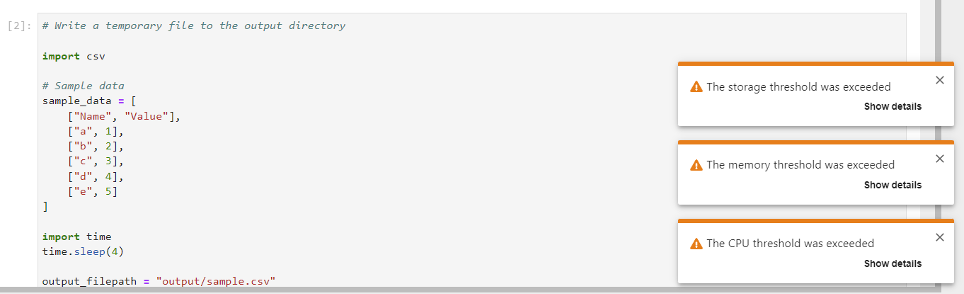
Figure 10 – Example of resources usage warning messages
Click on “Show details” to have more information about warning and related support documentation (Figure 11), or click on “x” to close message window.
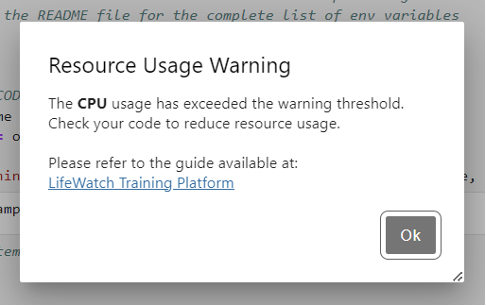
Figure 11 – Example of resource usage warning message - details
1.7 Execution Time
After the execution of each notebook cell, system shows information about related execution time.
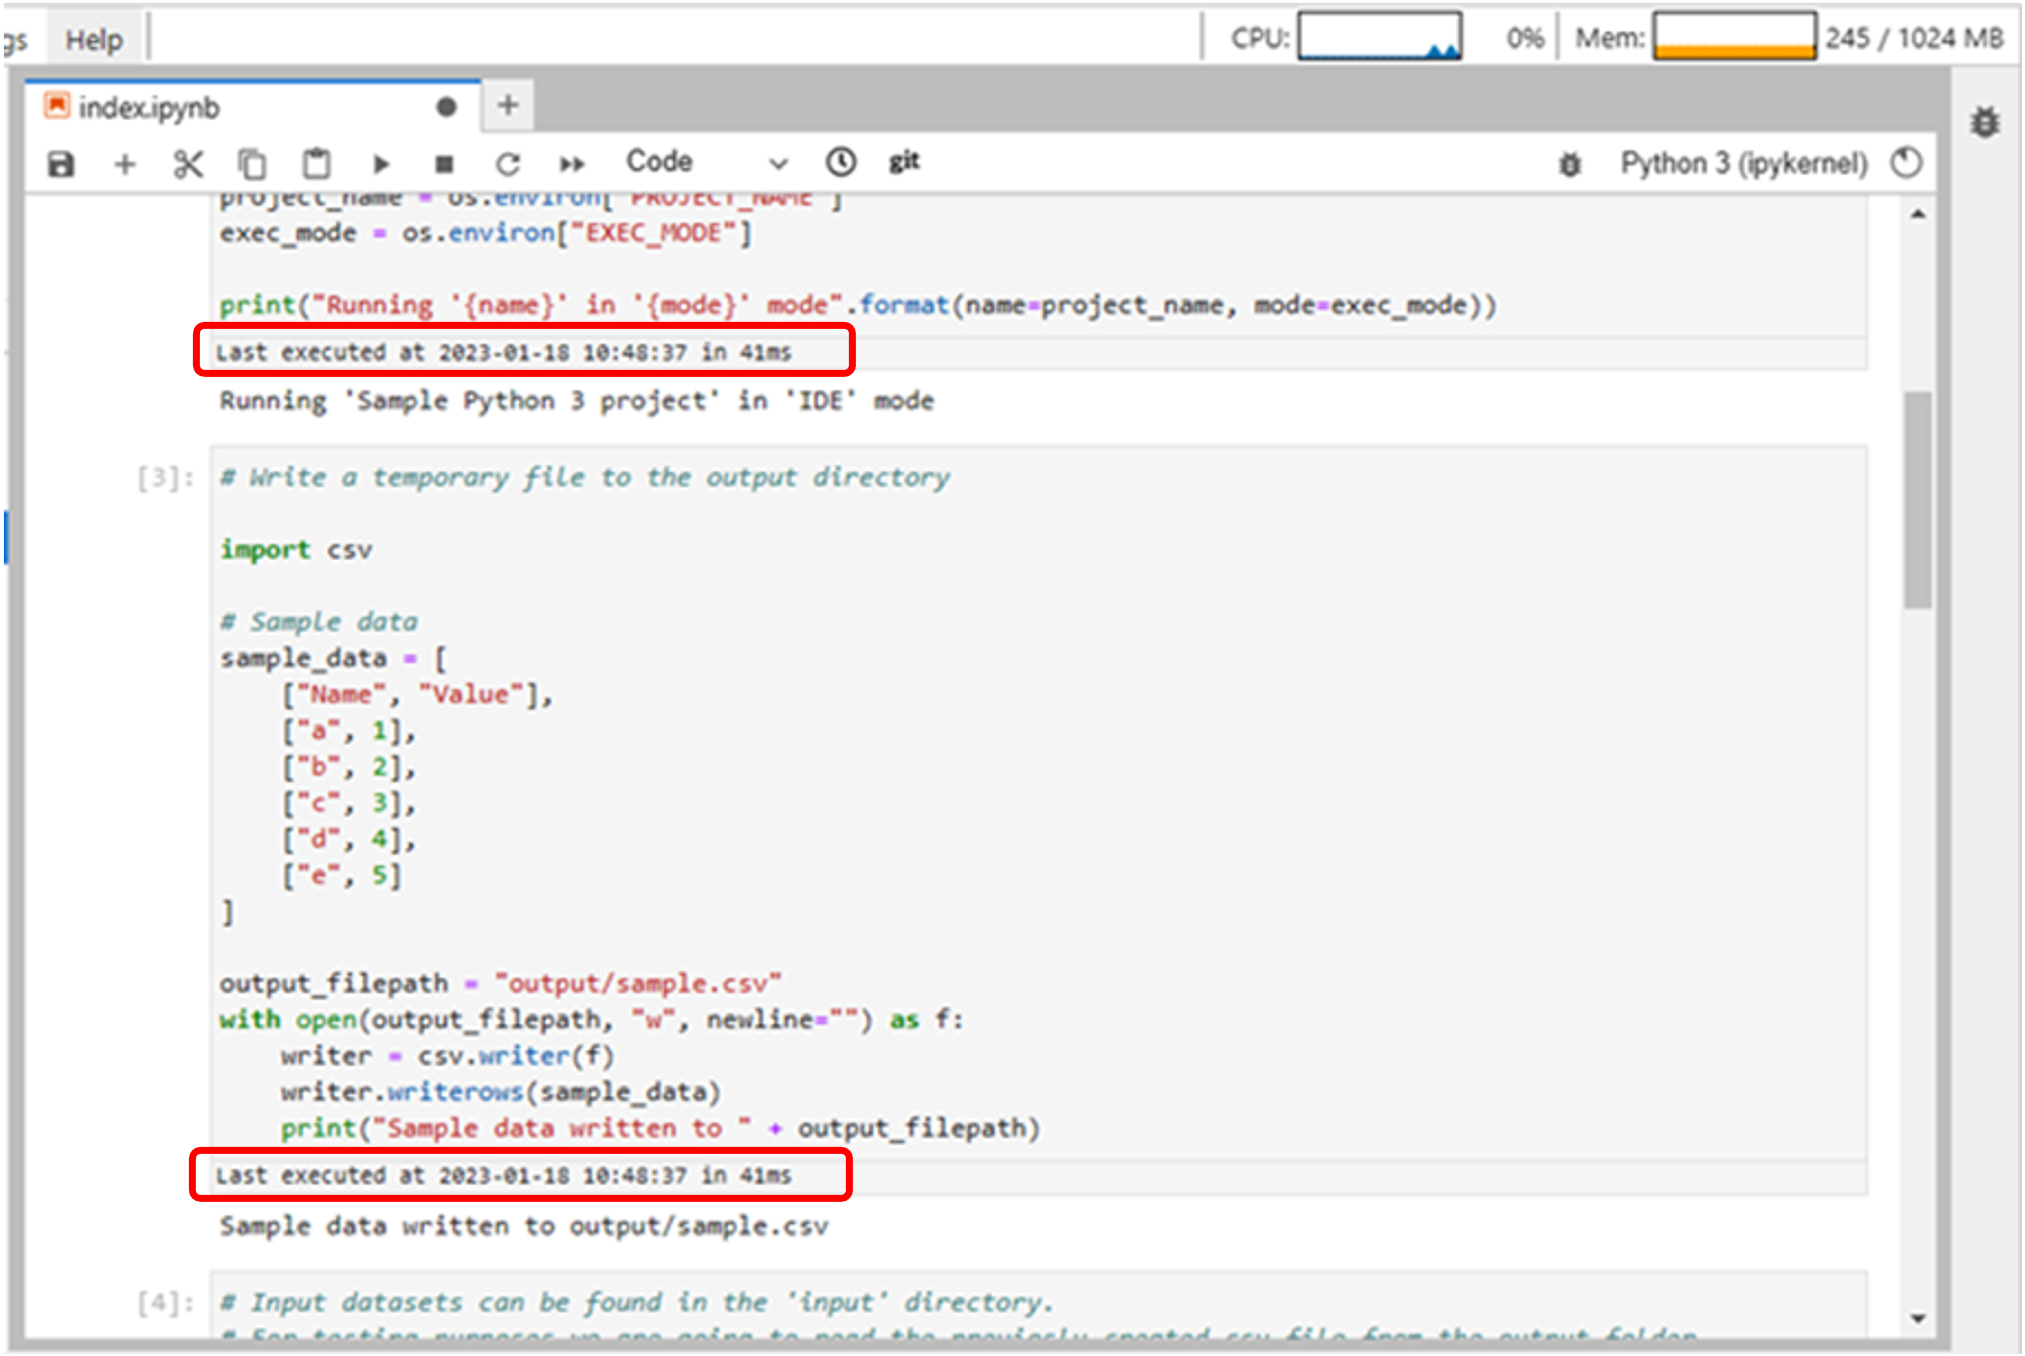
Figure 12 – Example of notebook cell execution time
1.8 Input / Output / Libraries installation
Work folder contains two sub-folders: Input and Output.
- Input folder contains input dataset files.
- All project script outputs must be saved into the Output folder.
In the work folders, for each flavor there are some files which can be used to customize the environment installing additional libraries.
- Python:
- install.apt
- install.conda
- MATLAB:
- install.apt
- R-4.3.0-cran:
- install.apt
- install.r
- R-4.2.2:
- requirements.txt
Below is an example for each file:
install.apt and install.conda
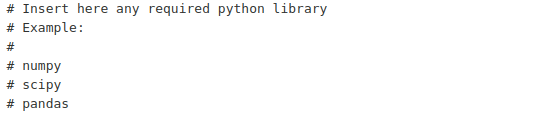
install.r

For the changes to take effect it needs saving and pushing the additional libraries, then restarting the environment. In the next run it will be added the new specified libraries.