3. Use cases
| Sito: | LifeWatch Italy Training Platform |
| Corso: | DataLabs - Tutorial Code |
| Libro: | 3. Use cases |
| Stampato da: | Utente ospite |
| Data: | martedì, 3 novembre 2026, 00:56 |
Sommario
- 3.1 Use cases
- 3.2 Template modification
- 3.3 New file creation
- 3.4 File upload
- 3.5 New cell creation
- 3.6 Cell deletion
- 3.7 Single cell execution
- 3.8 Notebook execution
- 3.9 Interrupt execution
- 3.10 Clear output(s)
- 3.11 File saving
- 3.12 Update on Git
- 3.13 Stop JupyterLab session
- 3.14 Libraries installation
- 3.15 Warning message management
3.1 Use cases
In this paragraph the main JupyterLab use cases are reported:
- Template modification
- New File creation
- File upload
- New cell creation
- Cell deletion
- Single cell execution
- Notebook execution
- Interrupt execution
- Clear output(s)
- File saving
- Update on Git
- Stop JupyterLab session
- Libraries installation
- Warning messages management
Images, as an example, refer to Python 3 technology.
3.2 Template modification
Double click (Figure 17) or single click with right mouse button (Figure 18) on index.ipynb fileto open it and to start editing project template.
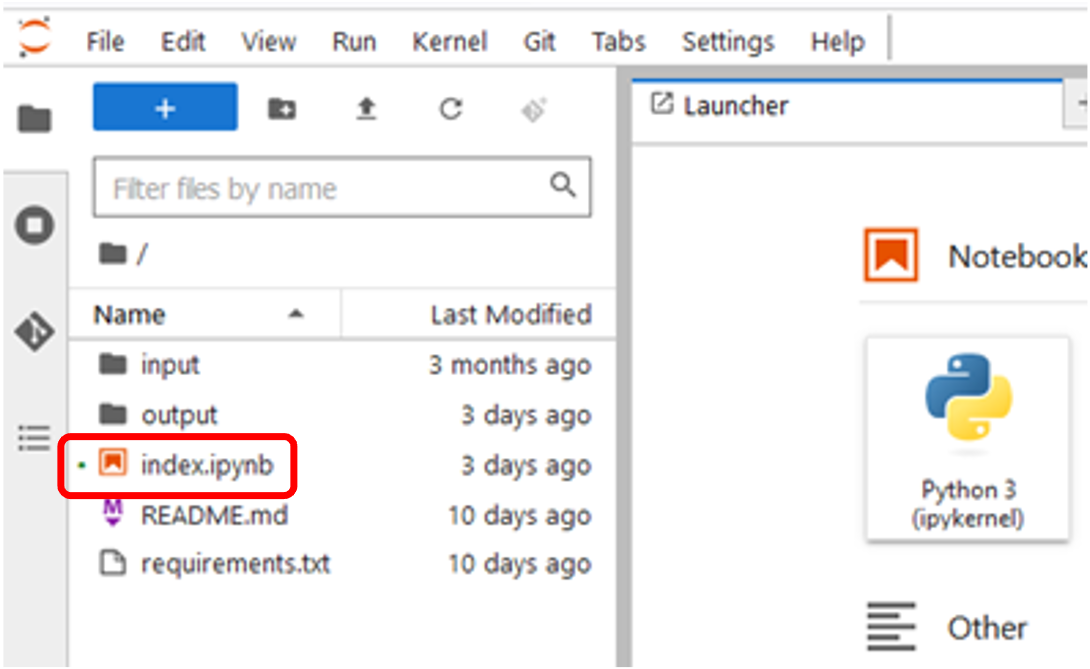
Figure 17 – Template modification – Open template (1/2)
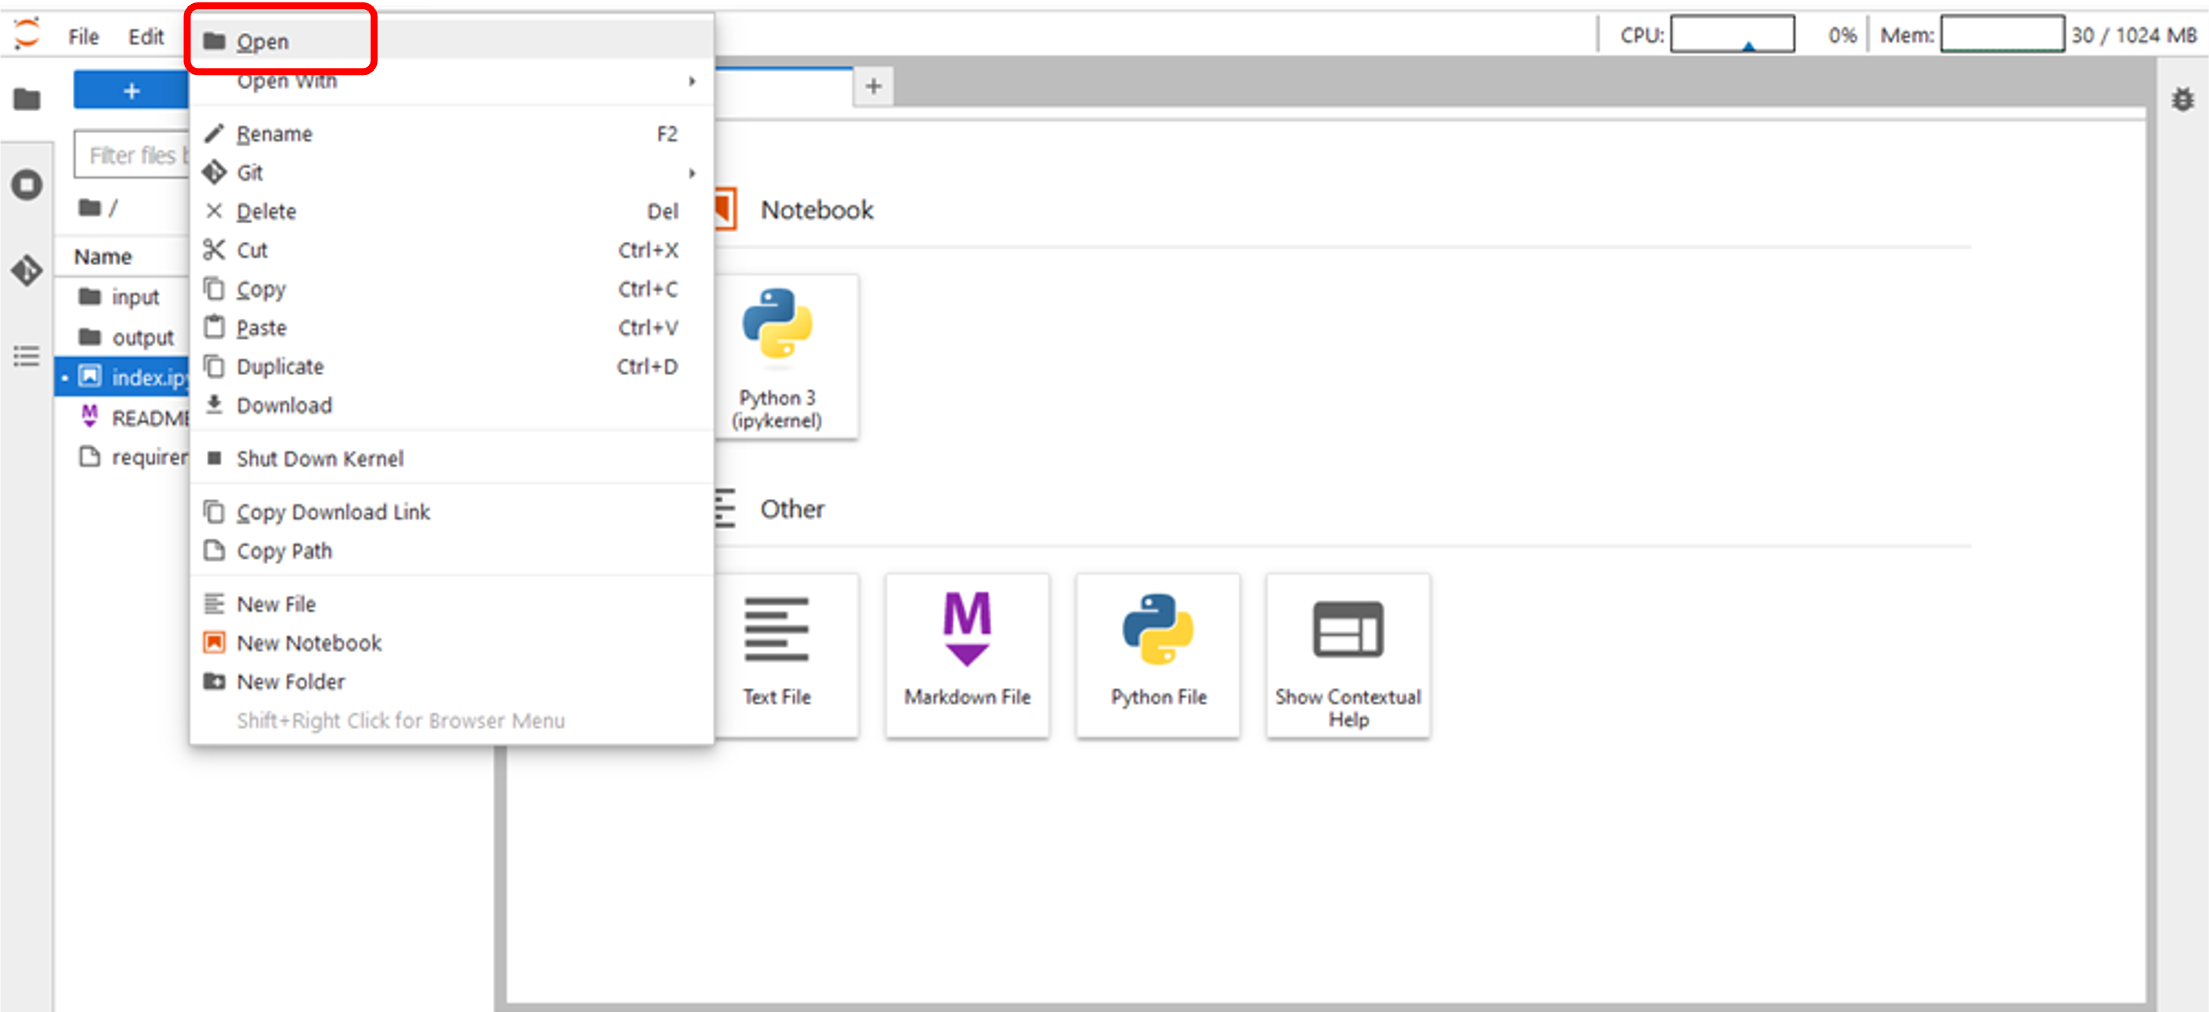
Figure 18 – Template modification – Open template (2/2)
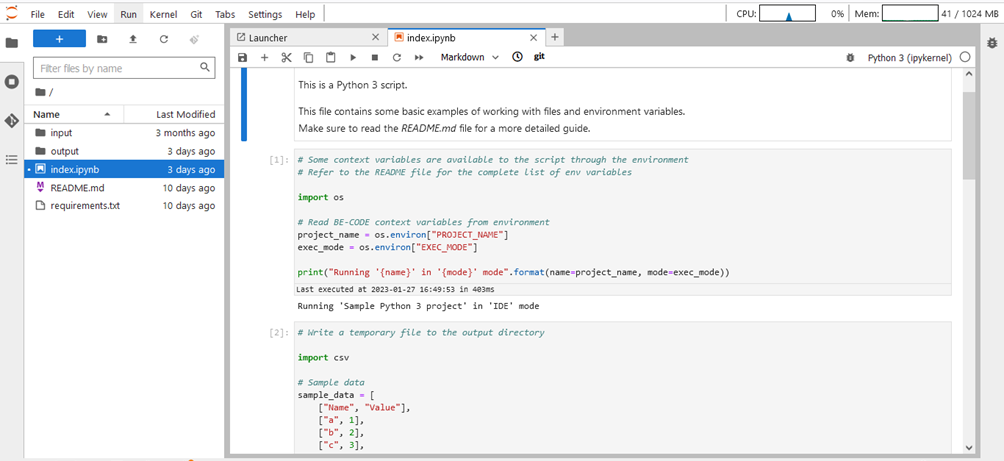
Figure 19 - Template modification – Template opened
3.3 New file creation
JupyterLab allows you to create many types of file:- Notebook
- Script (according to selected technology)
- Text File
- Markdown File
Top bar menu: Click on File ->New. Select from the menu the File type you want to create (Figure 20):
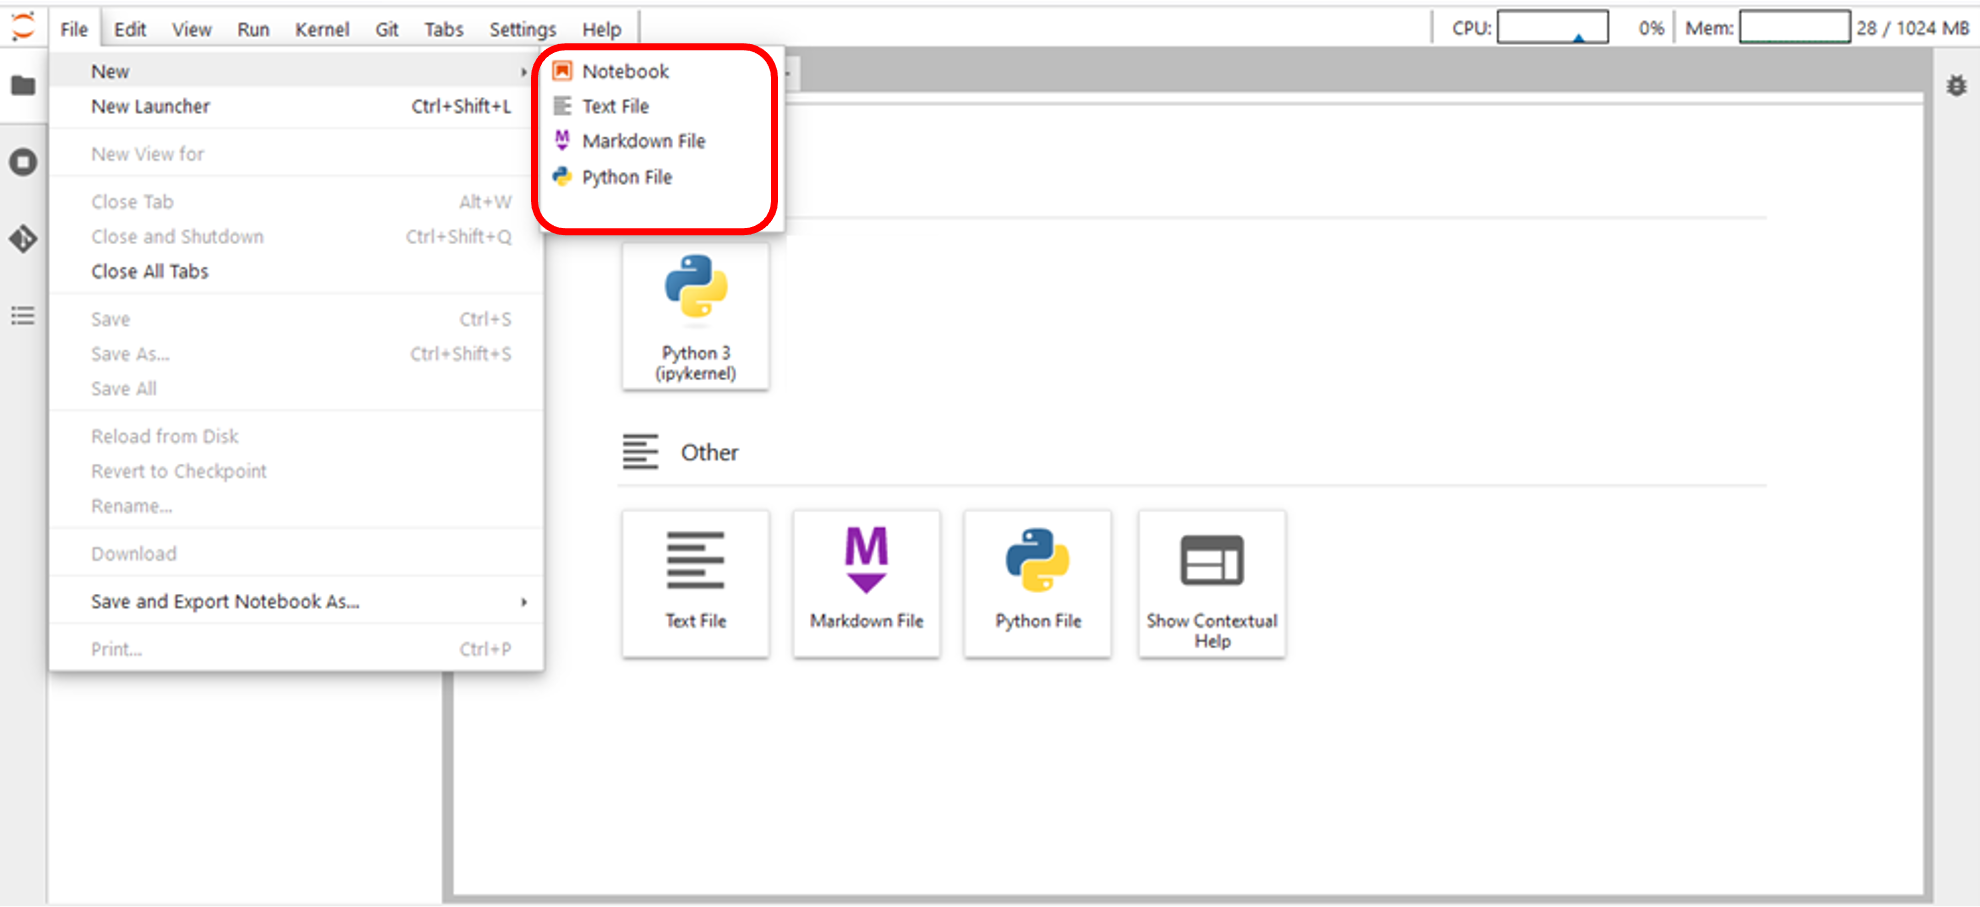
Figure 20 – New File creation – Top bar menu
Right-click on the Explorer Area to create a new Text File and a new Notebook (Figure 21).
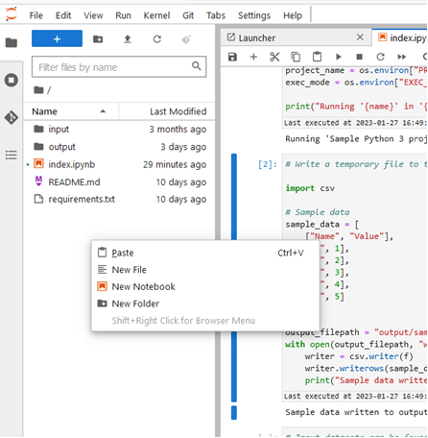
Figure 21 – New File creation – Explorer Area
3.4 File upload
To upload file(s) you can:- Click on the “Upload Files” icon and select file(s) you want to upload (Figure 22).
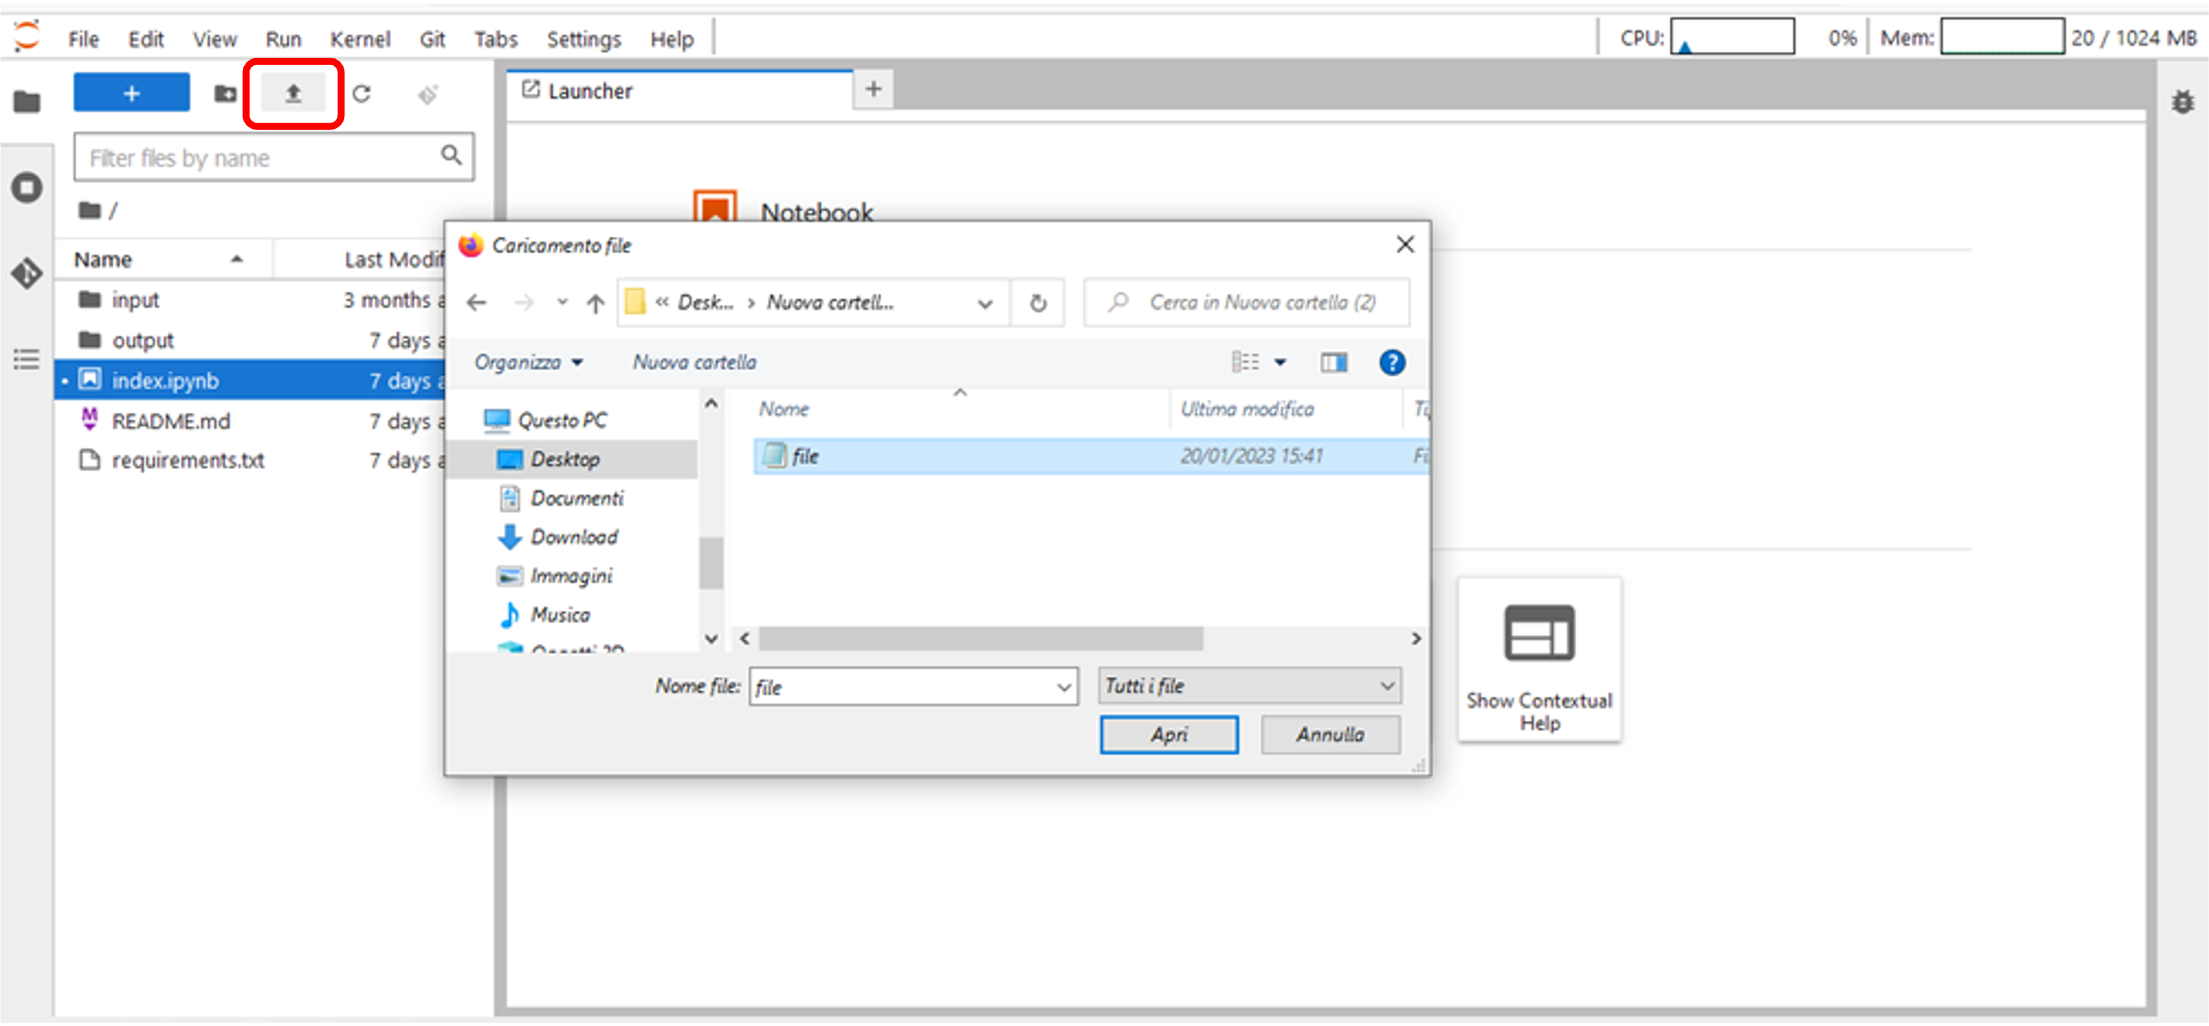
Figure 22 – Upload files - button
- Drag and drop in the Explorer Area the file(s) you want to upload (Figure 23)
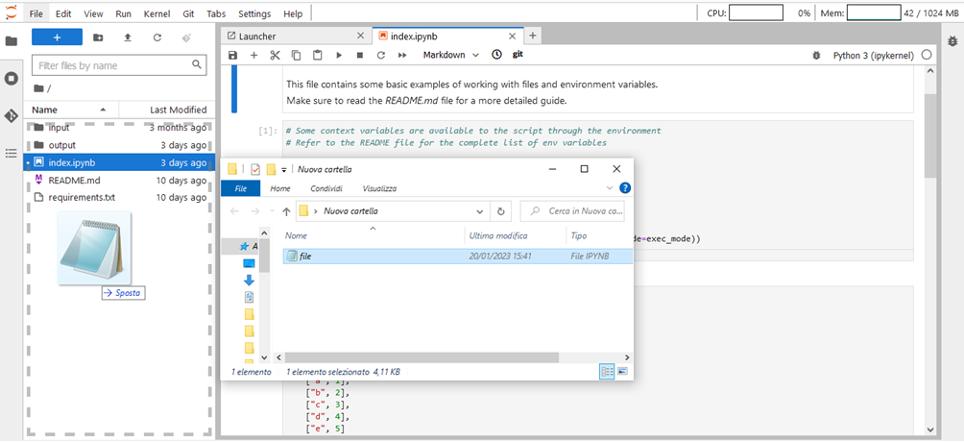
Figure 23 – Upload files- drag and drop
3.5 New cell creation
Select a cell and click on + button on the Notebook Bar to insert a new cell into the Notebook (Figure 24), below selected cell (Figure 25).
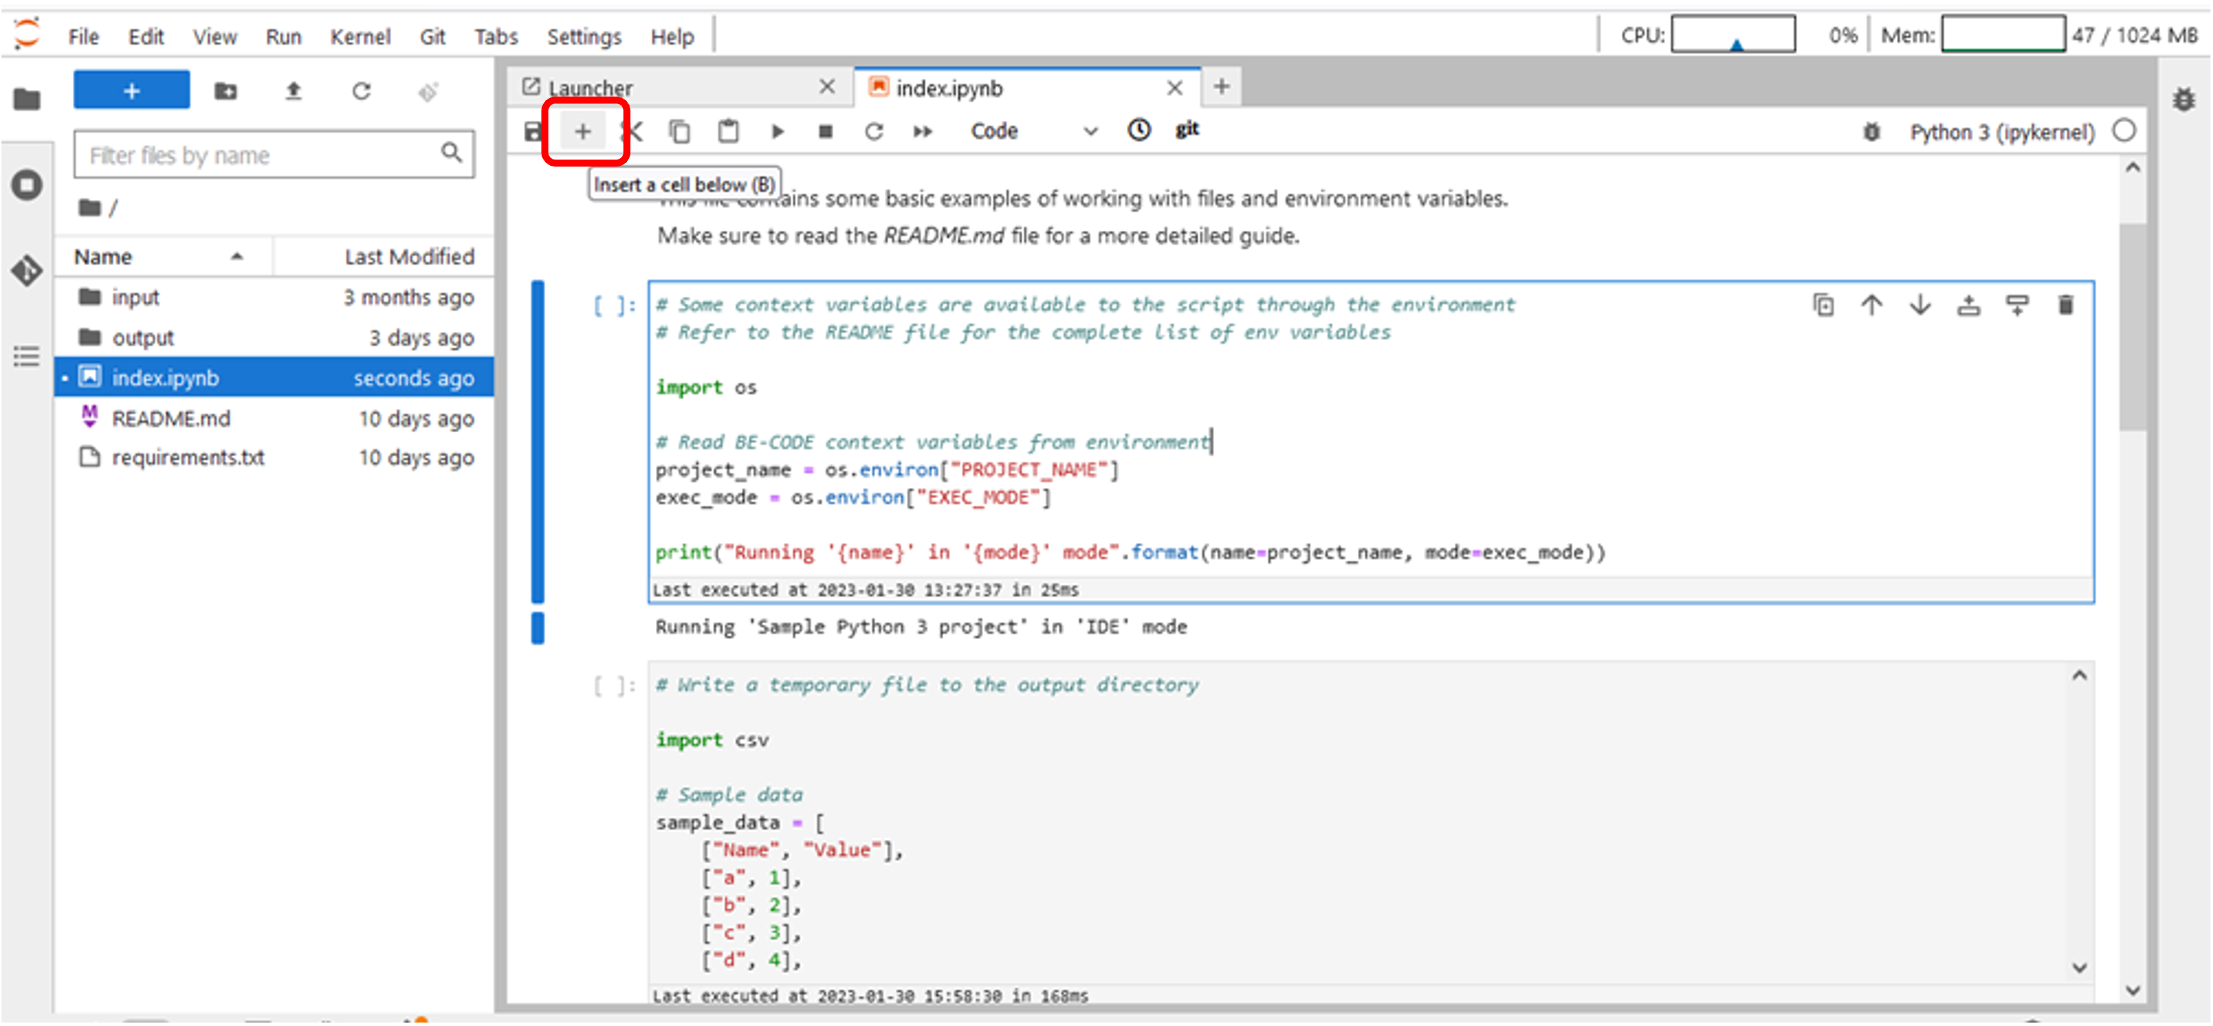
Figure 24 – New cell creation (1/2)
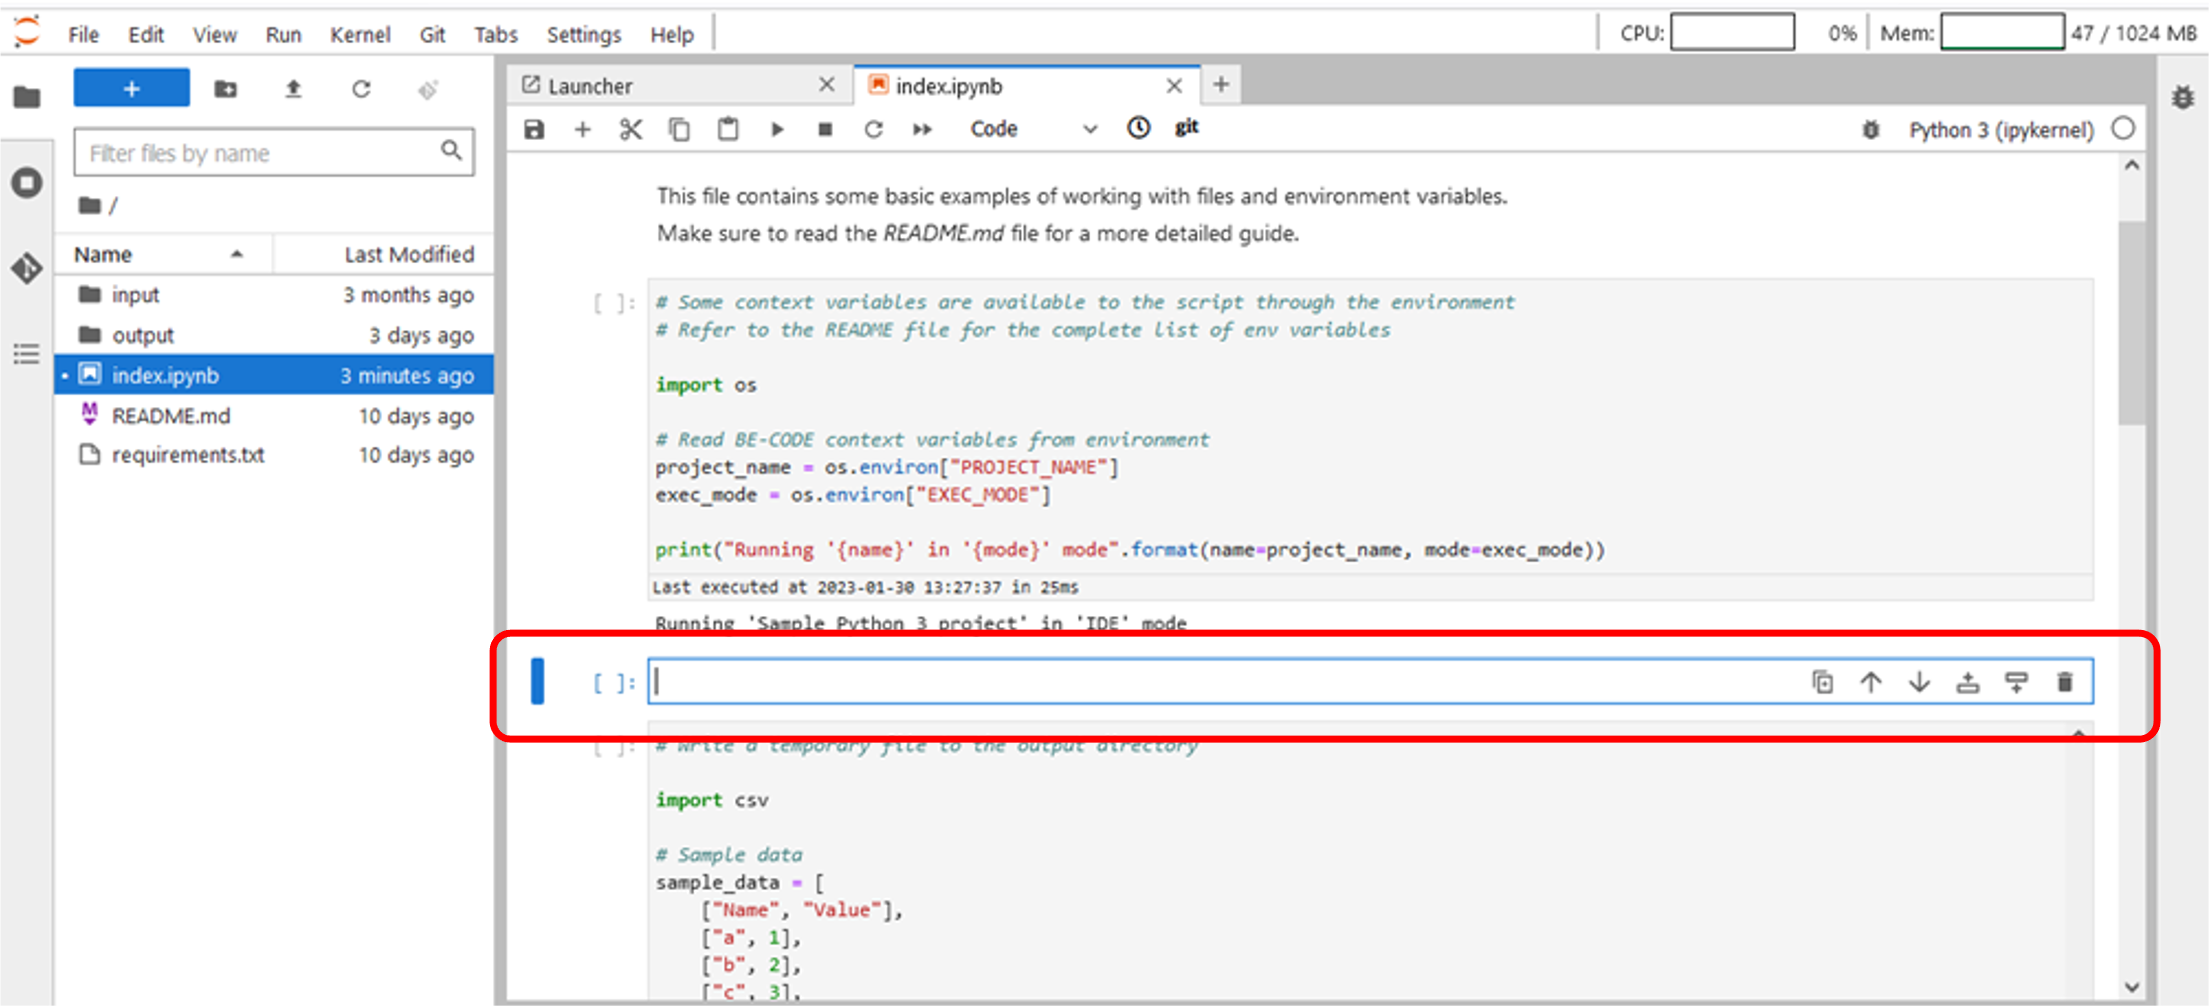
Figure 25 – New cell creation (2/2)
3.6 Cell deletion
You can delete a cell through different ways:- Click on Delete Cells icon on the top right of the cell (Figure 26).
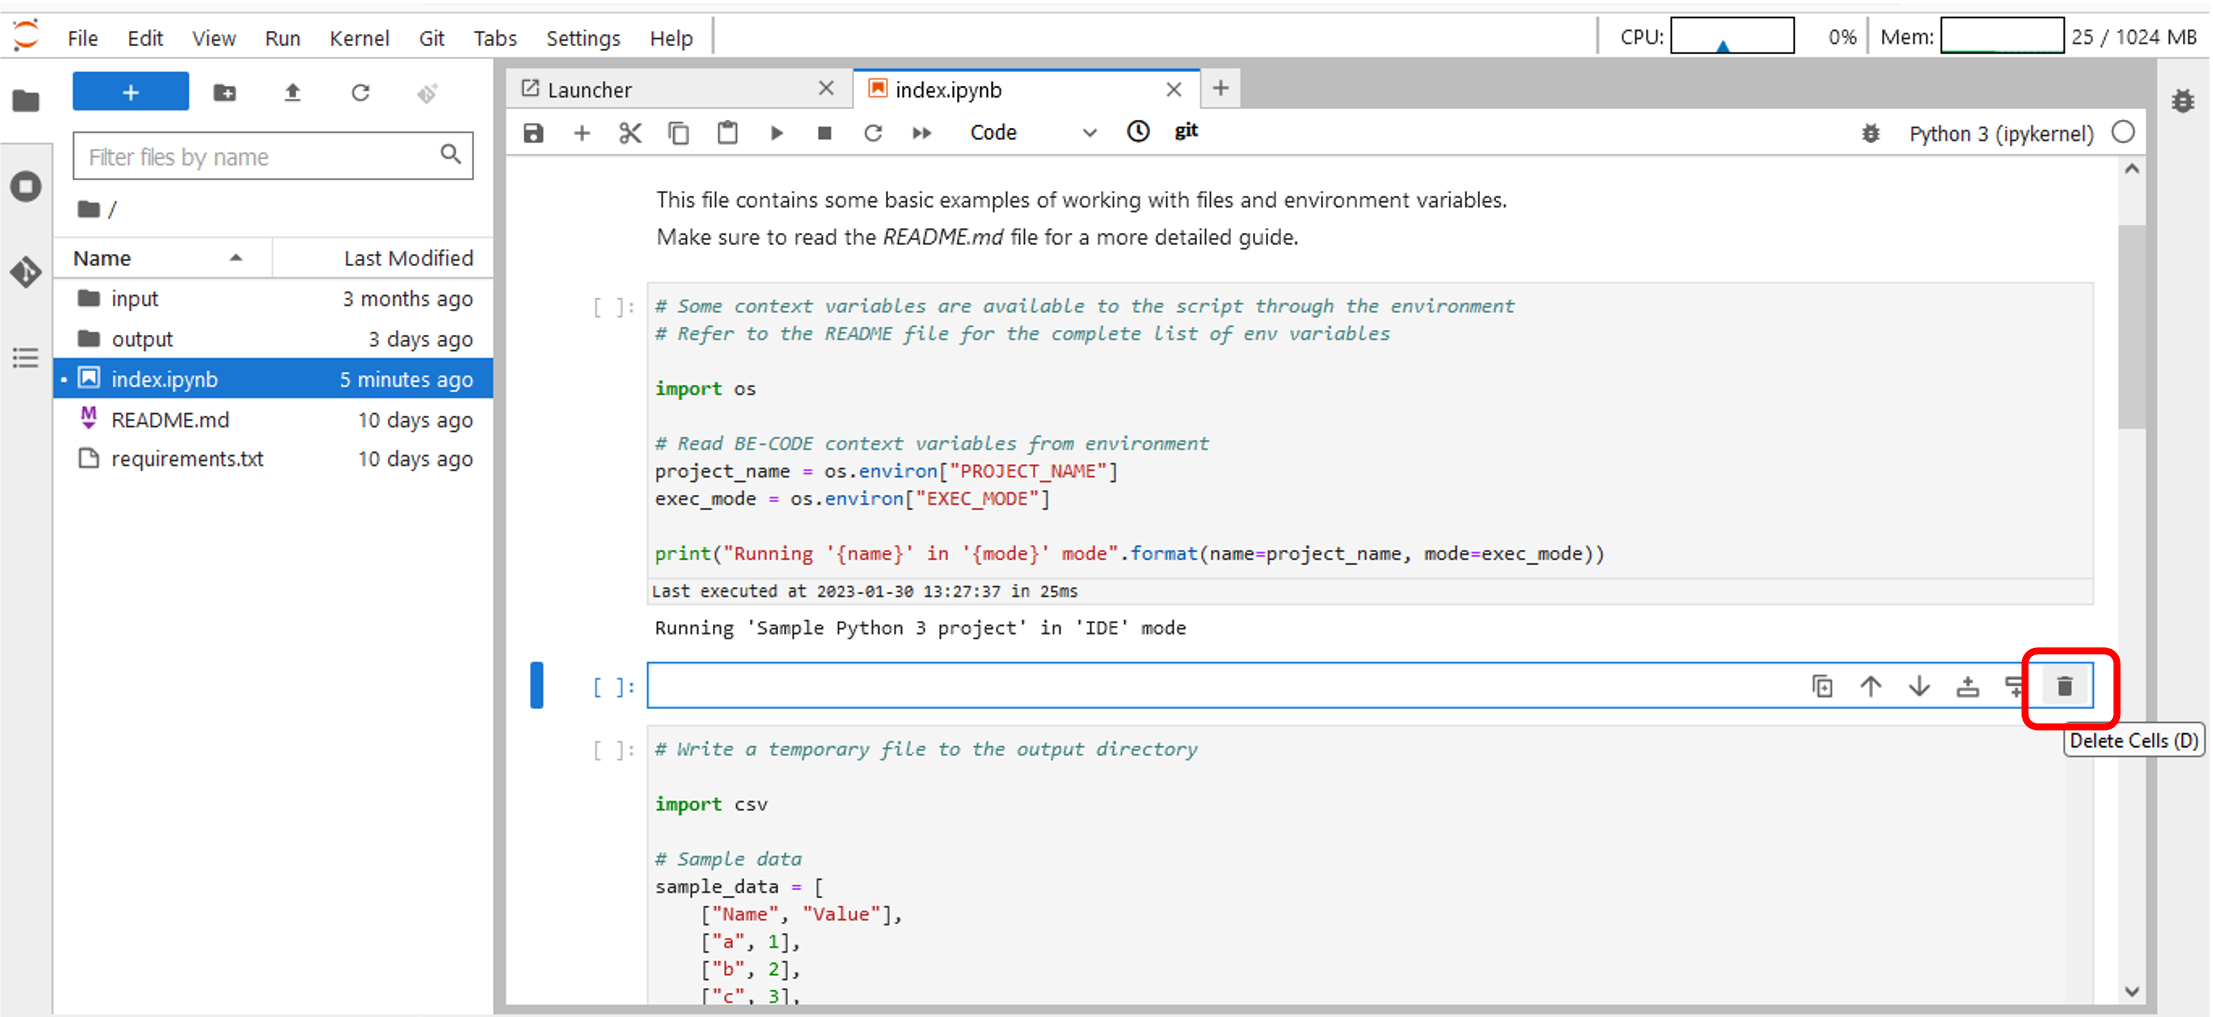
Figure 26 – Cell deletion – Notebook (1/2)
- Click the mouse right button into the cell and select Delete Cells (Figure 27).
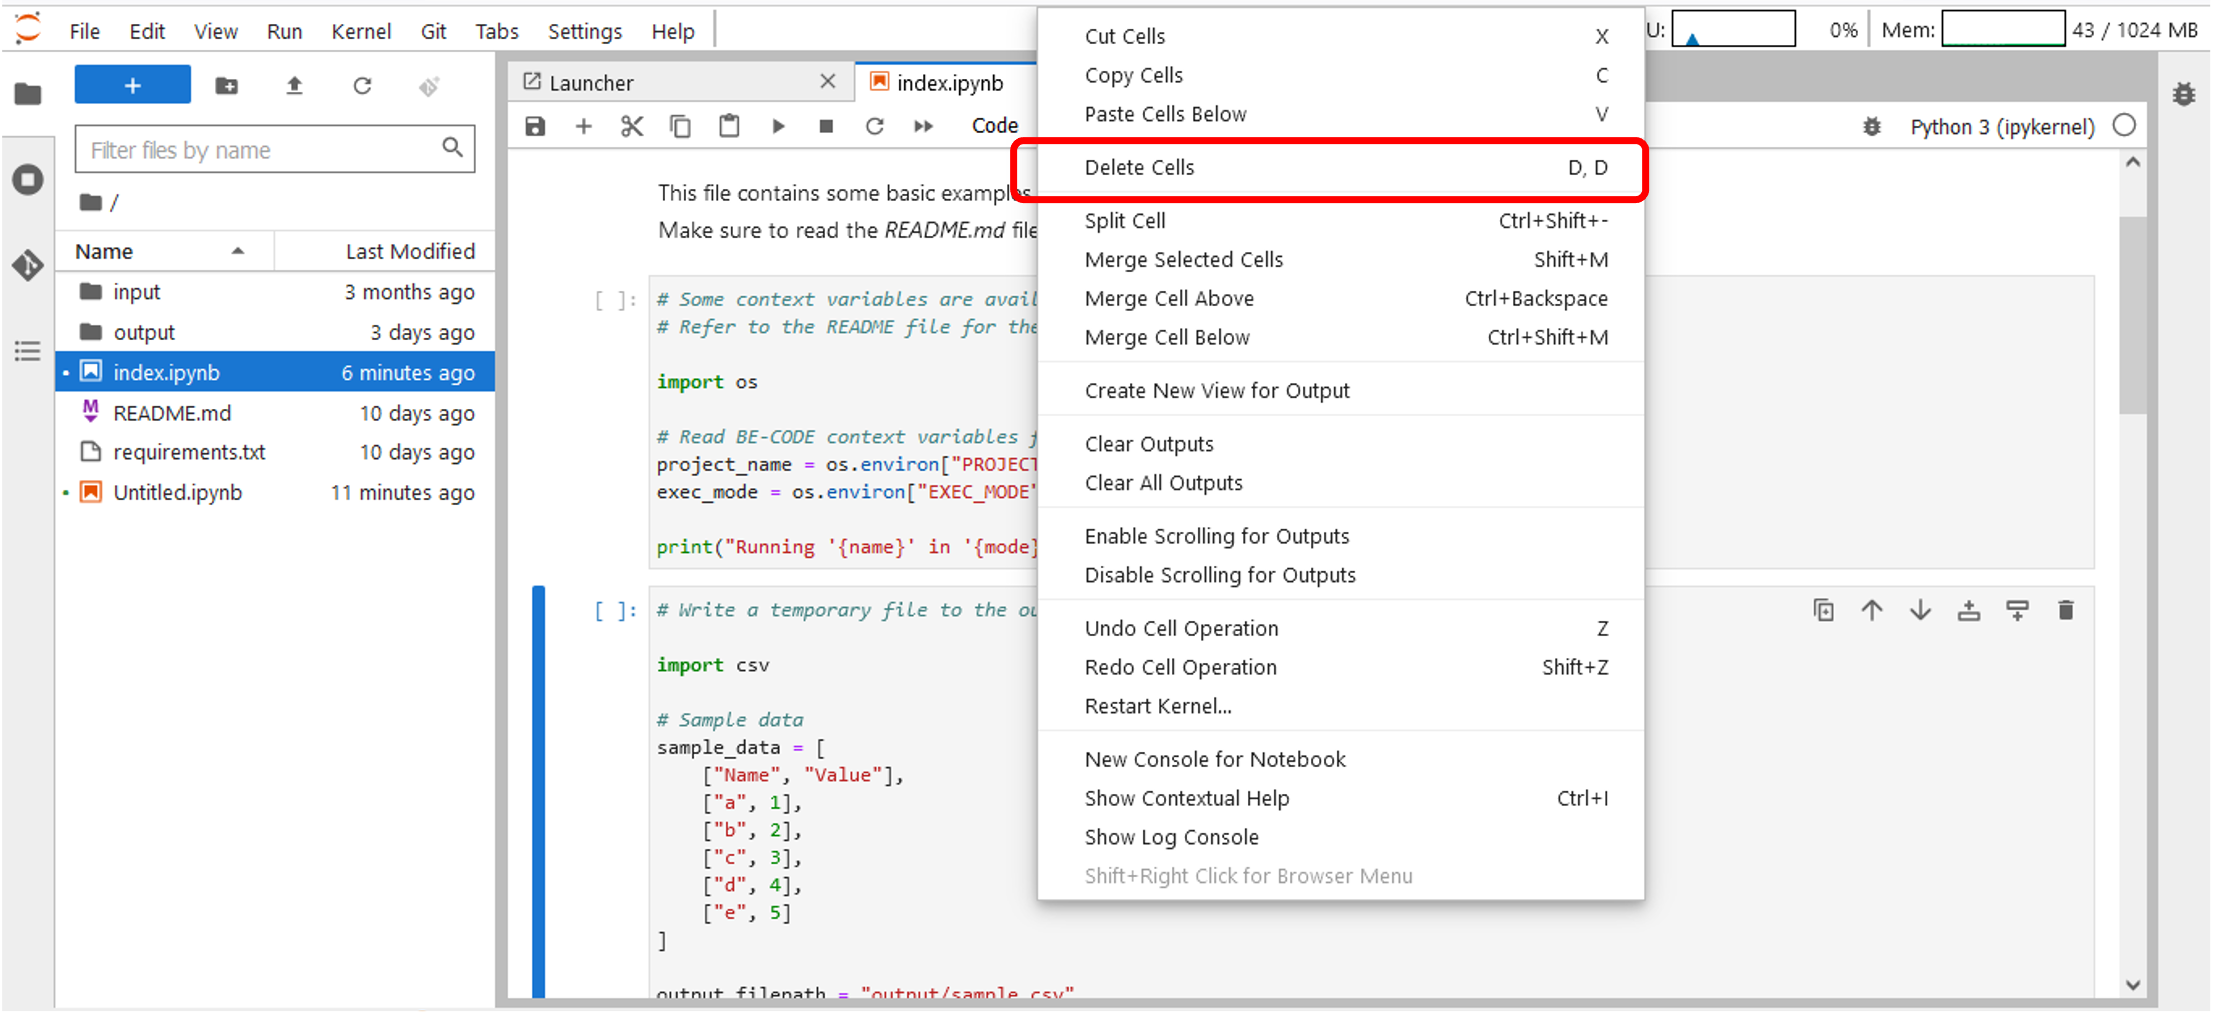
Figure 27 – Cell deletion – Notebook (2/2)
- Click on Edit->Delete Cells on the JupyterLab TopBar Menu (Figure 28).
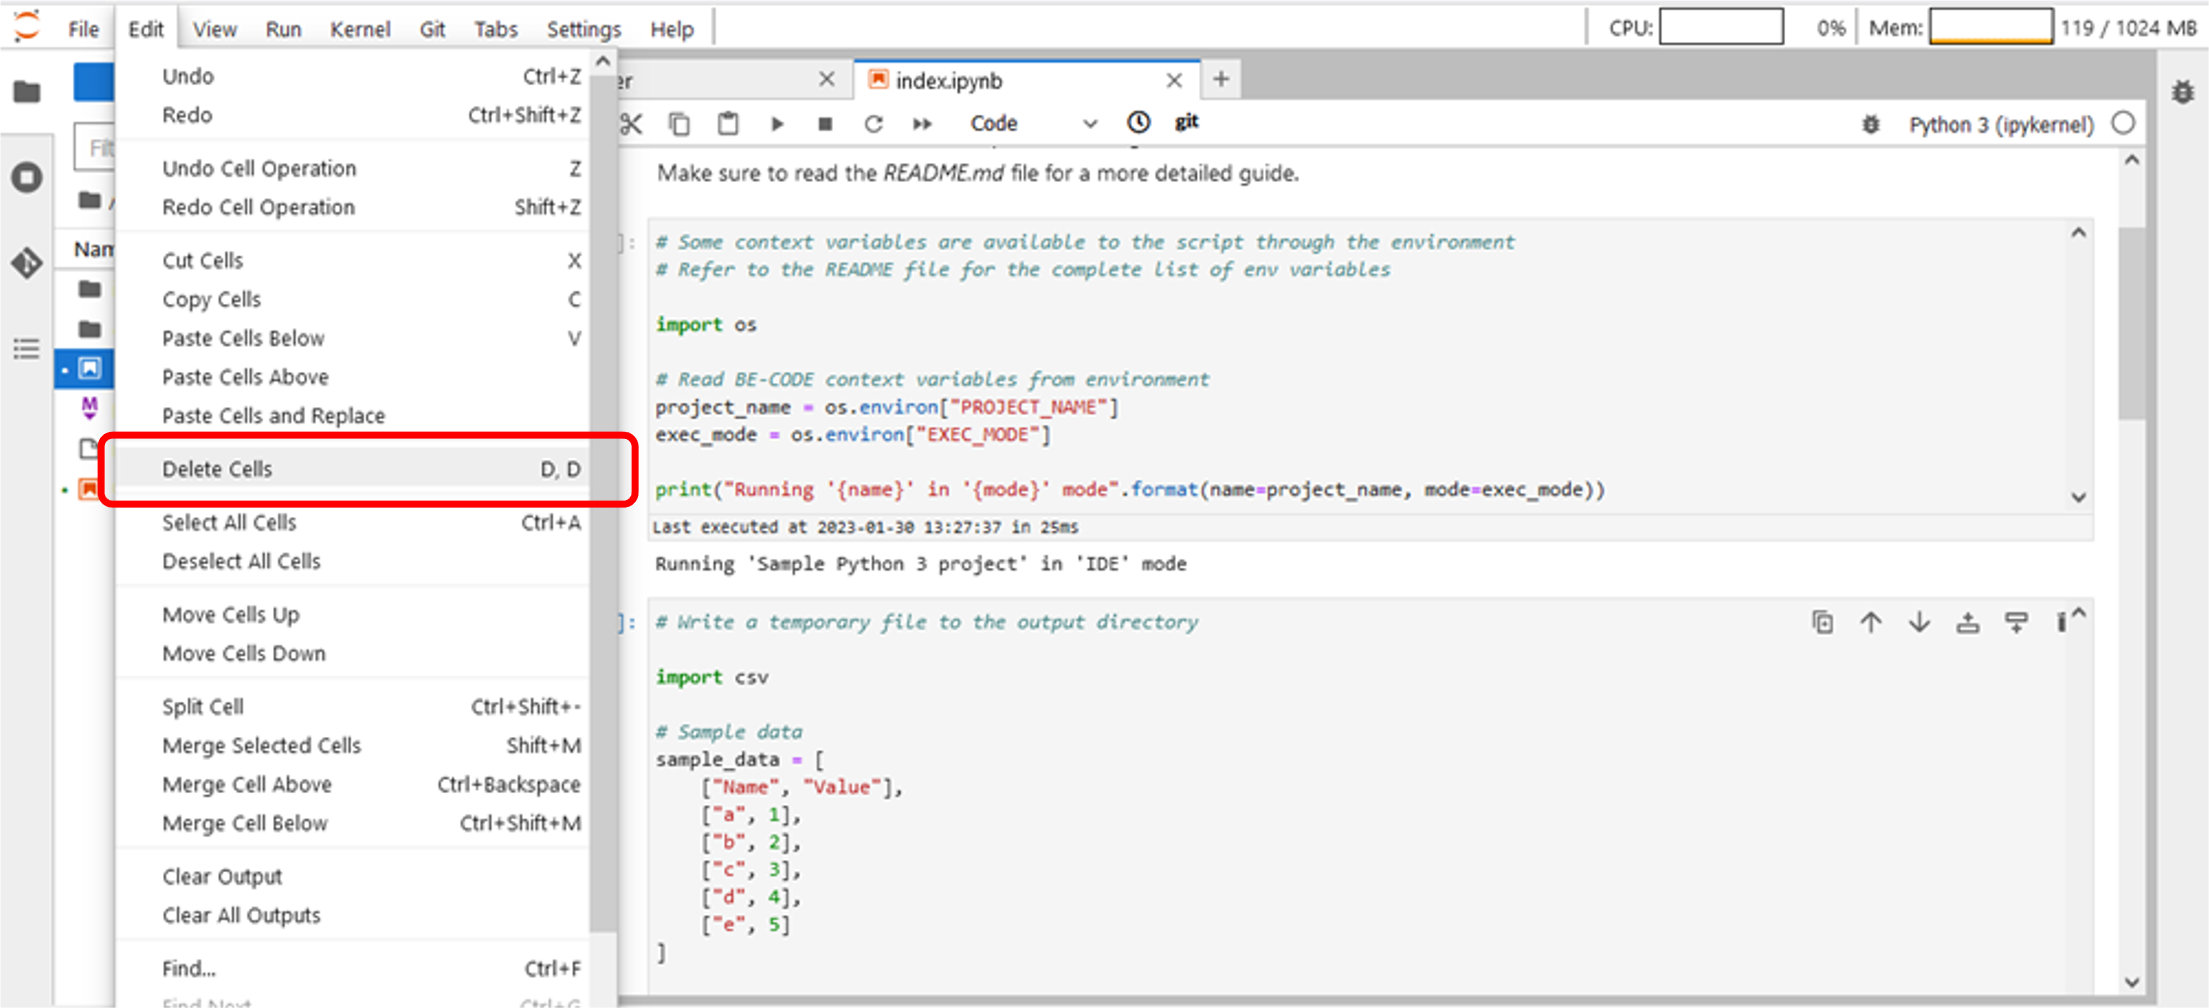
Figure 28 – Celle deletion – JupyterLab TopBar Menu
3.7 Single cell execution
- Select cell and Click on Run button (Figure 29) in the Notebook Bar.
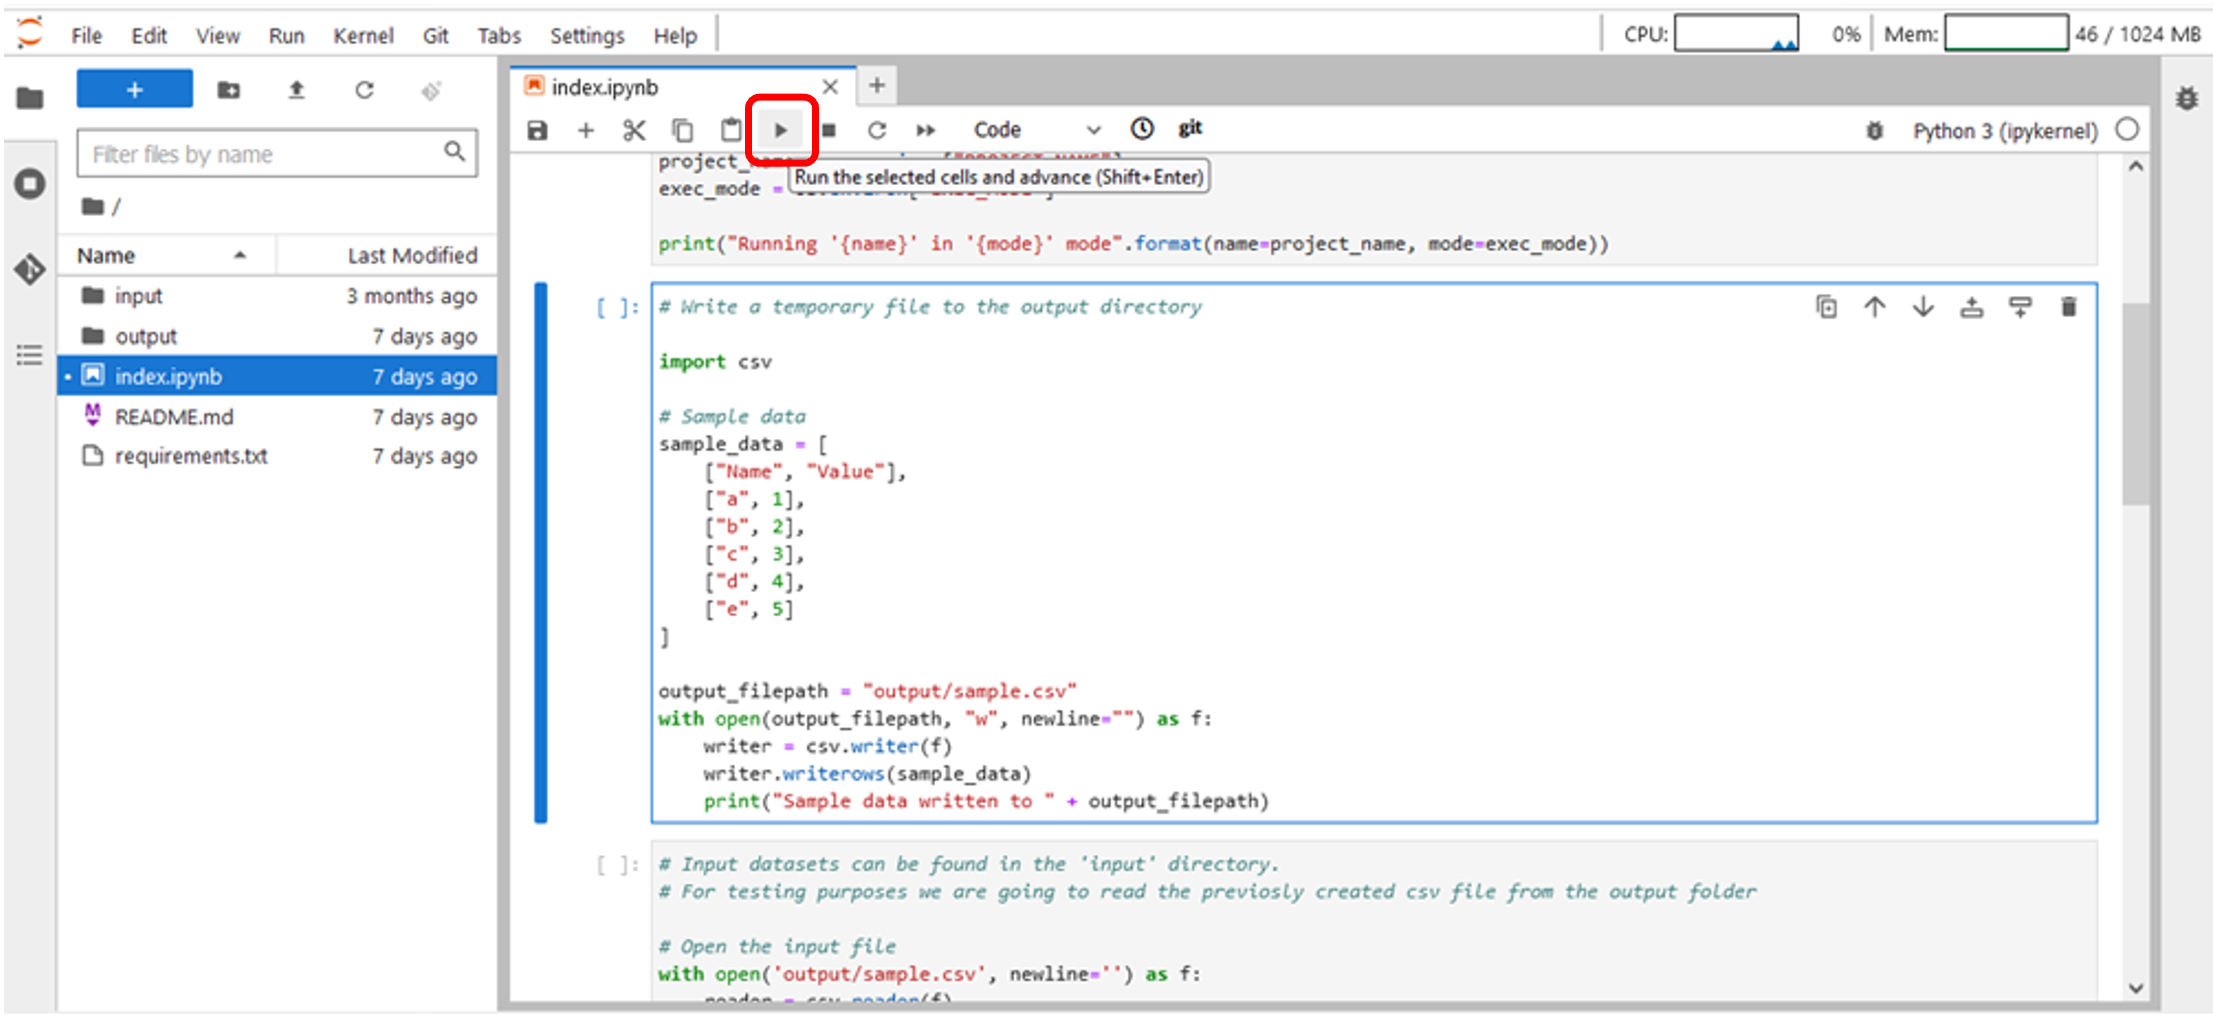
Figure 29 – Single cell execution – Notebook bar
- Select cell and Click on Run->Run Selected Cells on the JupyterLab TopBar (Figure 30).
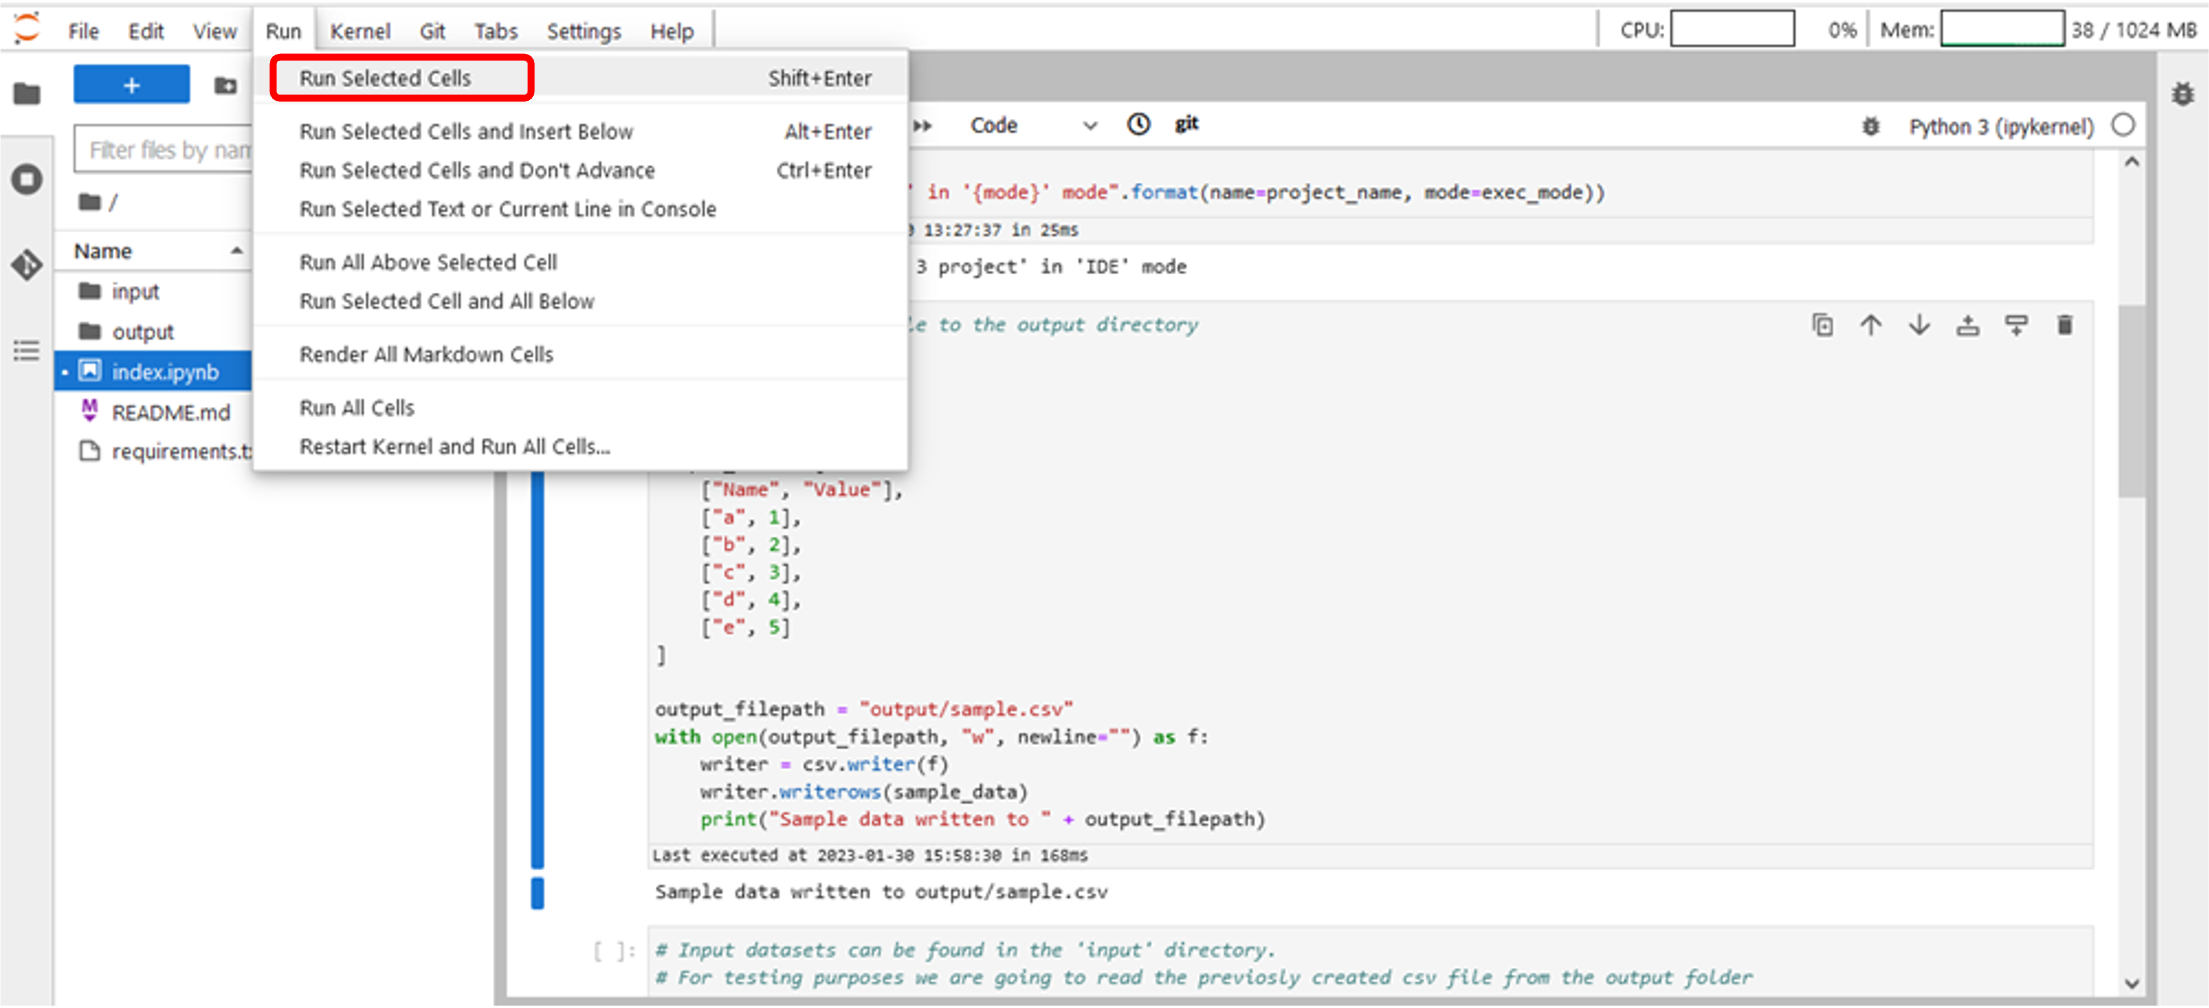
Figure 30 – Single cell execution – JupyterLab TopBar Menu
- After cell execution, system shows information about related execution time (Figure 31).
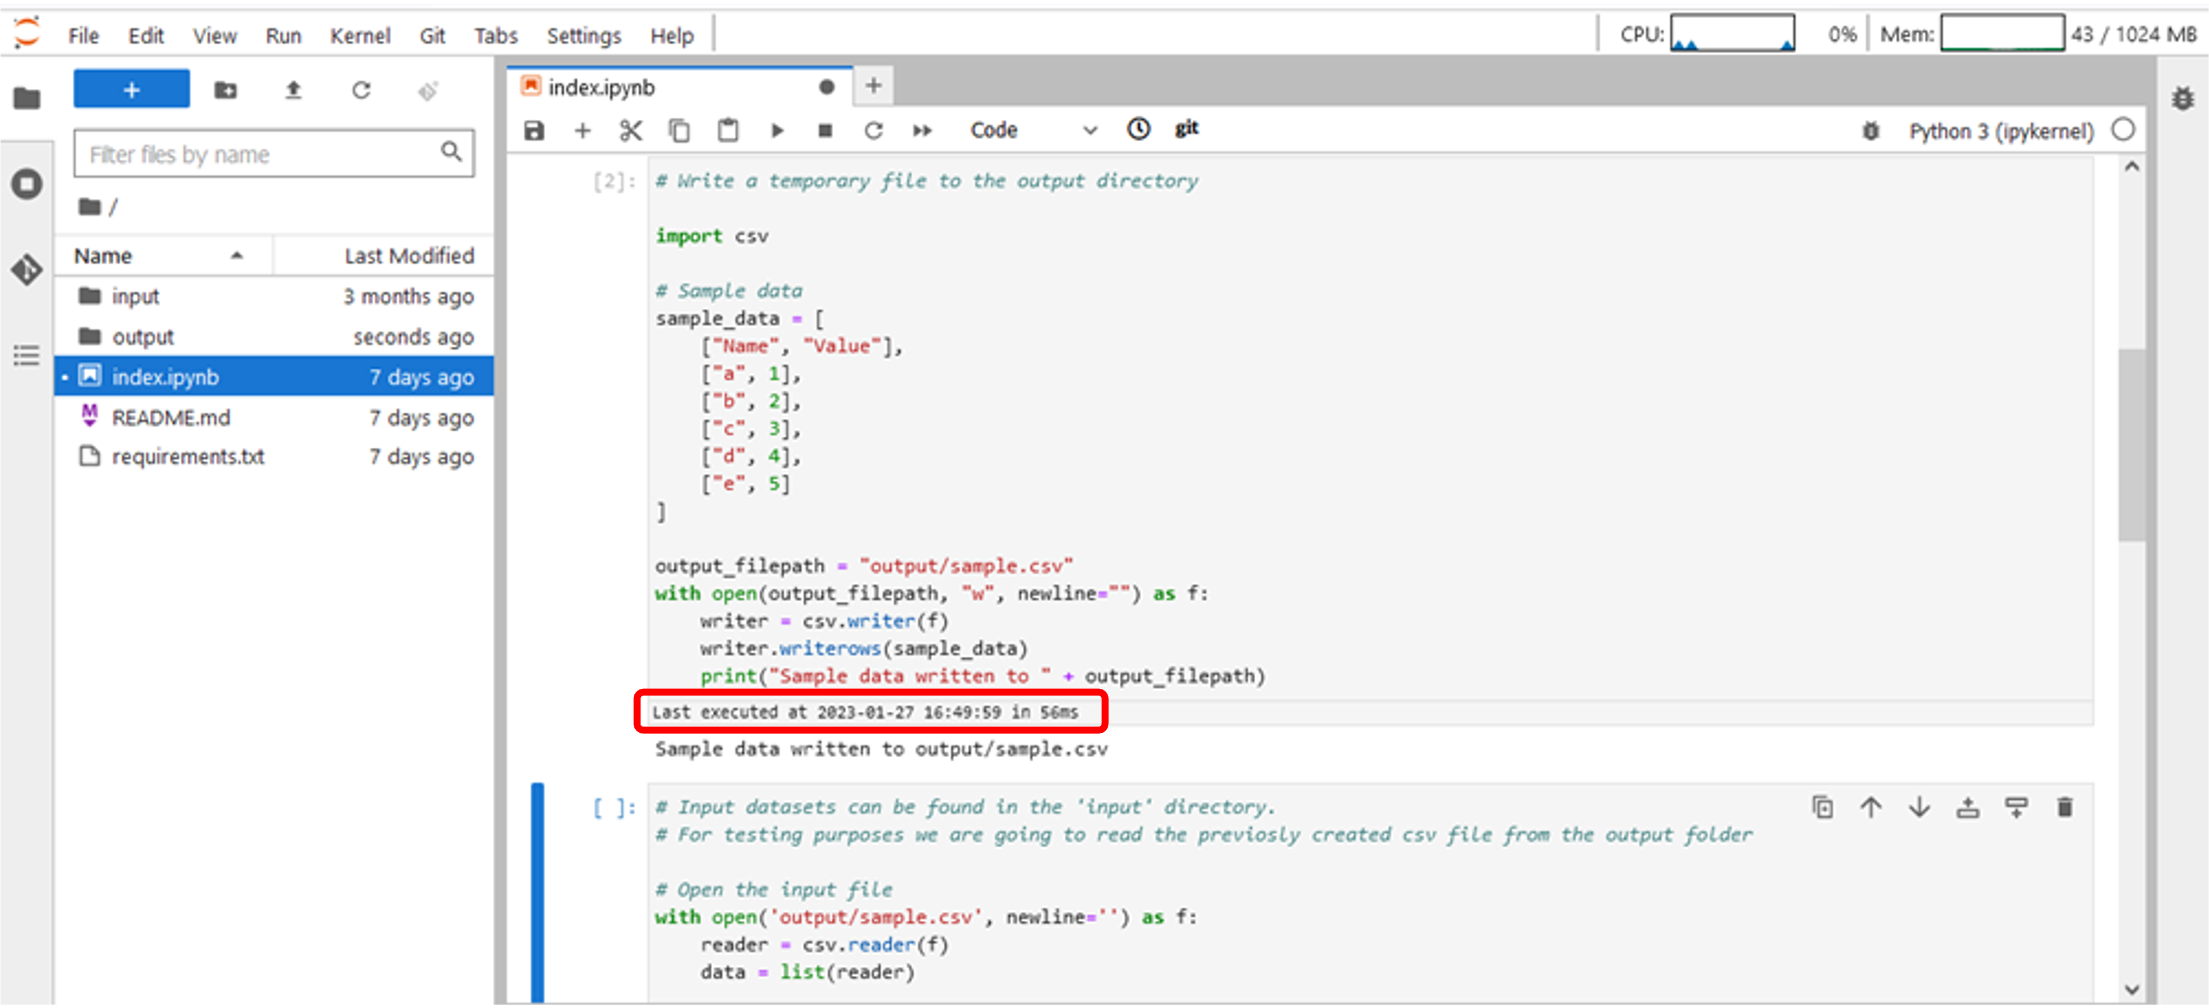
Figure 31 – Execution time
3.8 Notebook execution
To run all notebook cells, you can:
- Click on Run All button (Figure 32) in the Notebook Bar.
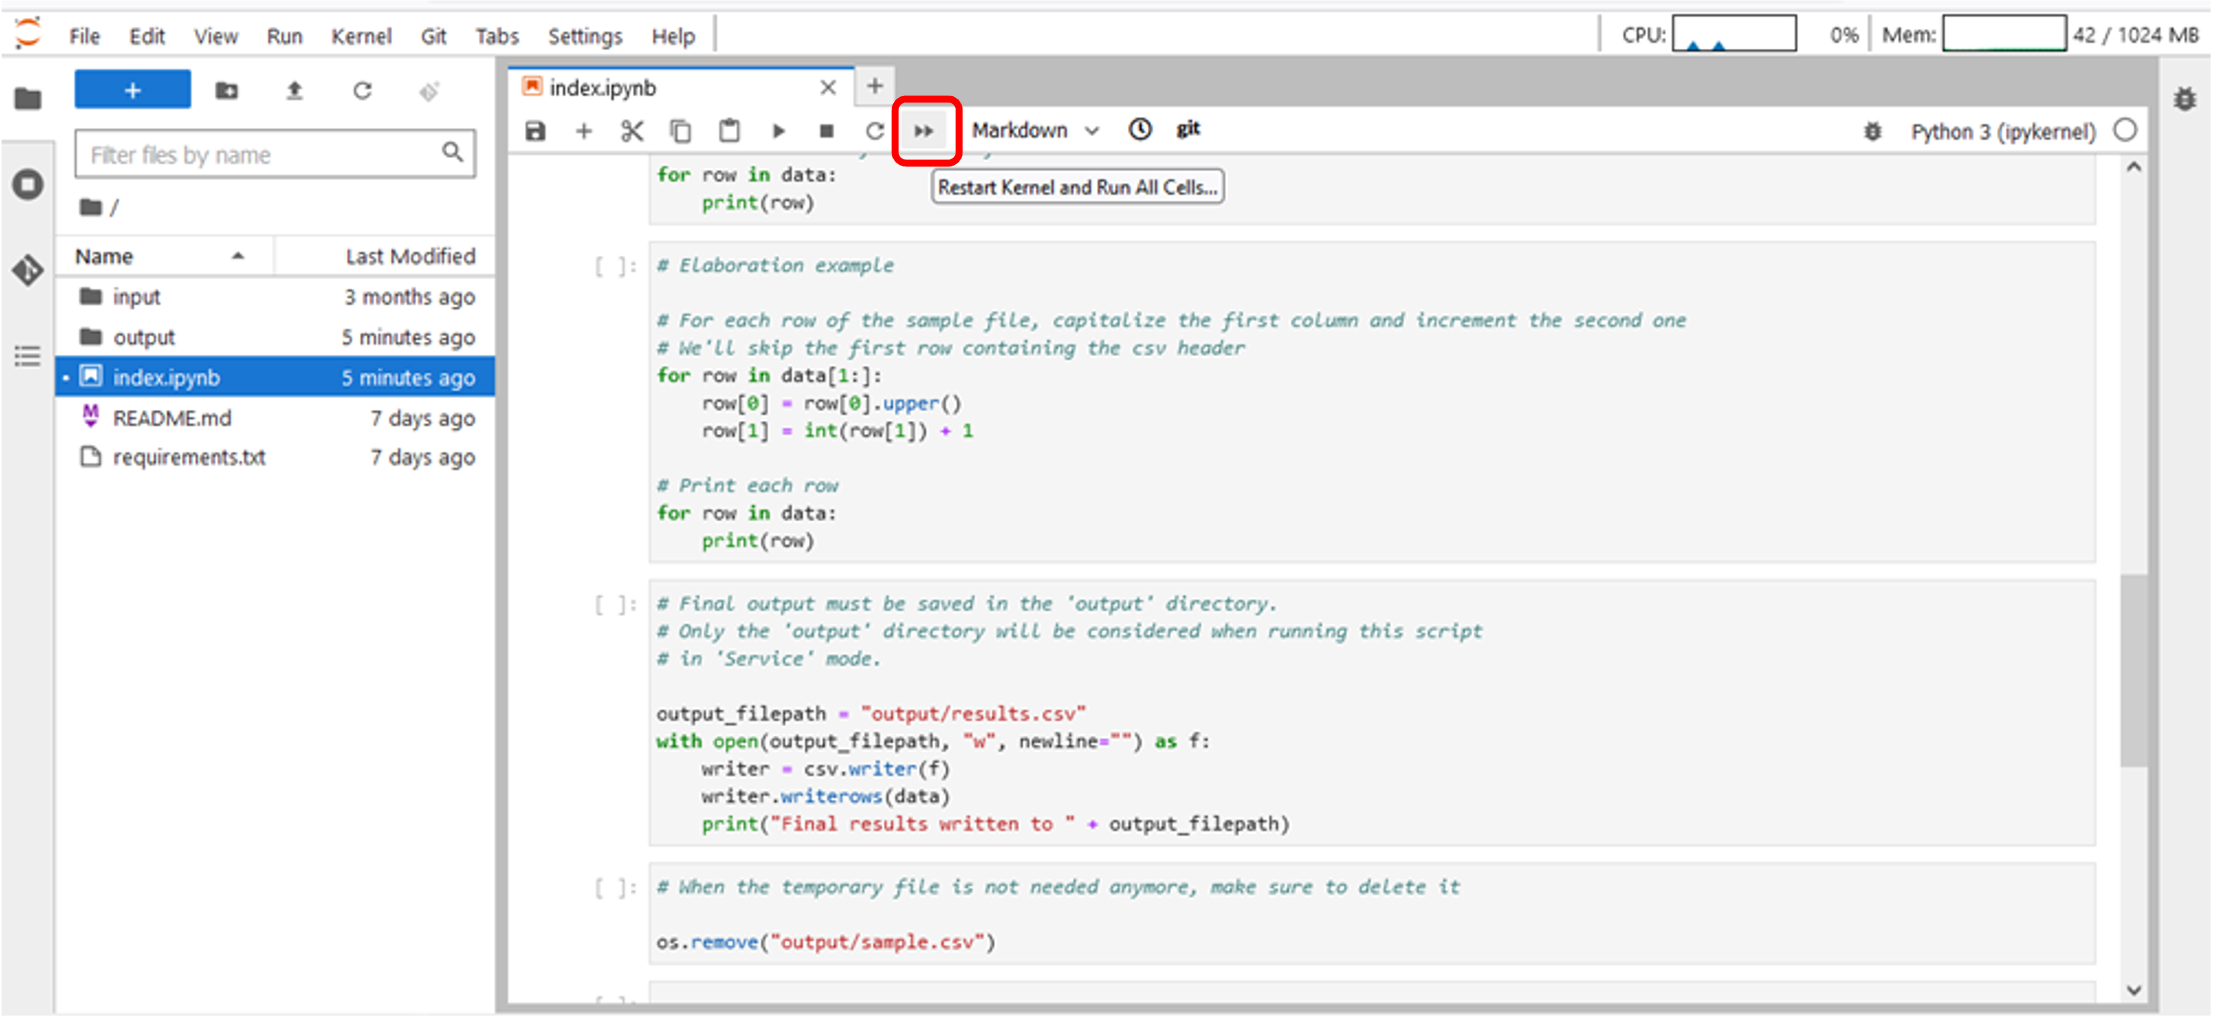
Figure 32 – Notebook execution – Notebook bar
- Click on Run->Run all cells in the JupyterLab TopBar Menu.
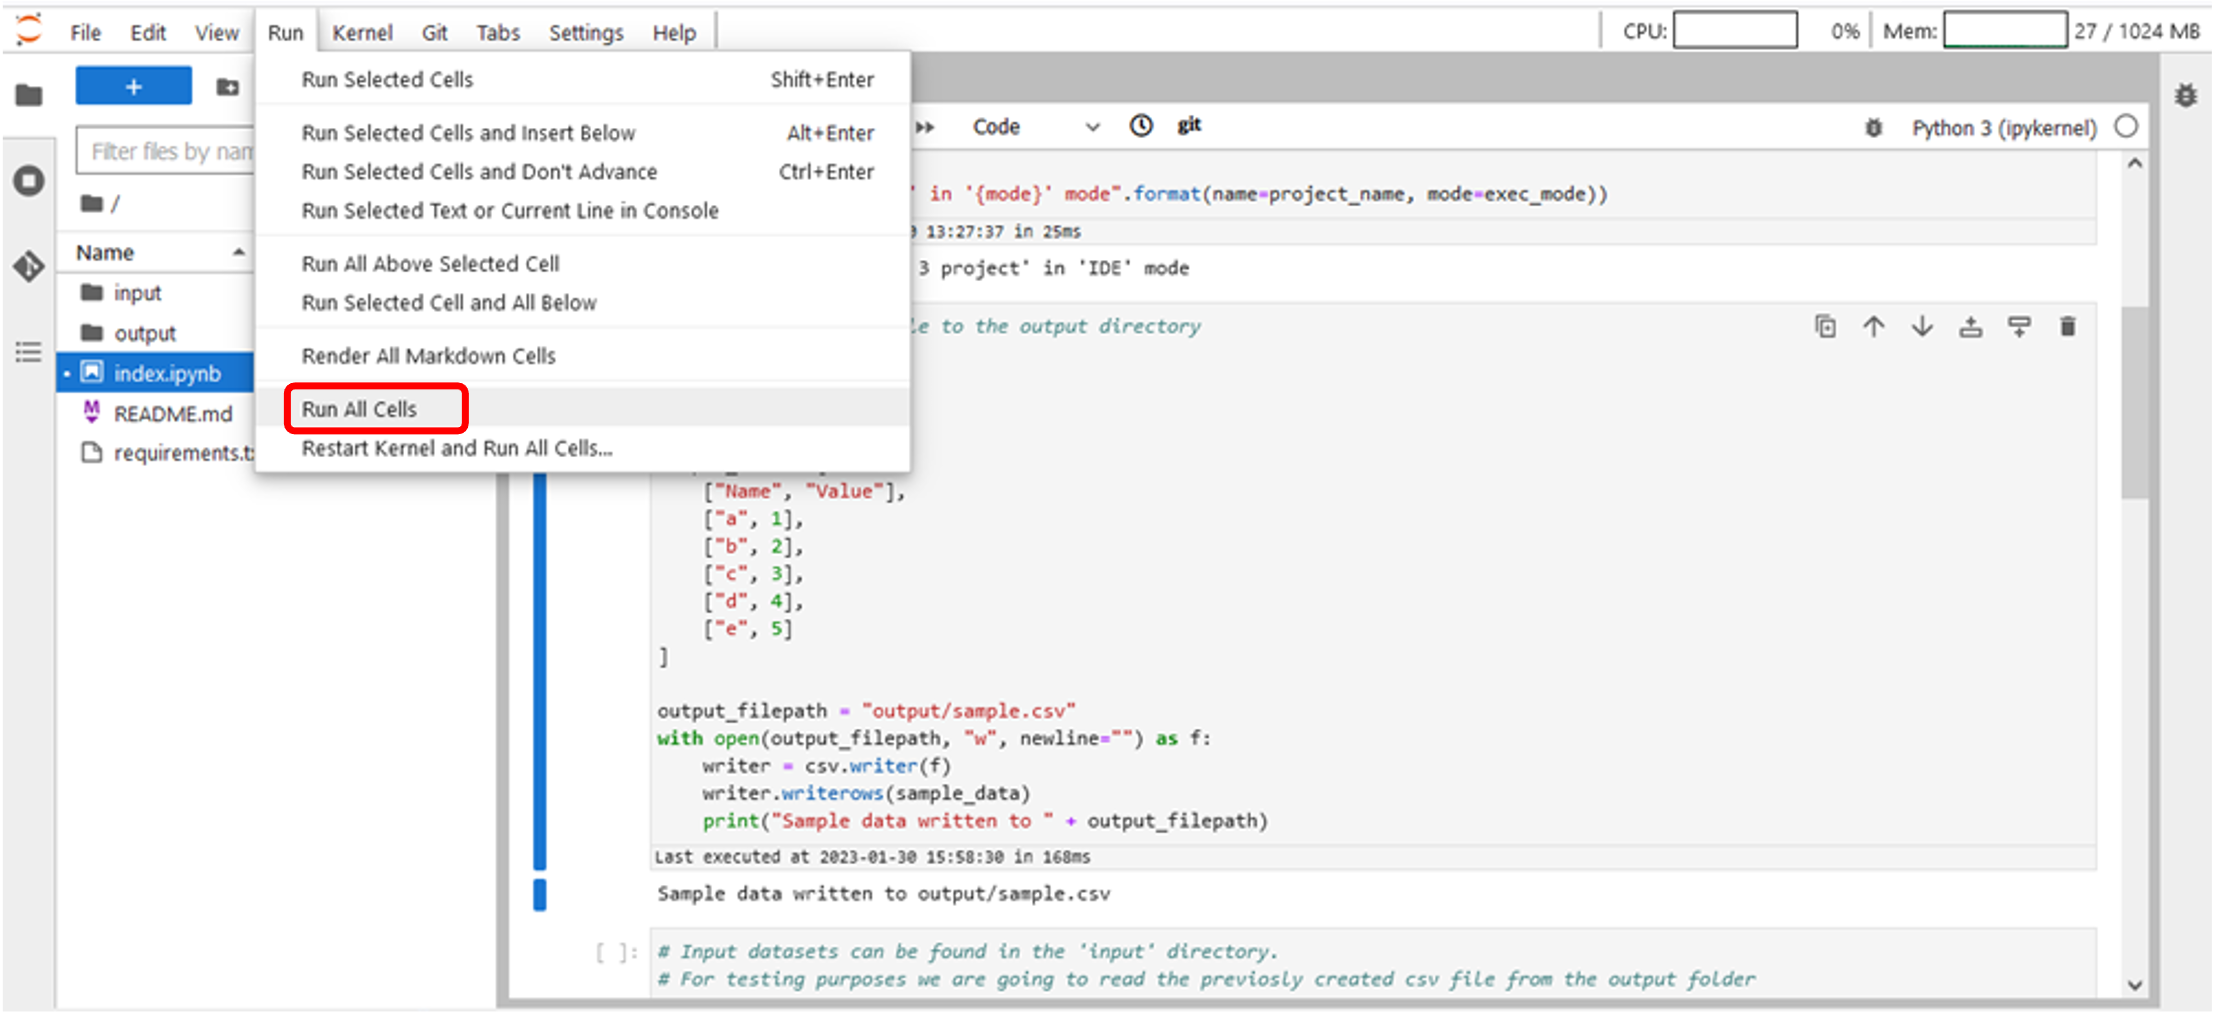
Figure 33– Notebook Execution – JupyterLab TopBar Menu
3.9 Interrupt execution
- Click on Stop button in the Notebook Bar to interrupt the execution:
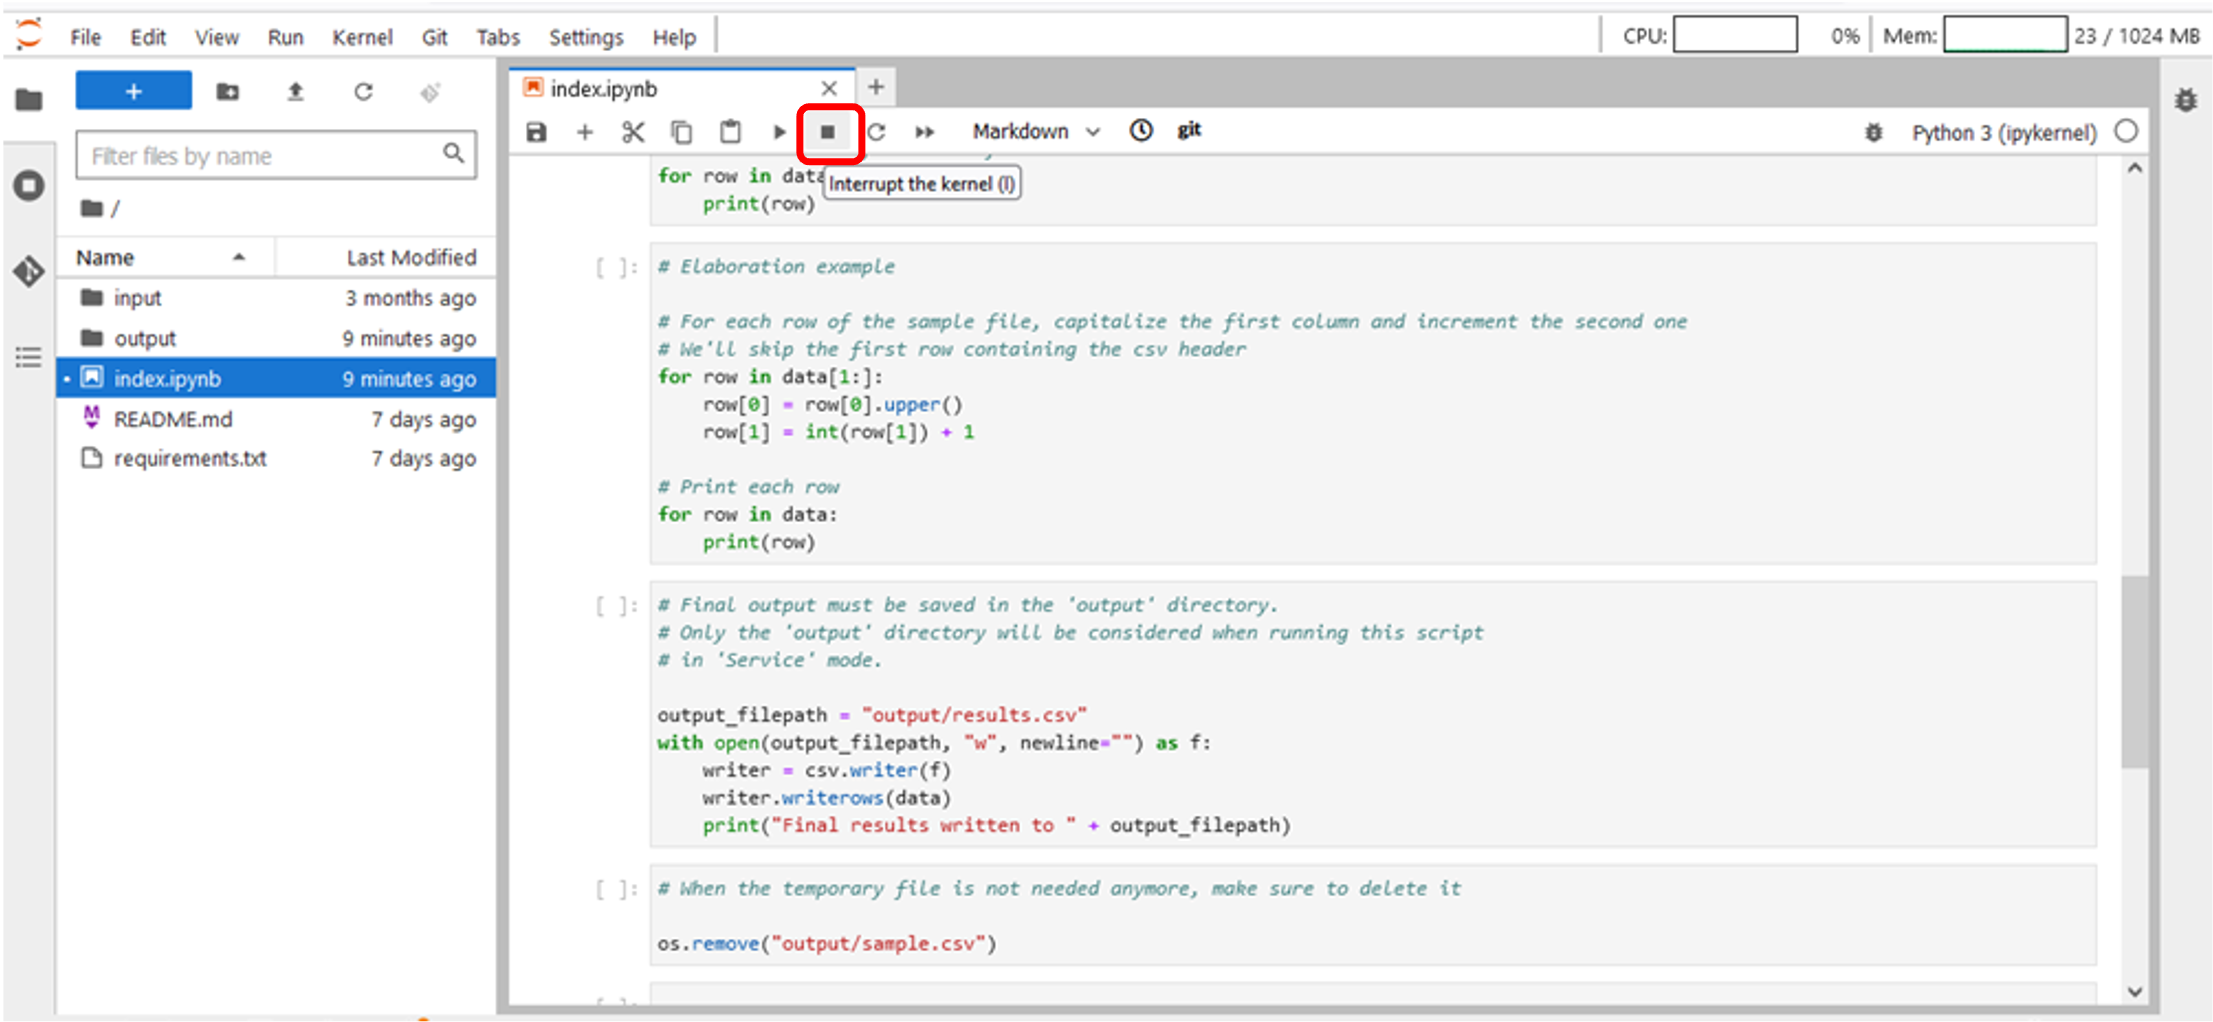
Figure 34 – Stop execution
3.10 Clear output(s)
Select a cell and click to Edit->Clear Output in the JupyterLab TopBar Menu to clear related output in the notebook.
- Click to Edit->Clear All Outputs to clear all outputs in the notebook.
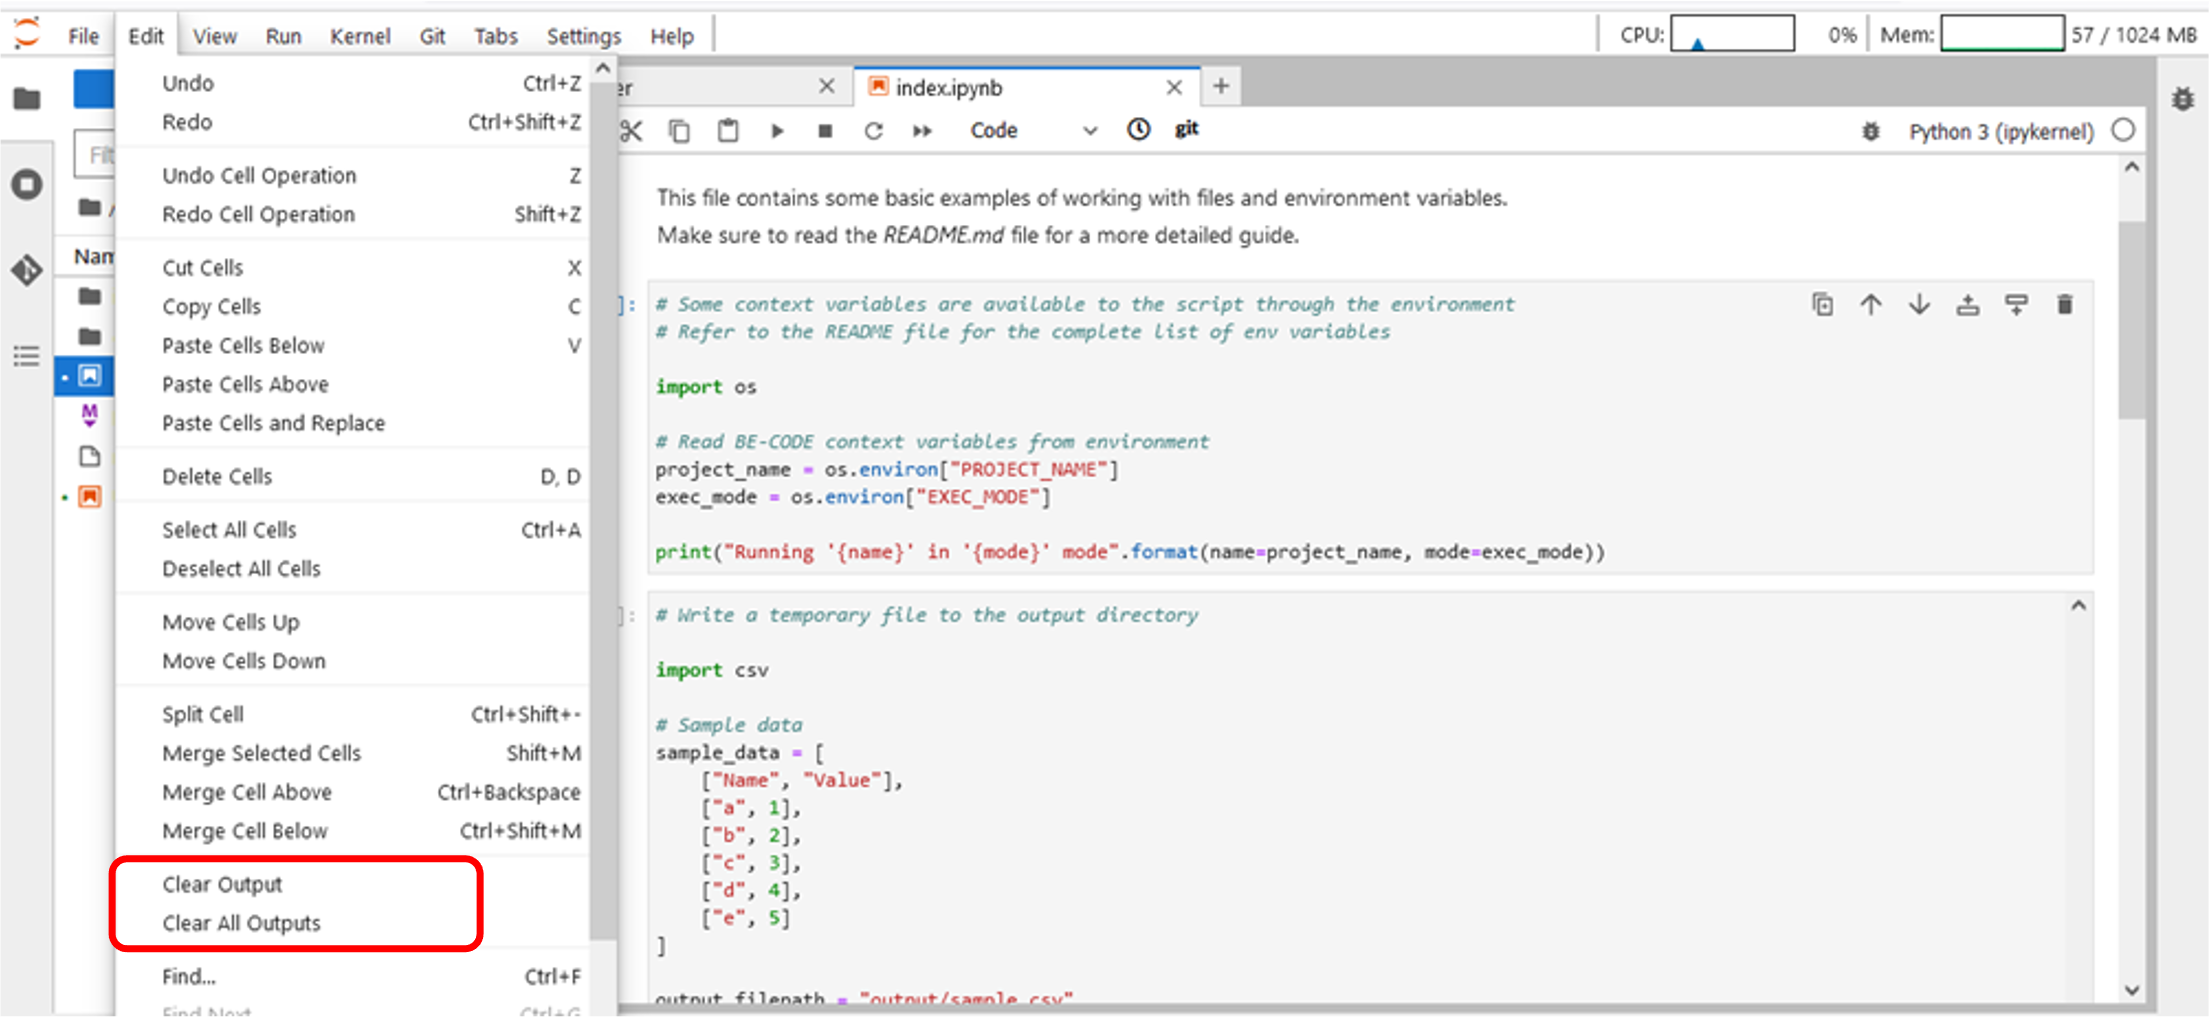
Figure 35 – Clear output(s)
3.11 File saving
A black circle in the upper area of the notebook tab (near file name) indicates unsaved changes. To save file you can:
- Click on Save button in Notebook Bar (Figure 36).
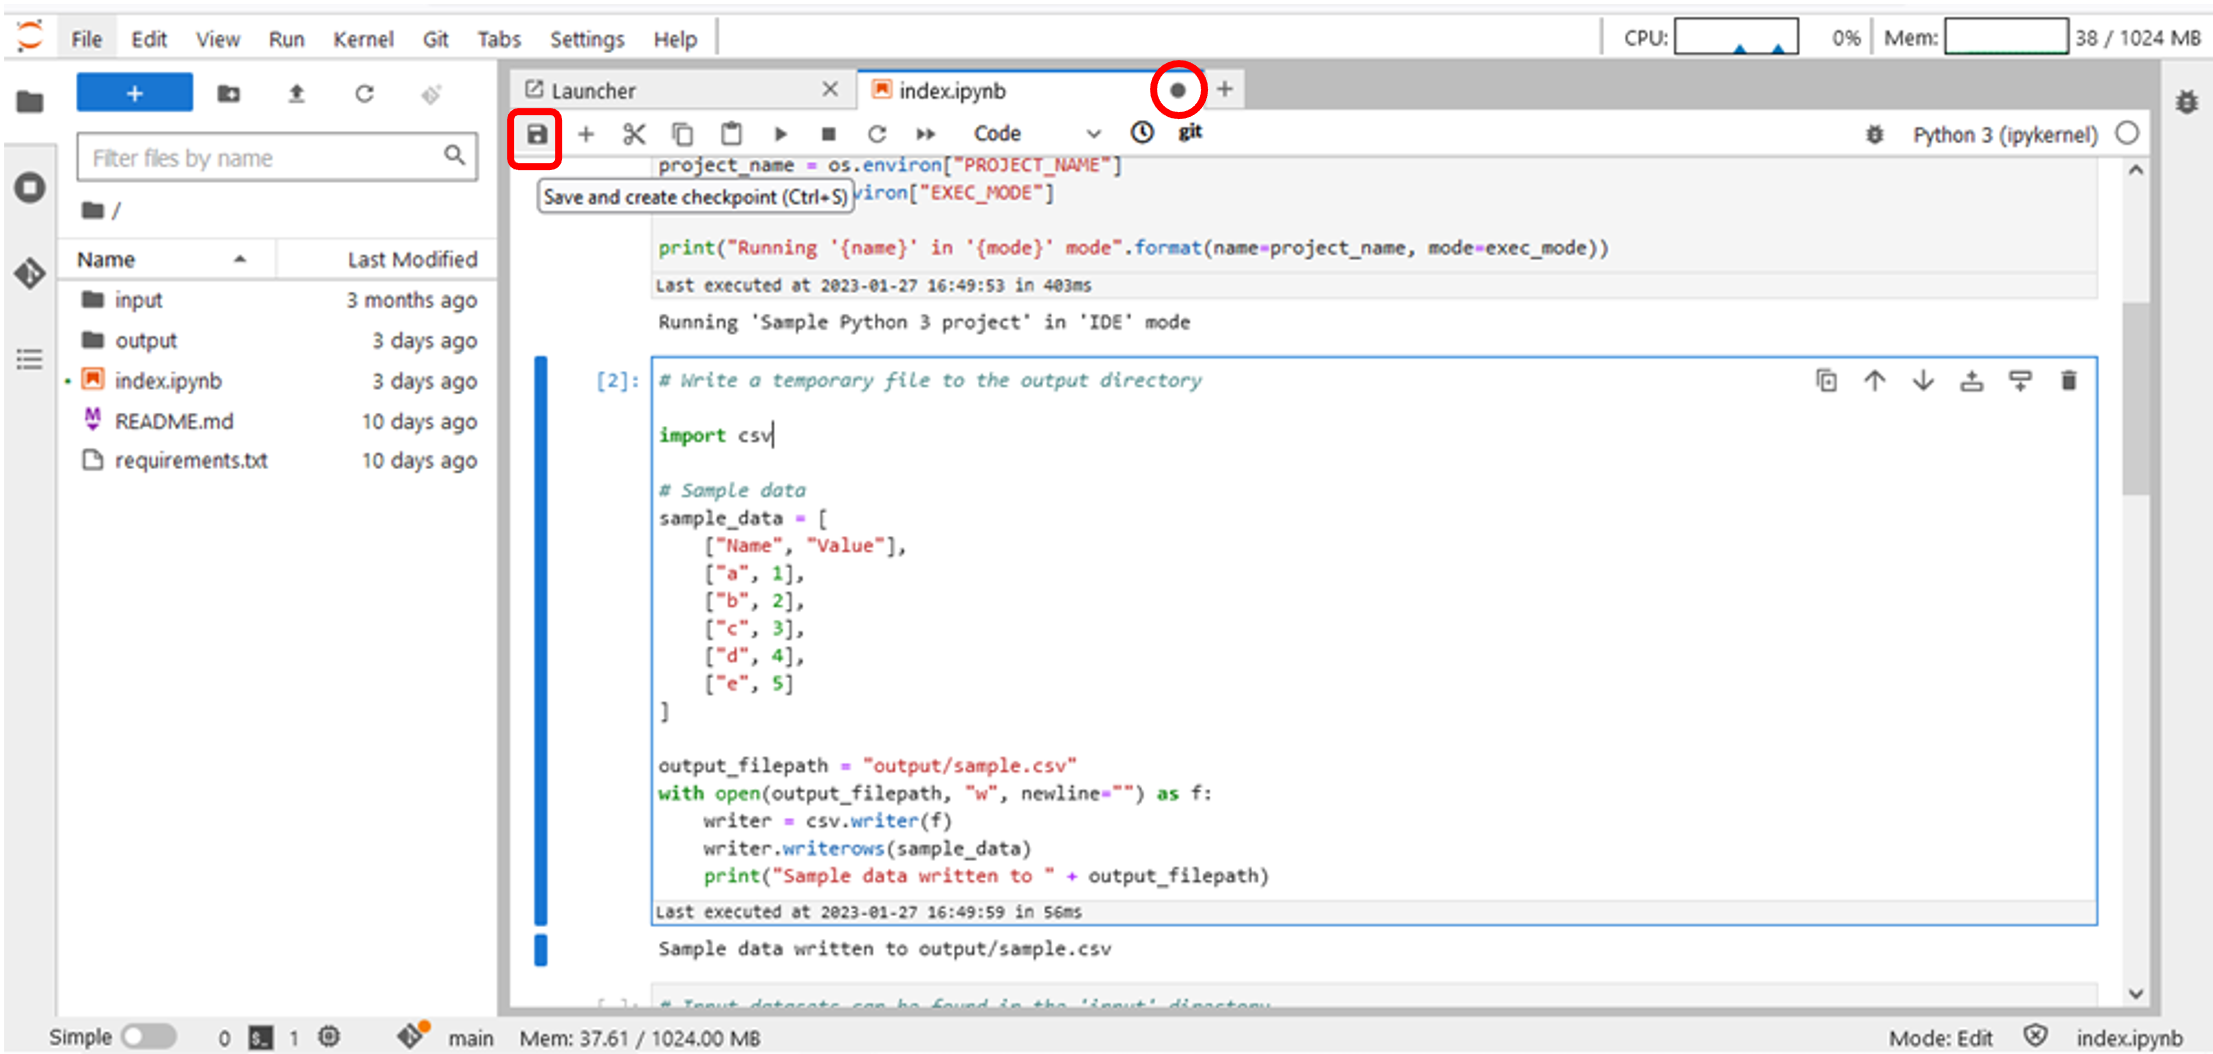
Figure 36 – File saving – Notebook bar
- In the JupyterLab TopBar, click on File->Save Notebook (Figure 37).
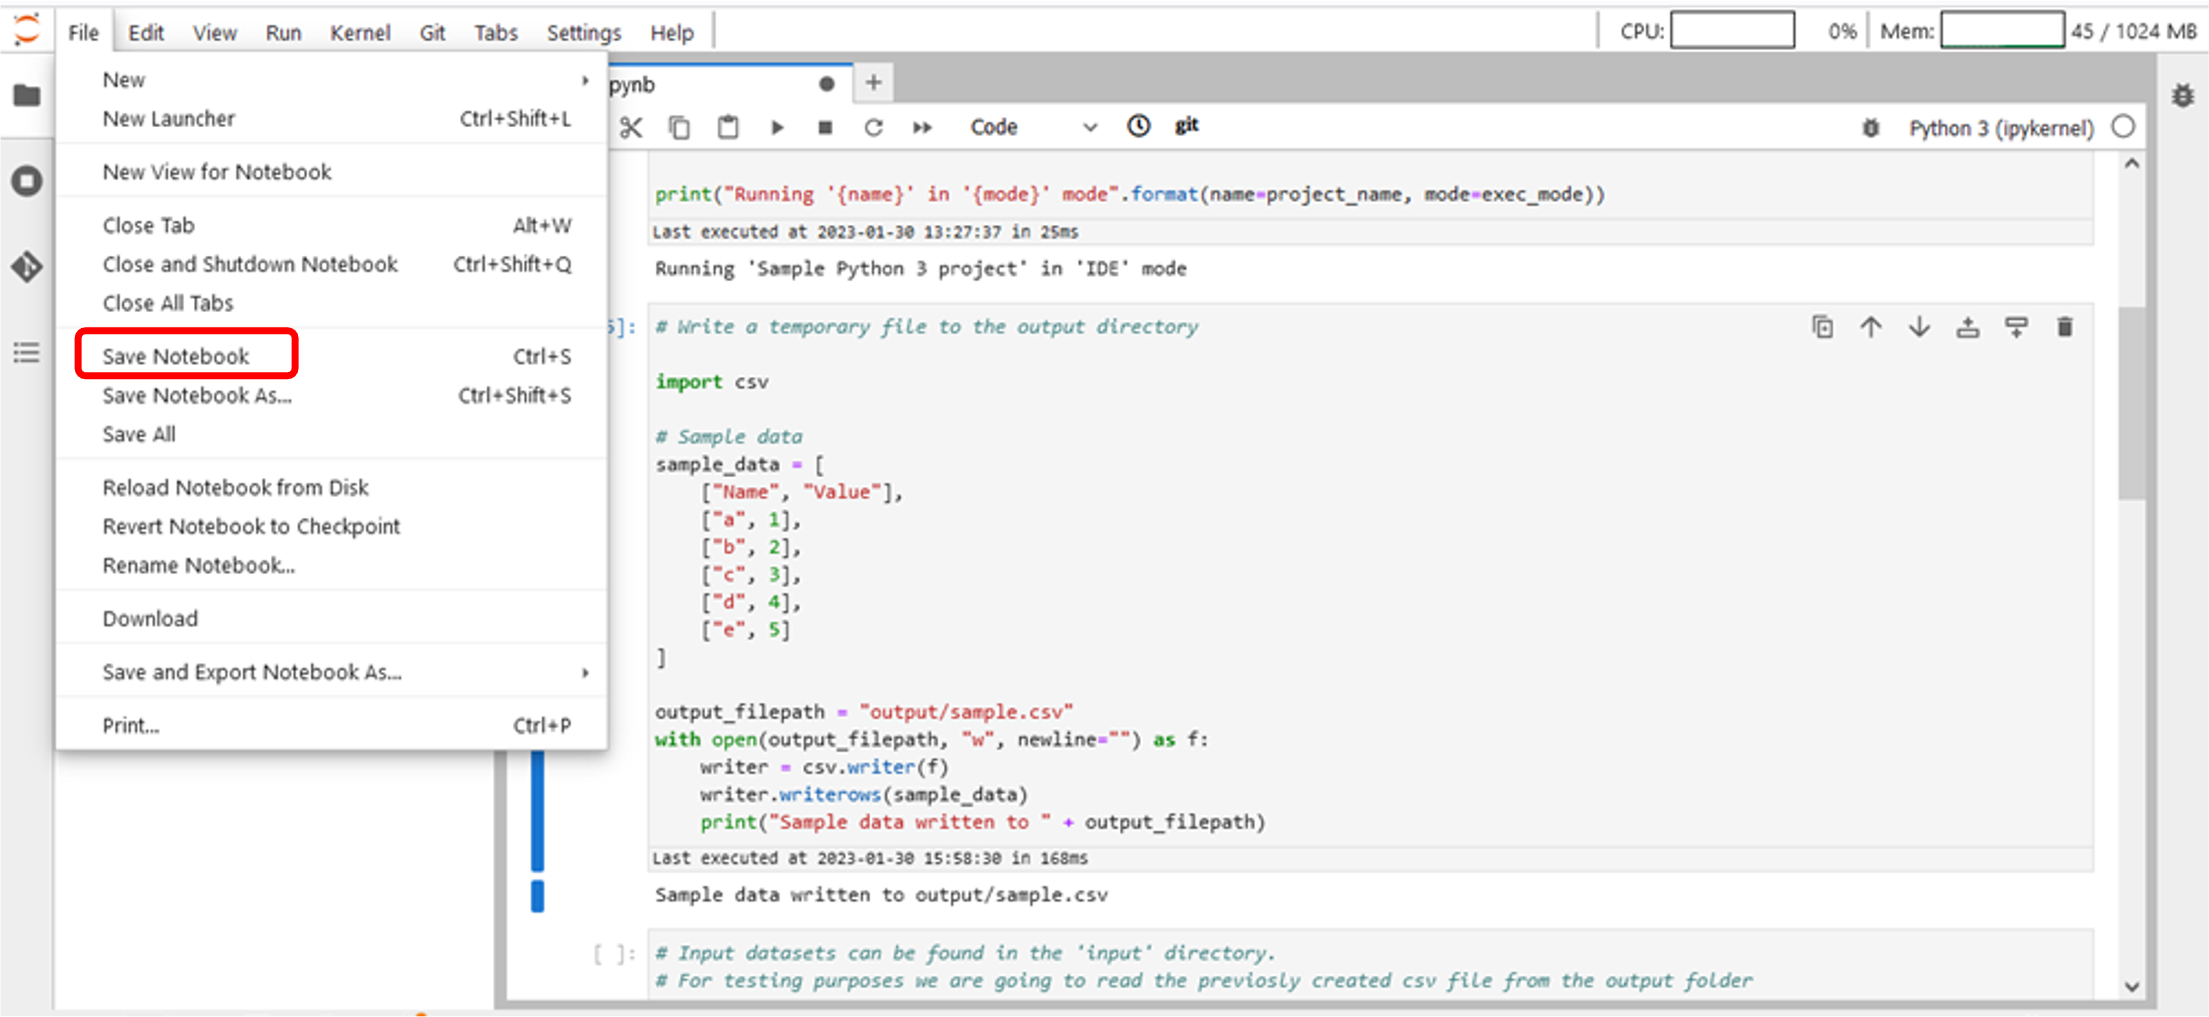
Figure 37 – File saving – TopBar Menu
3.12 Update on Git
You can commit and push file changes from Git tab and from Git Menu on the Top Bar.
Git Tab
- To commit file changes open Git tab, select file(s), insert acomment and click on Commit button:
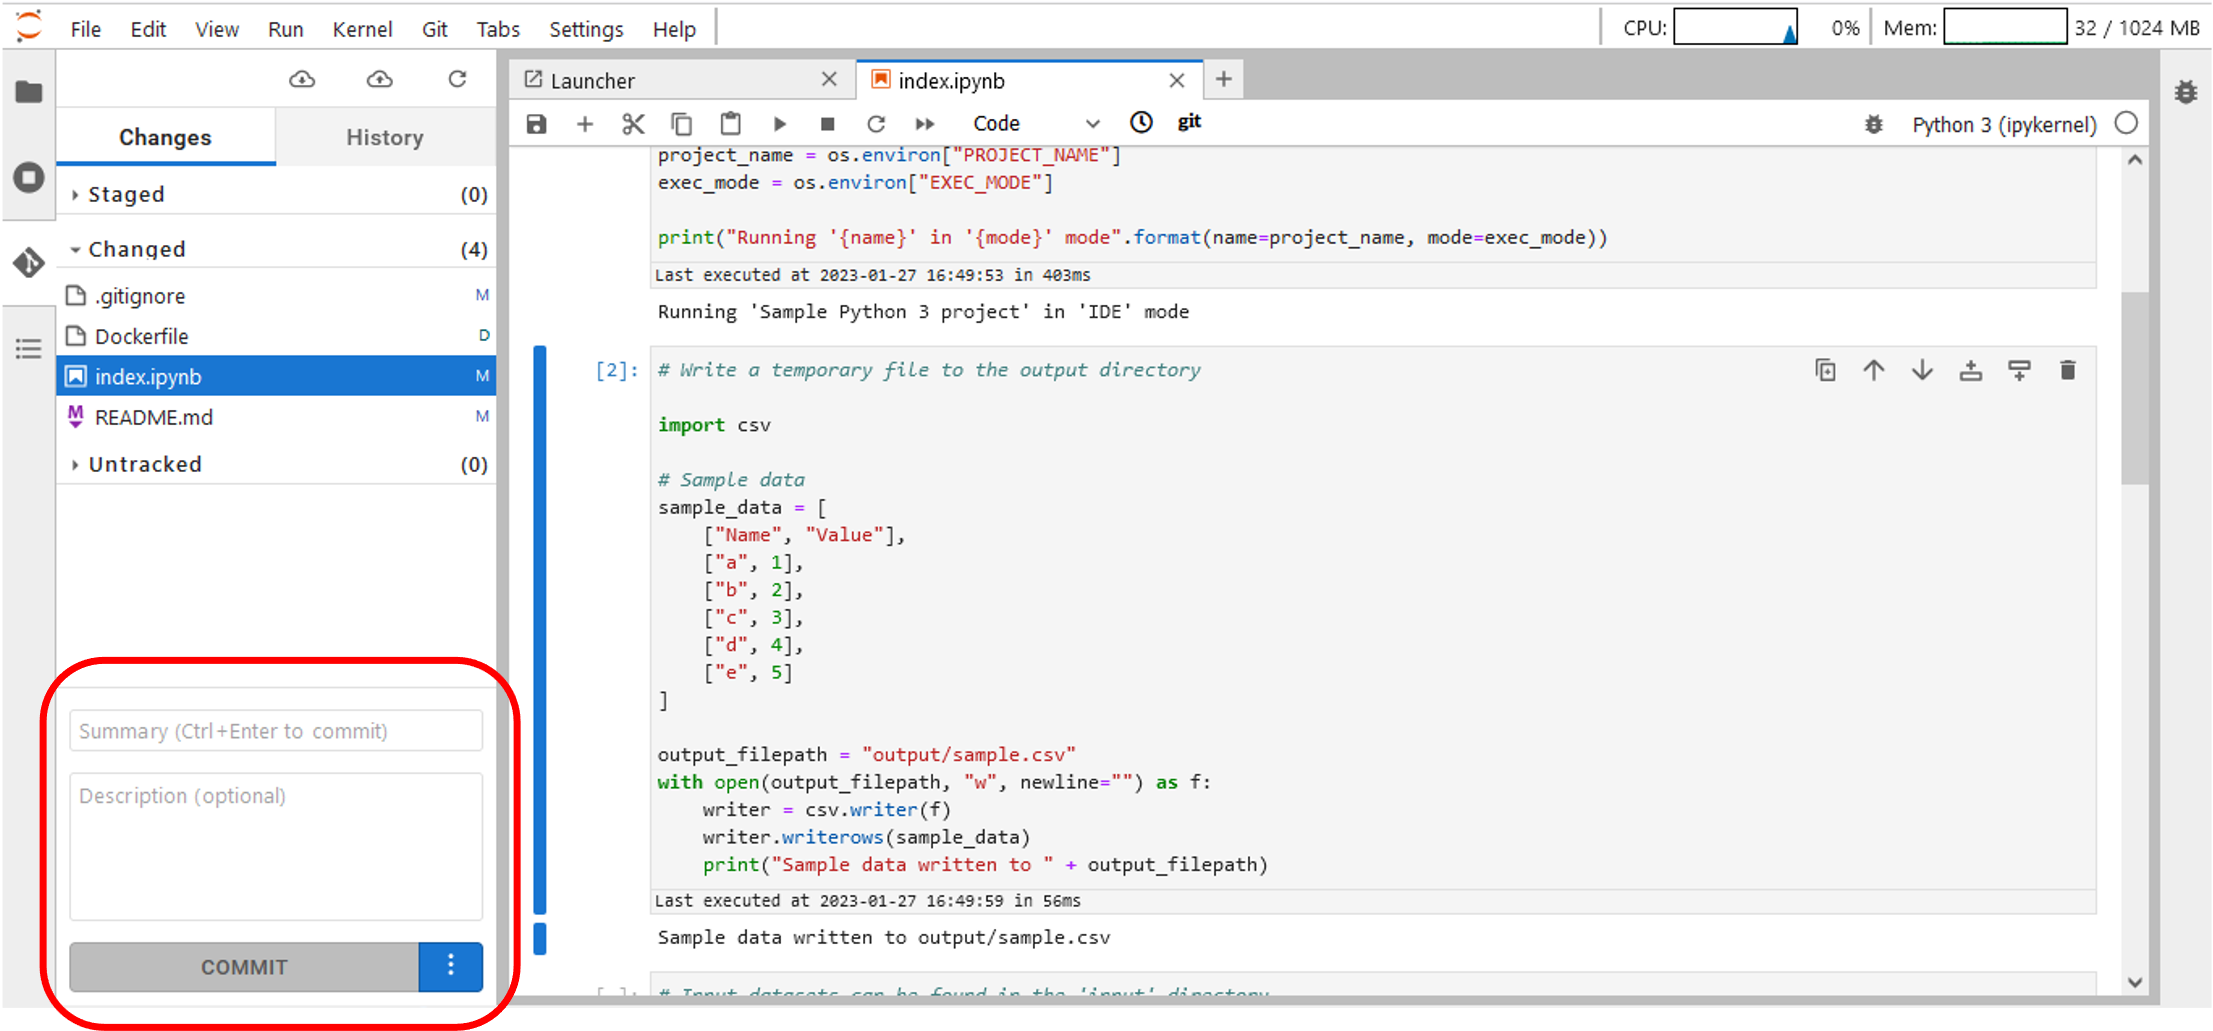
Figure 38 – Commit file changes – Git tab
- Click on Push button to push committed changes:
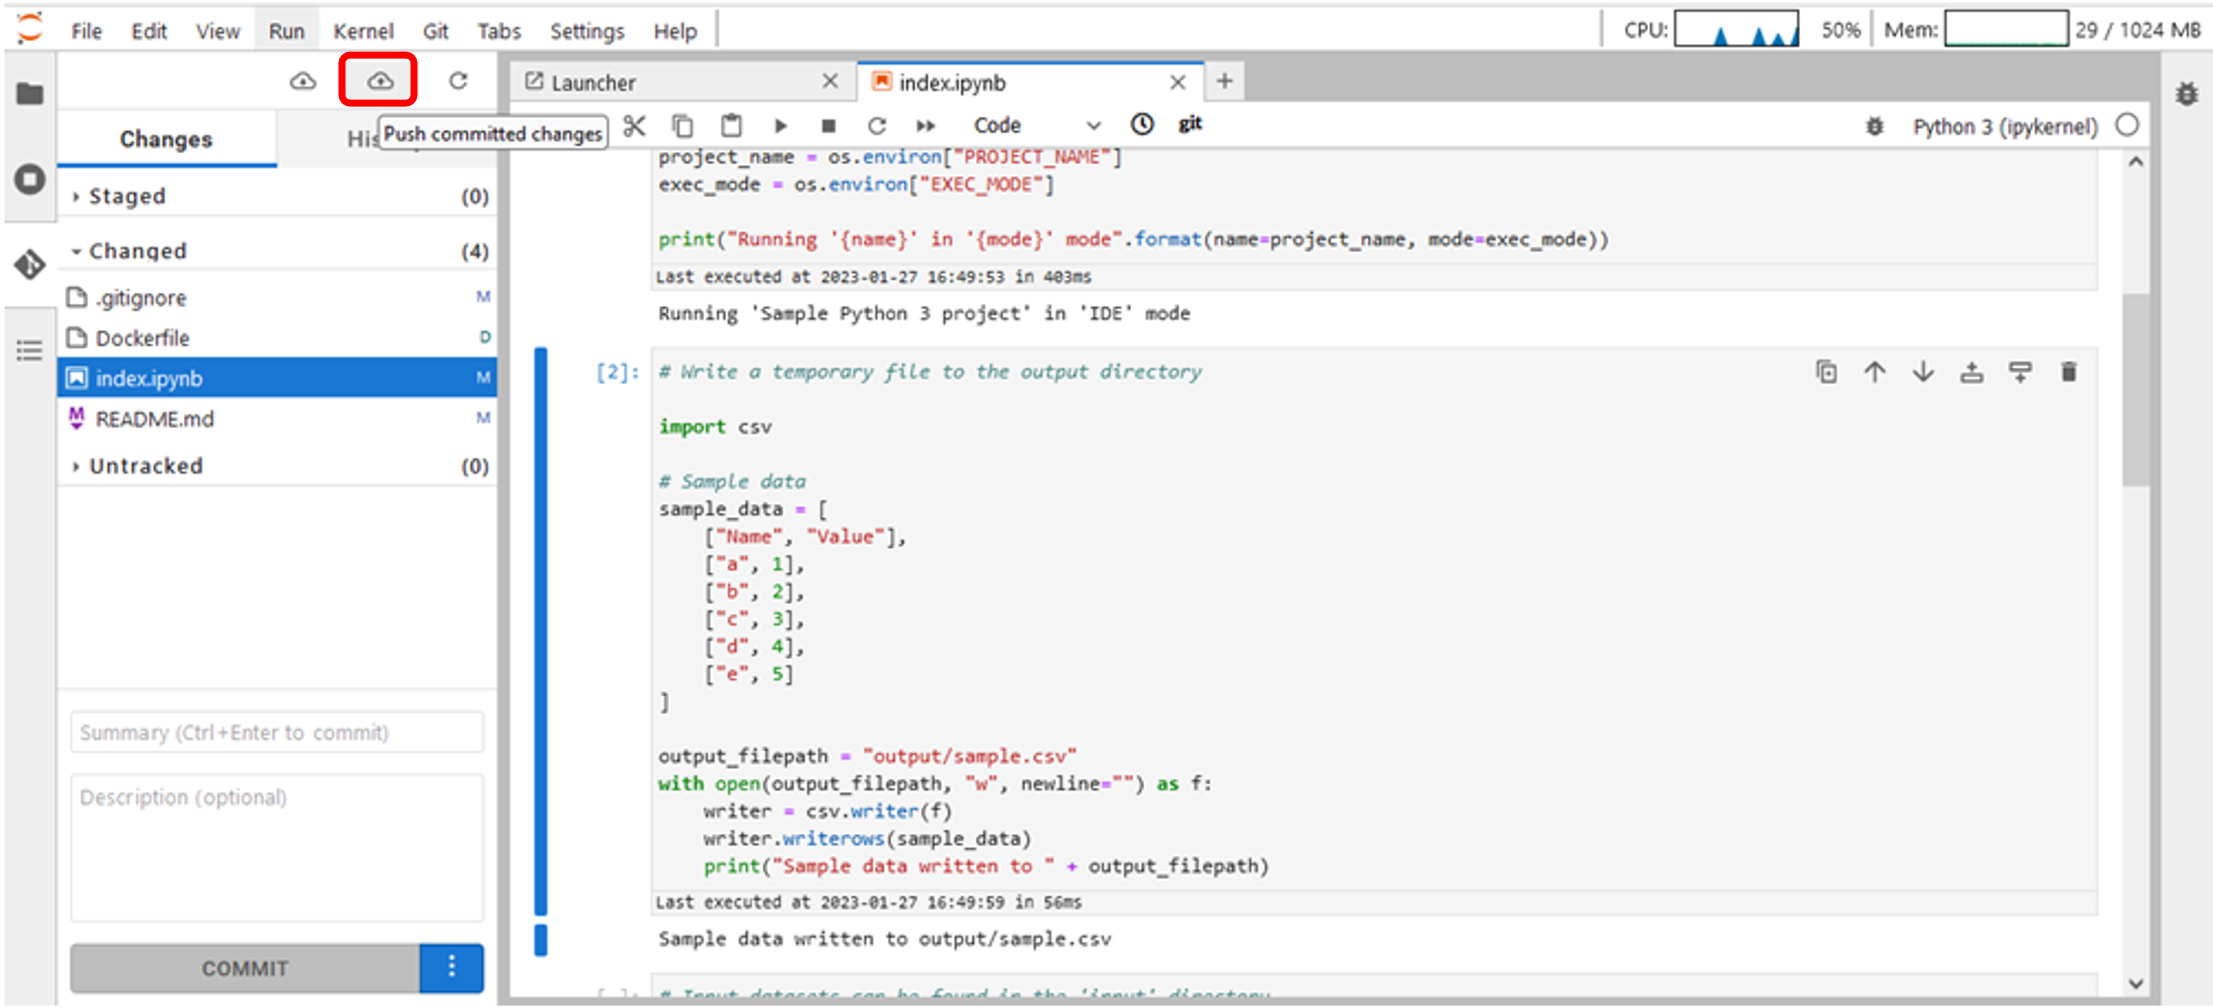
Figure 39 – Push committed changes – Git tab
Git Menu on the Top Bar
- On the JupyterLabTopBar Menu, click on Git ->Push to Remote to push file changes:
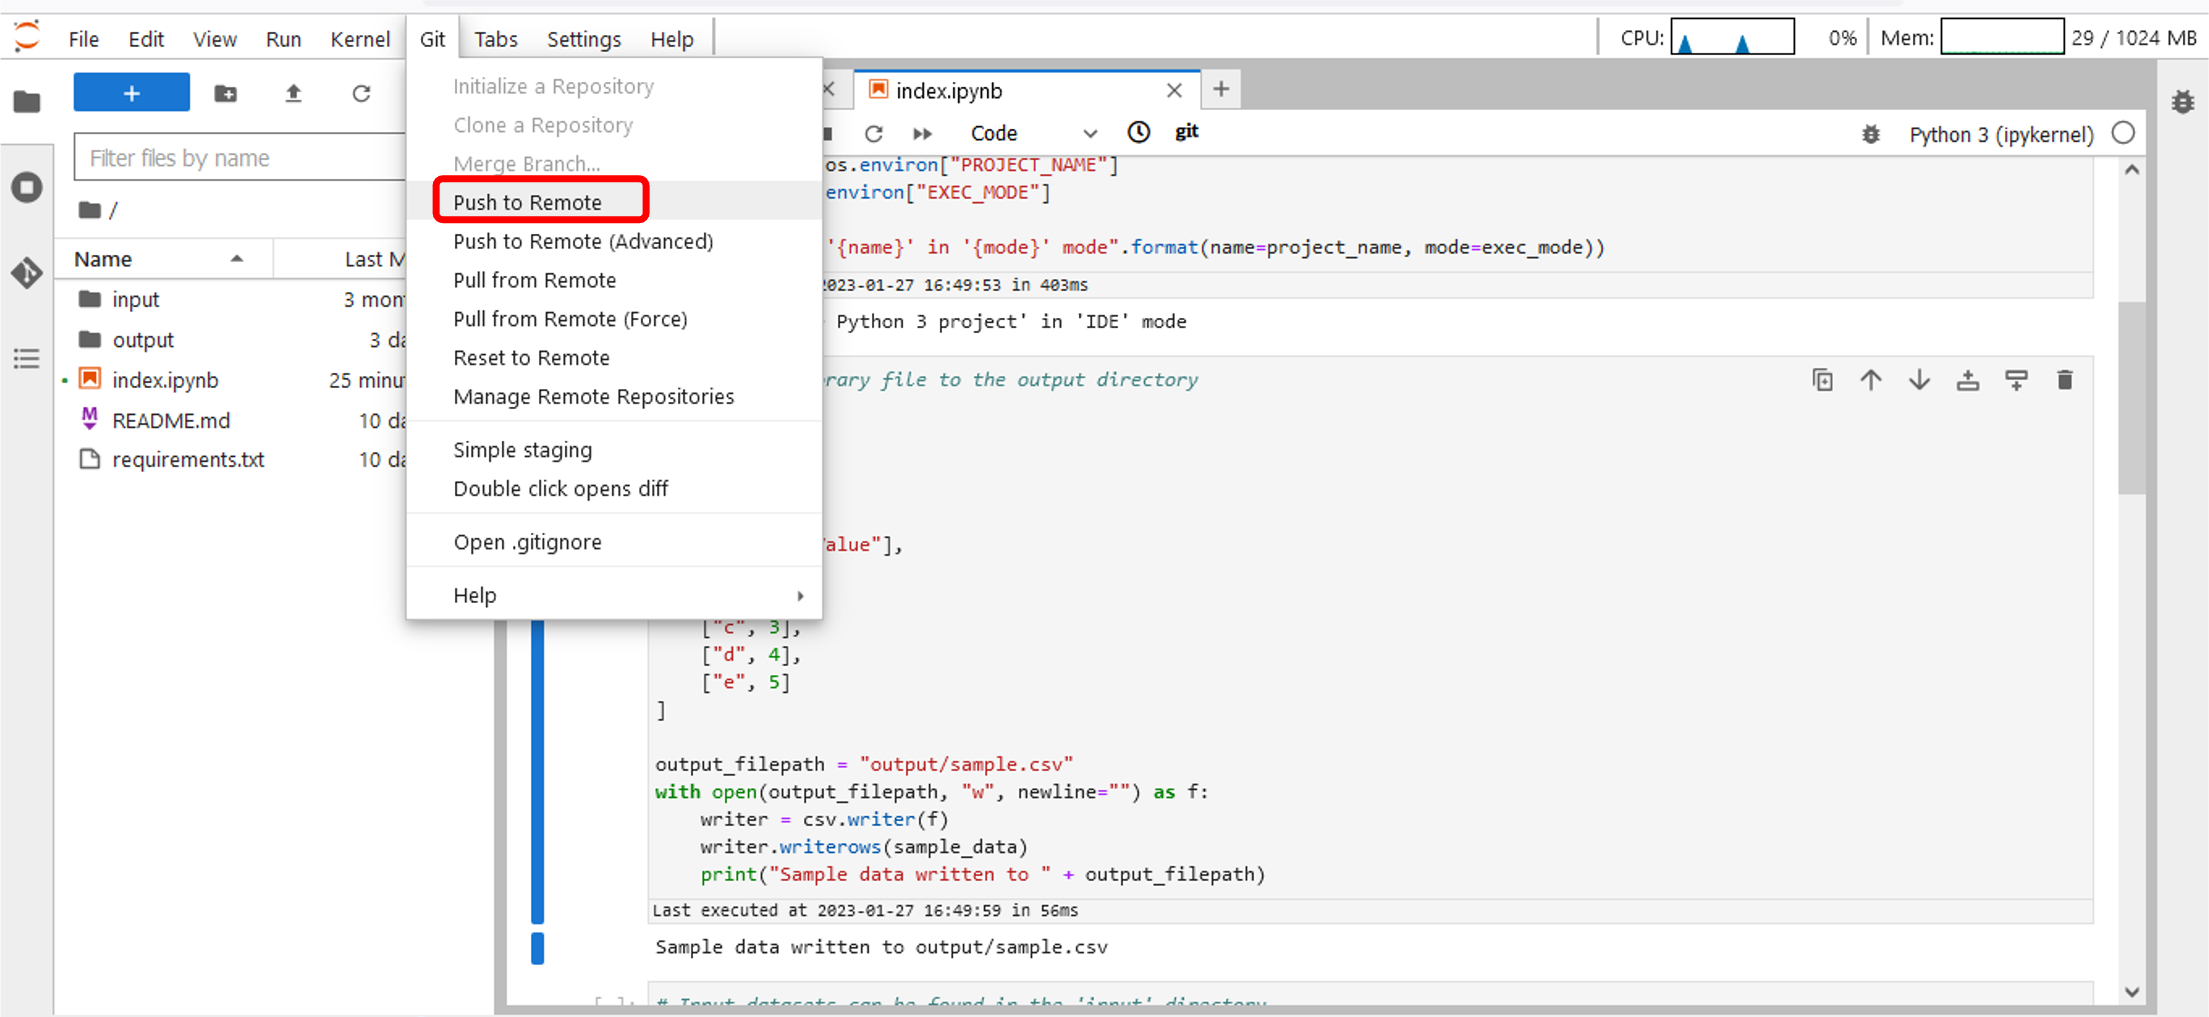
Figure 40 – Push file changes – Git menu
3.13 Stop JupyterLab session
You can stop JupyterLab session from the dashboard
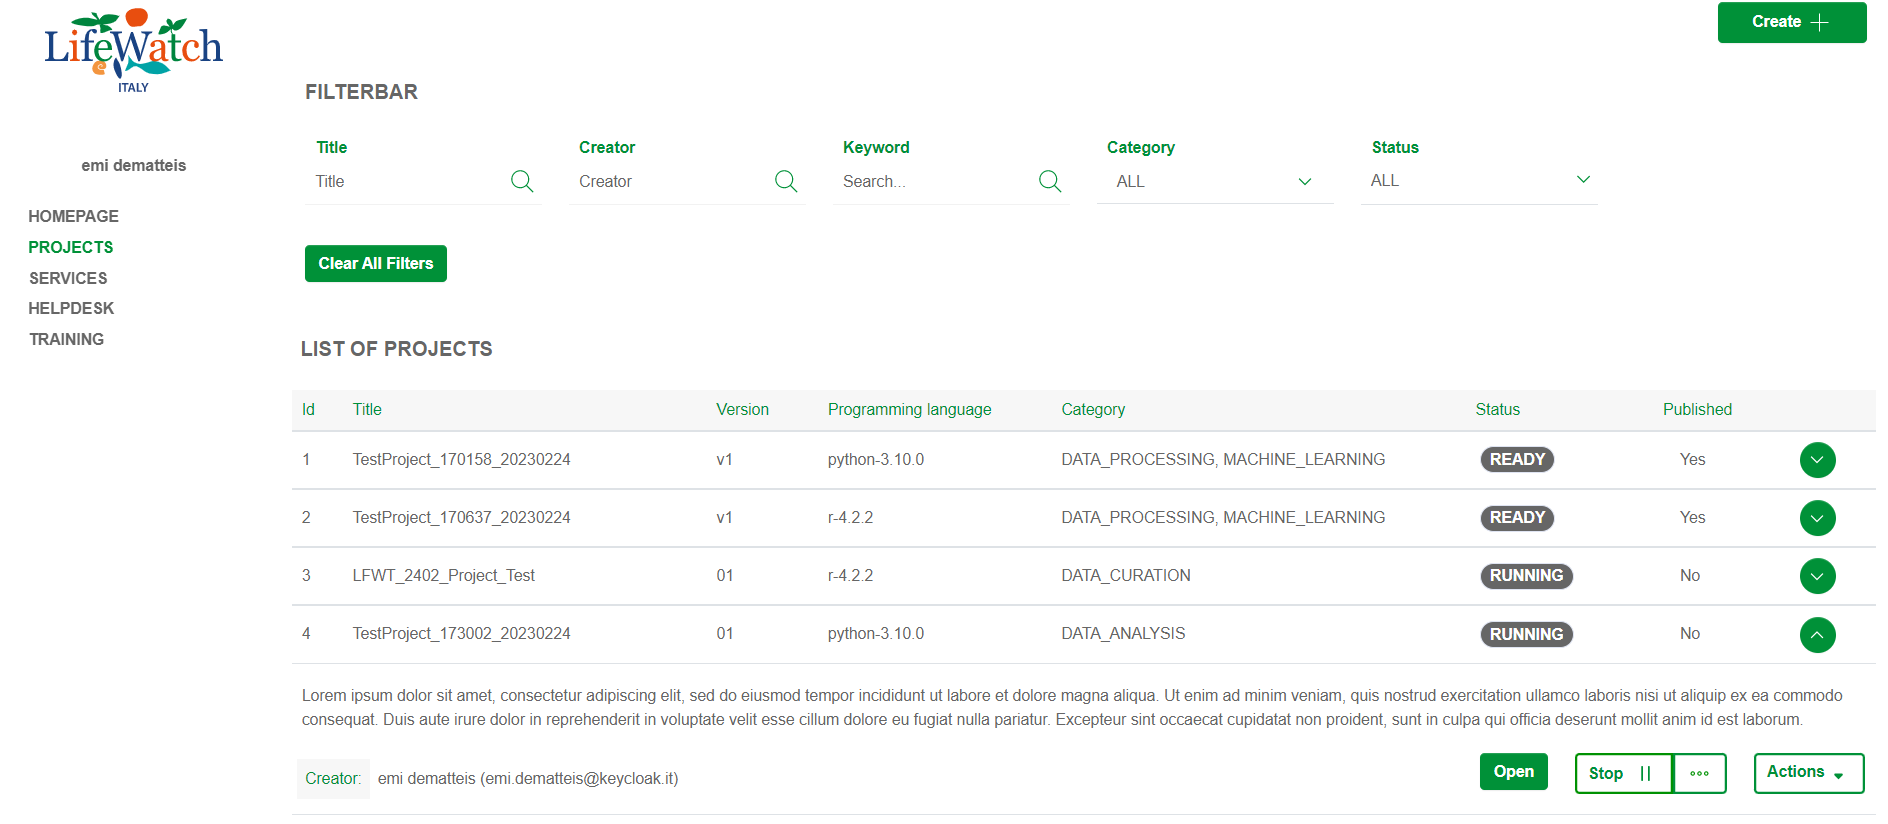
or from the Project Detail view
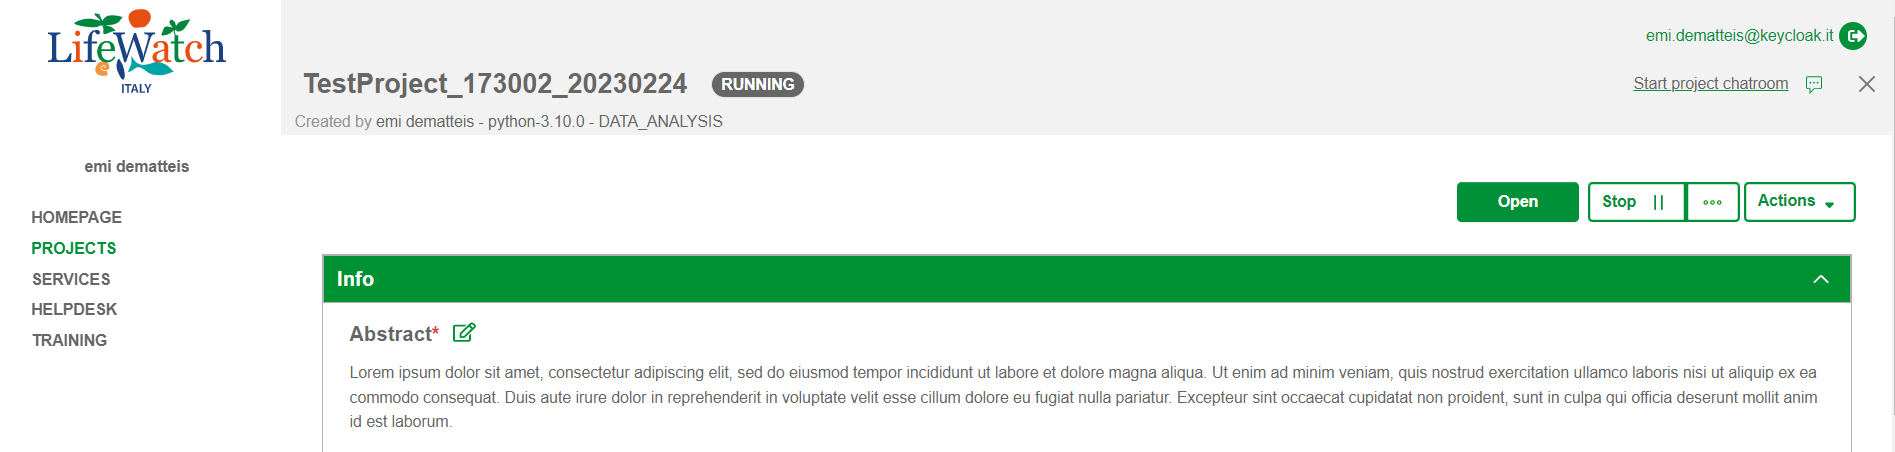
Please note: before stopping JupyterLab session you must save, commit and push all changes.
3.14 Libraries installation
As a first step, you can check if the library needed is already available in default installation. You can use the common commands for importing a library and execute the cell to check the availability in default installation. For example:
- if Python environment: import library_name
- if R and R-CRAN environment: library(library_name)
- if MATAB environment: import PackageName.ClassName
If some library is not available there are specific scenarios for each template:
In Python and R-4.2.2: you can check the list of libraries available for automatic installation in the conda default channel (conda-forge) by consulting the following link: https://anaconda.org/conda-forge/repo.
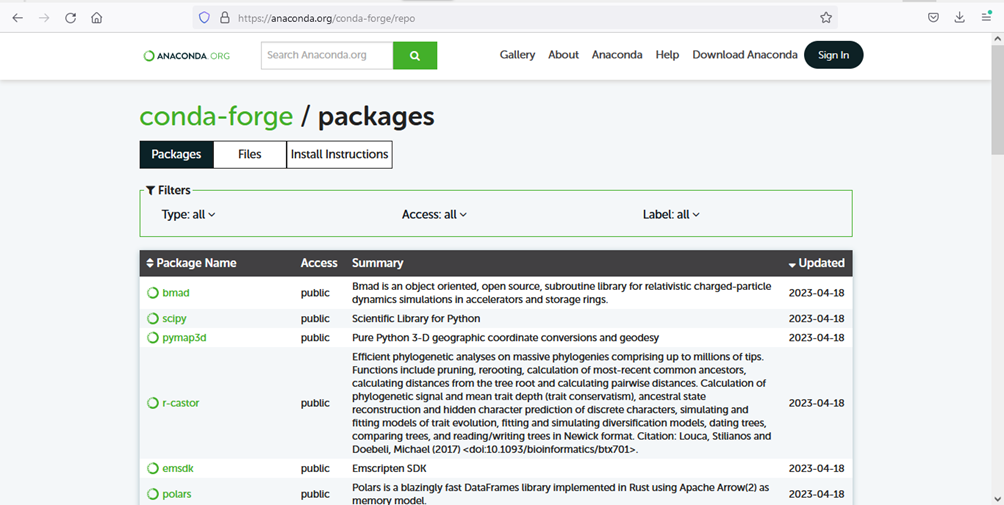
Figure 41 – Conda-forge repository.
To install new libraries needed by the main script to run, list them in the:
install.conda file for the libraries from conda
Sometimes the specific version of library could be not present in conda but could be present in Ubuntu package management apt. In this case it need to modify:
Install.apt file in the work folder for the libraries from Ubuntu package management apt
Double click on the choosen file to open and to modify it. Make sure to list every library, one for each line, indicating a version if necessary.
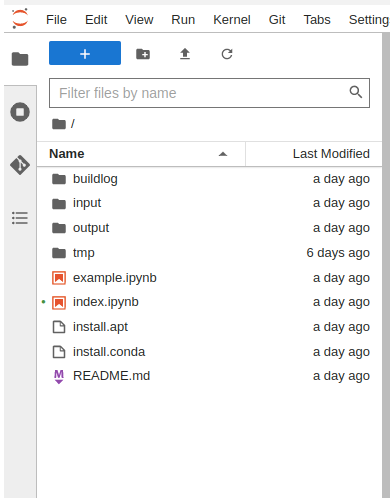
Figure 42 – install.conda and install.aptfile
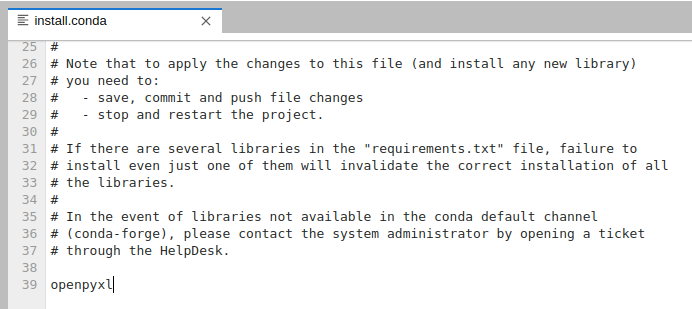
Figure 43 – Example of install.conda and install.apt file for a Python project
Please note: to apply the changes to this file (and install any new library) you need to:
- save, commit and push file changes
- stop and restart the project.
If there are several libraries in the "requirements.txt" file, failure to install even just one of them will invalidate the correct installation of all the libraries.
Errors information is available on the “Warnings and alerts” accordion in the Project Detail view.
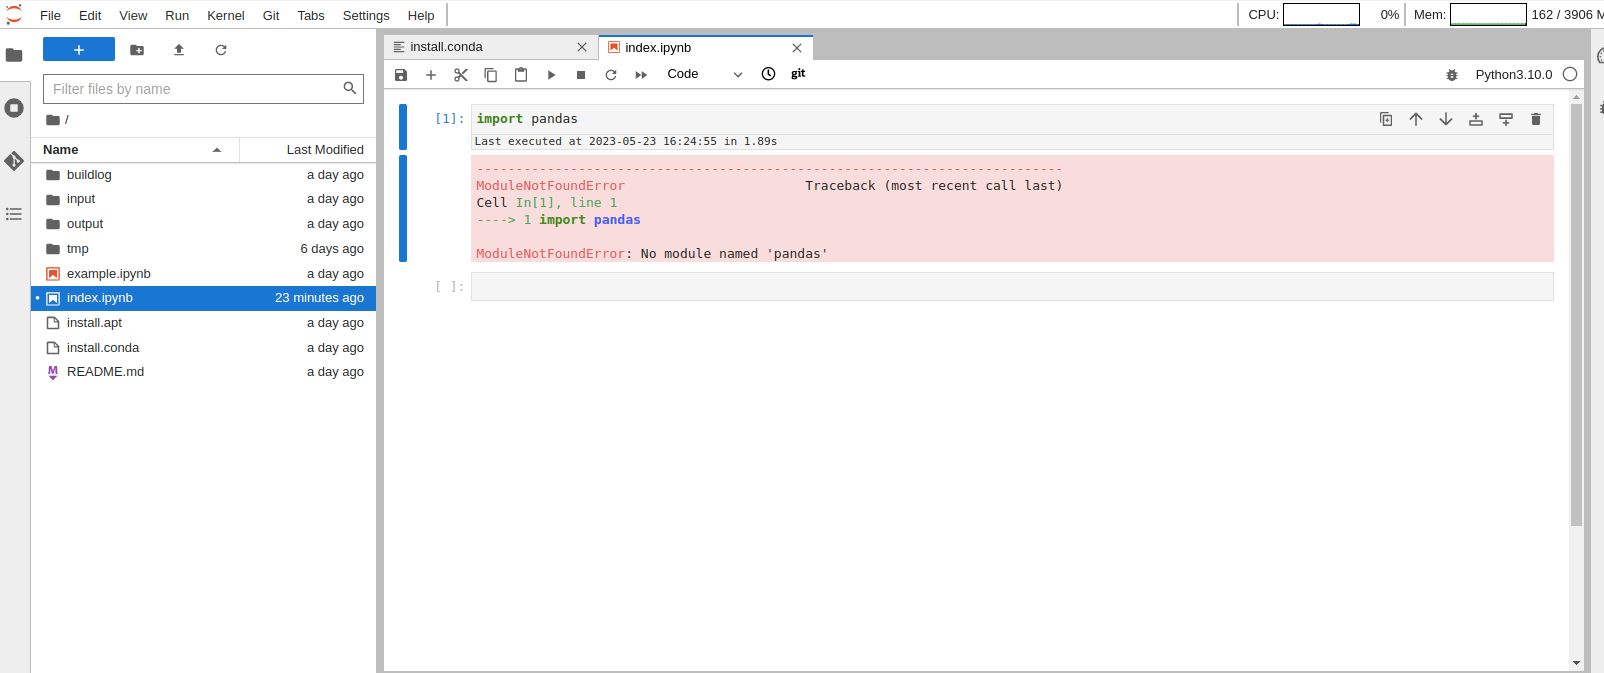
Figure 44 – Libraries installation – example of error message
In the event of libraries not available in the conda default channel (conda-forge) or in the Ubuntu package management (apt), please contact the system administrator by opening a ticket through the HelpDesk.
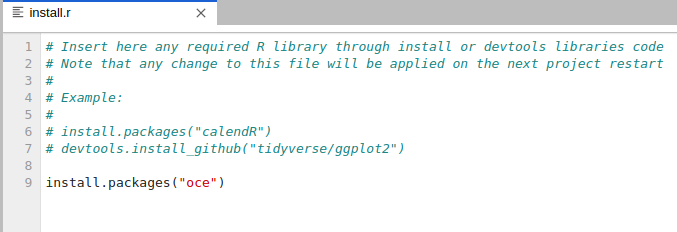
In R-4.3.0-CRAN environment: there are two files to configure the libraries
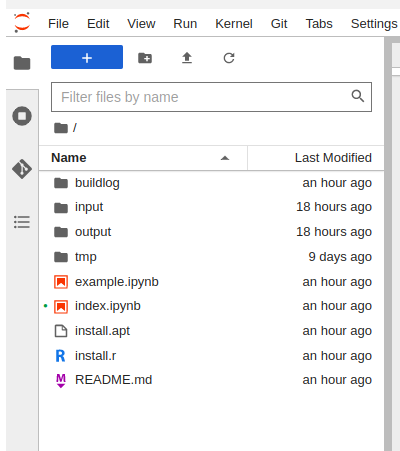
Figure 45 – install.apt and install.r
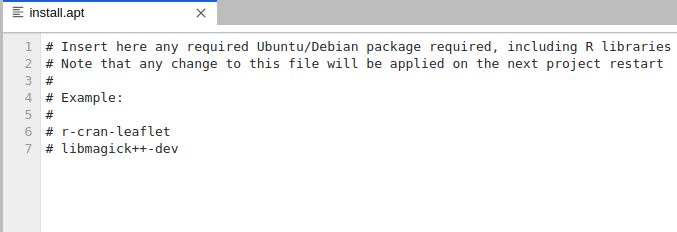
install.apt file for the libraries from Ubuntu package management apt which includes the CRAN packages as well. The libraries installed from this file are alredy compiled in the package management.
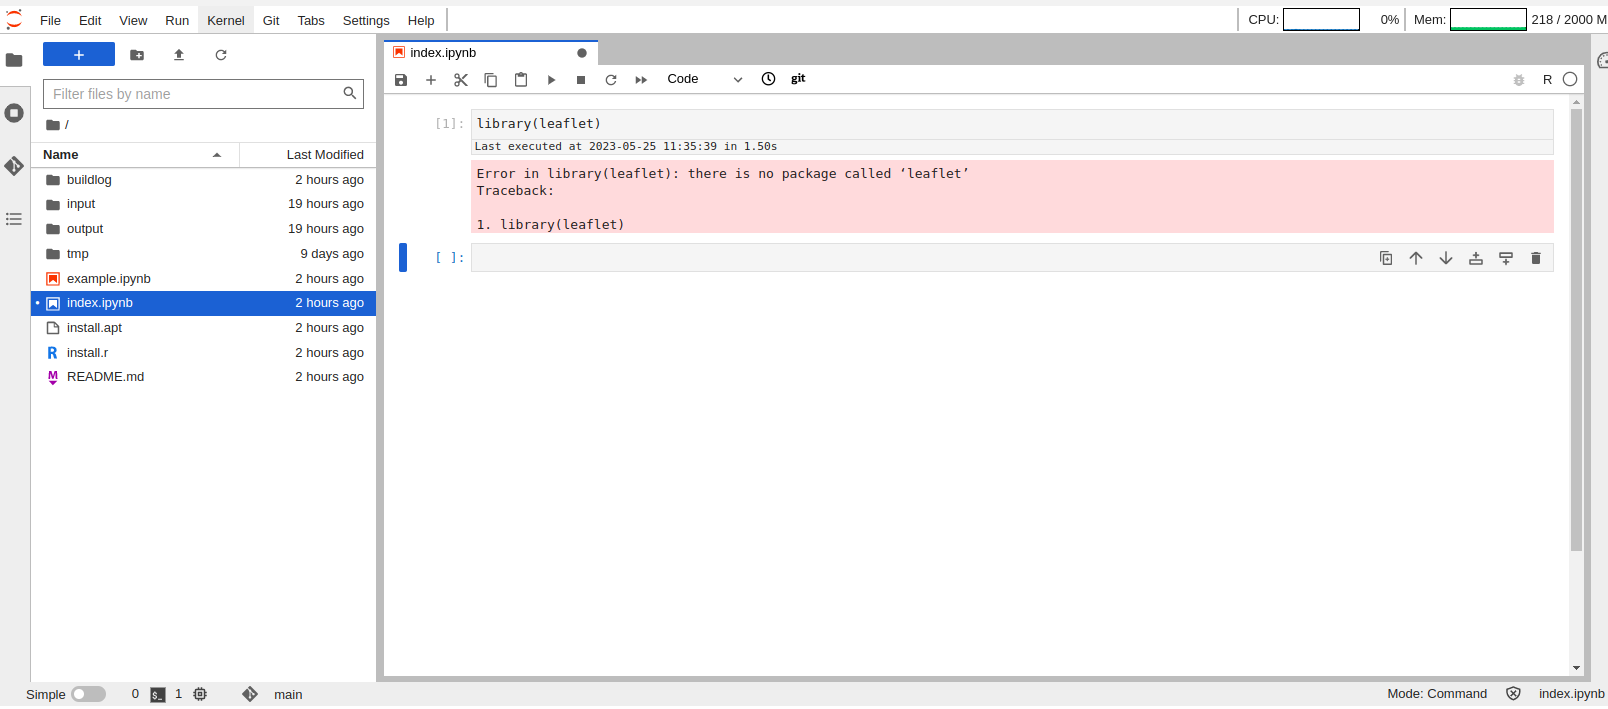
install.r file that can be used to install libraries througth R commands. The libraries installed from this file requiere to be compiled, then on the next run during the build phase it will require more time to compile the libraries configured. It is needed when the library is not already present as compiled in the Ubuntu package management apt.
Please note: to apply the changes to this file (and install any new library) you need to:
- save, commit and push file changes
- stop and restart the project.
If there are several libraries in the "requirements.txt" file, failure to install even just one of them will invalidate the correct installation of all the libraries.
Errors information is available on the “Warnings and alerts” accordion in the Project Detail view.
In MATLAB environment: to add additional library there is one file which retrieves the defined packages from Ubuntu package management apt.
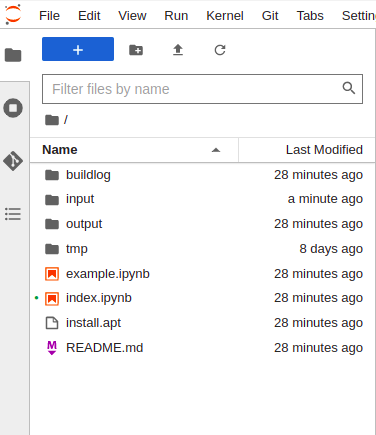
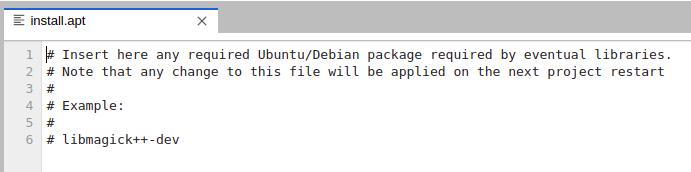
Figure 46 – install.apt
install.apt file for the libraries from Ubuntu package management apt. The libraries installed from this file are alredy compiled in the package management.
Please note: to apply the changes to this file (and install any new library) you need to:
- save, commit and push file changes
- stop and restart the project.
If there are several libraries in the "requirements.txt" file, failure to install even just one of them will invalidate the correct installation of all the libraries.
Errors information is available on the “Warnings and alerts” accordion in the Project Detail view.
3.15 Warning message management
When resources warning messages are shown in the bottom right of JupyterLab window, you can:
- Click on Show details to have more details about warning and related support information (Figure 48).
- Click on X to close message window.
- Click on Don’t show again to disable warning messages for your current session. Warning messages aren’t disabled for other users of the same session.
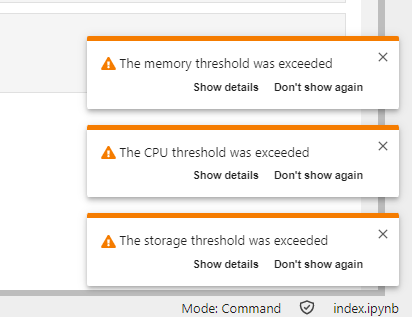
Figure 47 – Example of resources usage warning messages
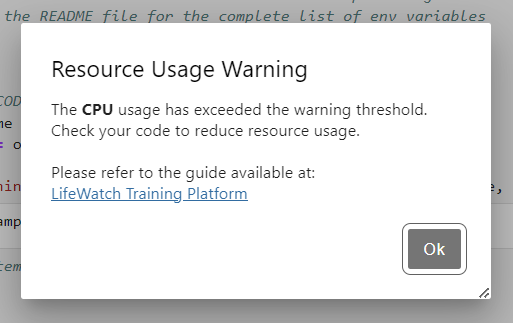
Figure 48 – Example of resource usage warning message - detail